Home > Service > Class support > Google > How to set up two-step authentication
How to set up two-step authentication
2025/10/07 更新
For added security, we recommend enabling two-step authentication.
|
Table of contents
|
1.For thosewho have a smartphone.
1-0. Advance preparation
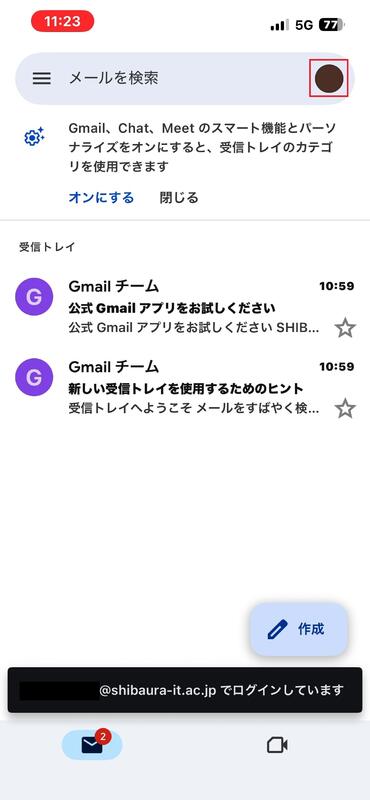
On the device on which two-step verification will be configured, sign in to Google services (e.g., Gmail, YouTube) using your university account.
If you are already signed in, proceed to the next step.
If you are unable to sign in with your university account, two-step verification must be disabled.
Disabling two-step verification requires individual support. Bring your student ID or staff ID and visit the nearest Information Innovation Division service counter.
1-1. Tap the account icon in the upper-right corner.
1-2. Tap “Manage your Google Account.”
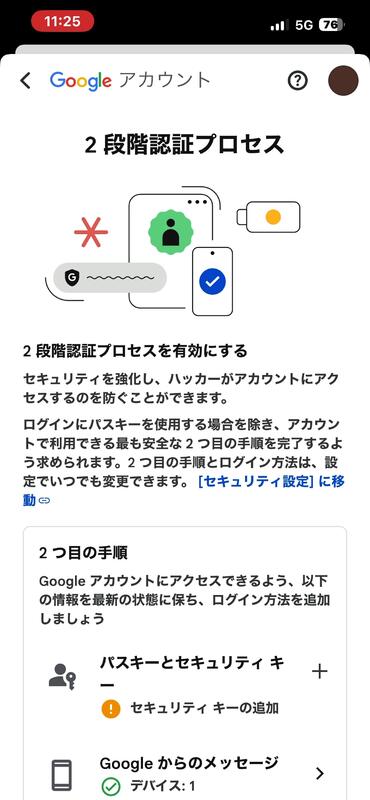
1-3.Select “Security”, then “2-Step Verification.”

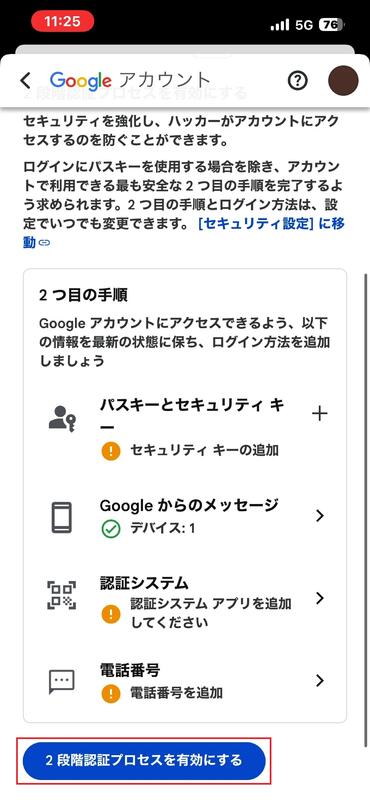
1-4. When the 2-Step Verification page opens, scroll to the bottom of the page.
1-5. Tap “Turn on 2-Step Verification.”
1-6. The message "Settings complete" will be displayed.
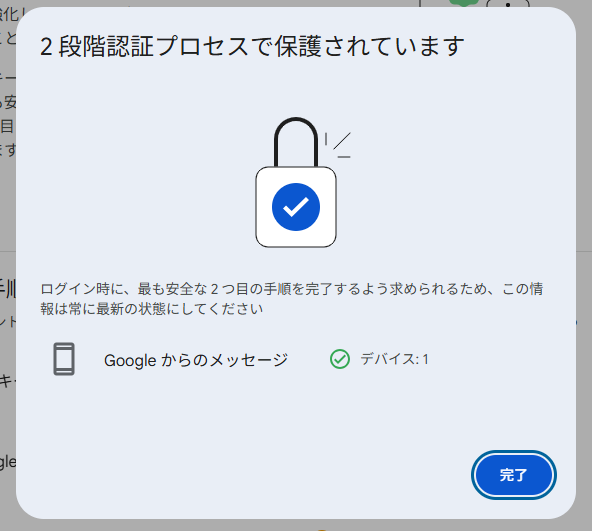
1-7.This completes the setup of two-step verification for your Google account.
Authentication method by message
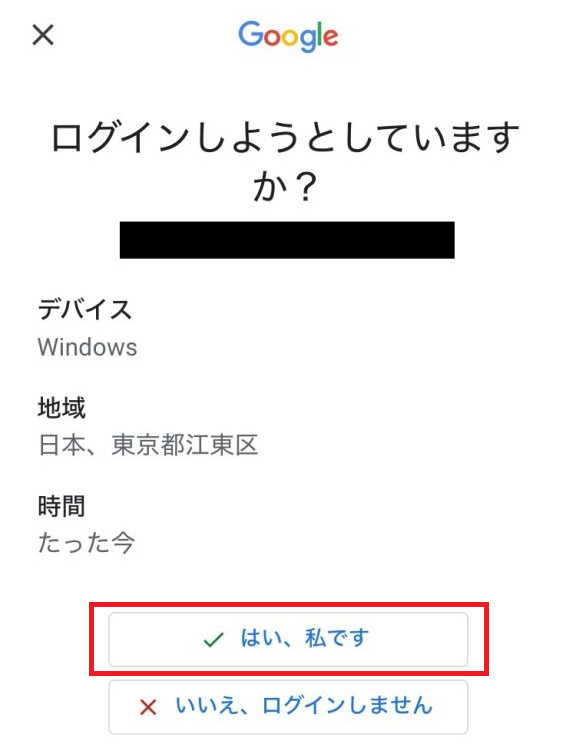
1-8. If you enable two-step verification, you will be required to log in to Google services using two-step verification.
After entering your password, you will be asked to authenticate on your smartphone.
For iOS users, when you open a Google app such as Gmail, the following screen will appear.
Select「Yes, it's me」
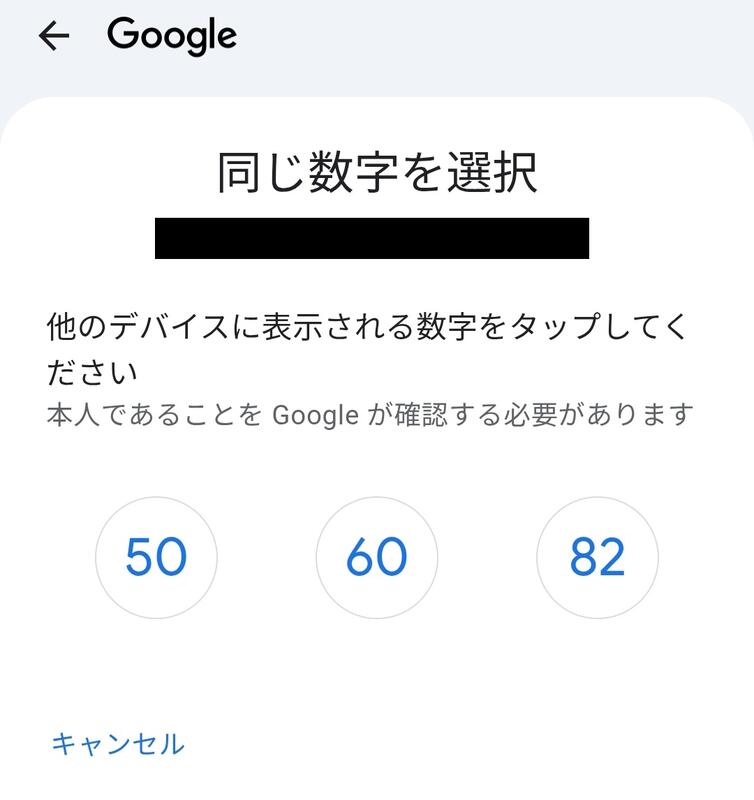
1-9 Select the number displayed on the screen of the device you want to log in to.
If you are asked to select a number on your smartphone after performing step 1.8,
select the same number as the one displayed on the screen of the device you are logging in with.
We recommend adding other authentication methods and registering multiple devices.
2.If you don't have a smartphone
2-1. Log in to your Google account.
Go here and log in to your Google account.
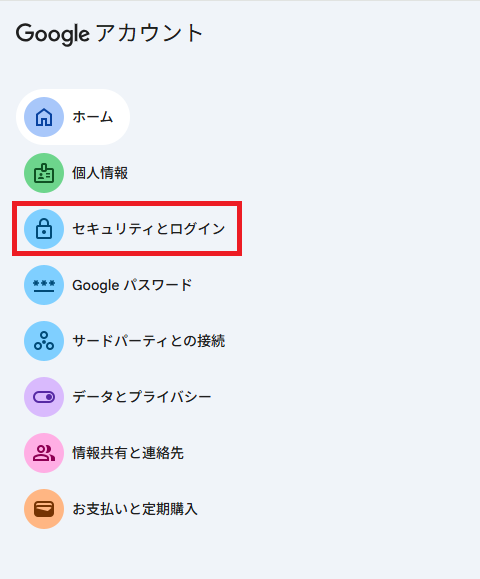
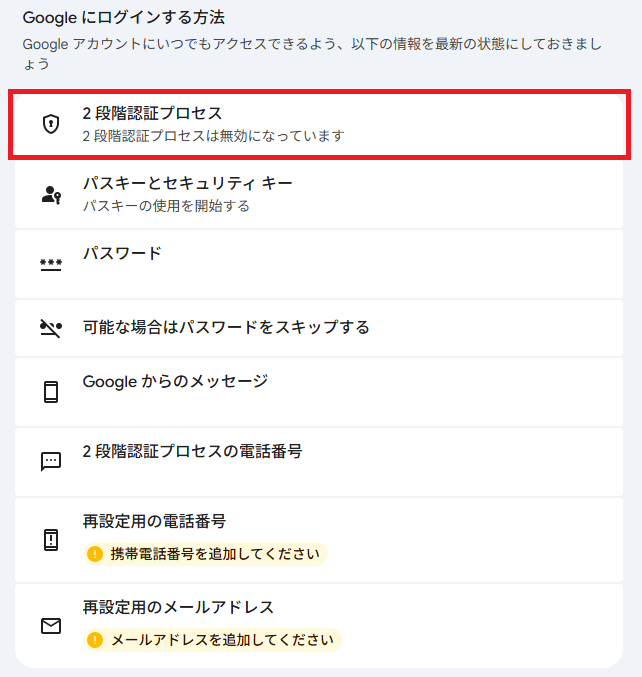
2-2. Select security
Once you've logged in to your Google account, select Security and Login on the left side of the screen.
2-3. Select 2-Step Verification
Select the two-step verification process for logging in to Google.
When you select it, you will be asked to enter your password to verify your identity.
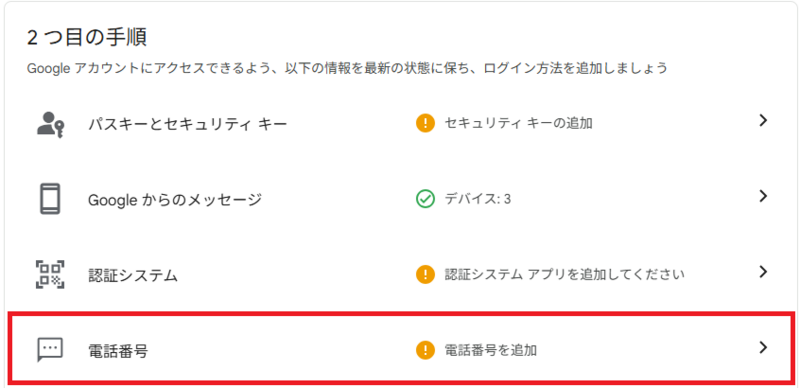
2-4. Enable 2-Step Verification
Select "Enable 2-Step Verification"

2-5. Select "Phone Number" for two-step authentication
Select "Phone Number" under "Second Step."
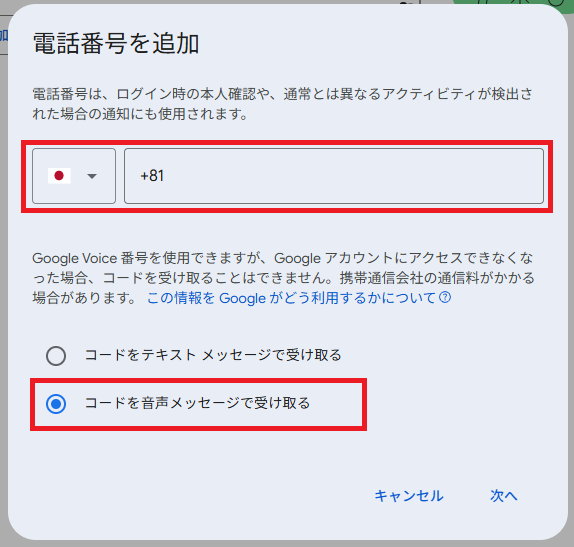
2-6. Enter your phone number and select how you want to get the code.
Select your nationality and enter your phone number.
Select "Receive a voice message with the code" and then select Next.
If you select "Receive a code by text message," a verification code will be sent to you via SMS.
This completes the setup for two-step verification using phone voice authentication.
Phone Call Verification Method
2-7. When two-step verification is enabled, you will be asked to complete two-step verification when signing in to Google services.
If a different verification method appears, select “Try another way.”
Then, on the next screen, choose phone call verification.

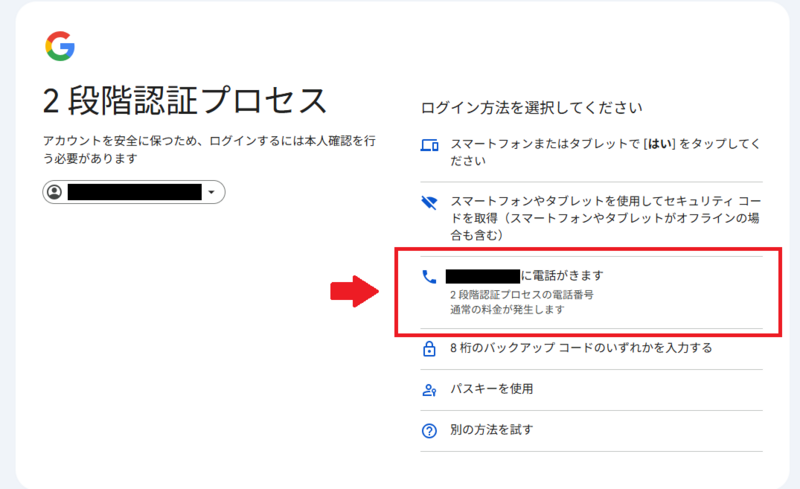
2-8. Enter the phone number to be used for voice authentication.
Enter the phone number you set when registering for two-step verification, and select “Call.”

After selection, you will receive a call from a U.S. phone number.
2-9. Enter the 6-digit verification code provided in the voice message.
Enter the 6-digit verification code provided, and select “Next.”

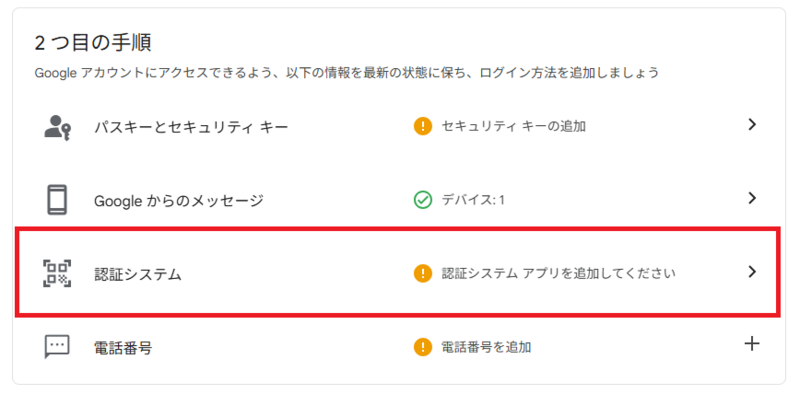
3.Other authentication methods (two-step verification using the “Authenticator”)
A one-time code method that can be used offline.
“Google Authenticator,” installed on your smartphone, generates a 6-digit code every 30 seconds.
3-1. In the “Second step,” select “Authenticator.”
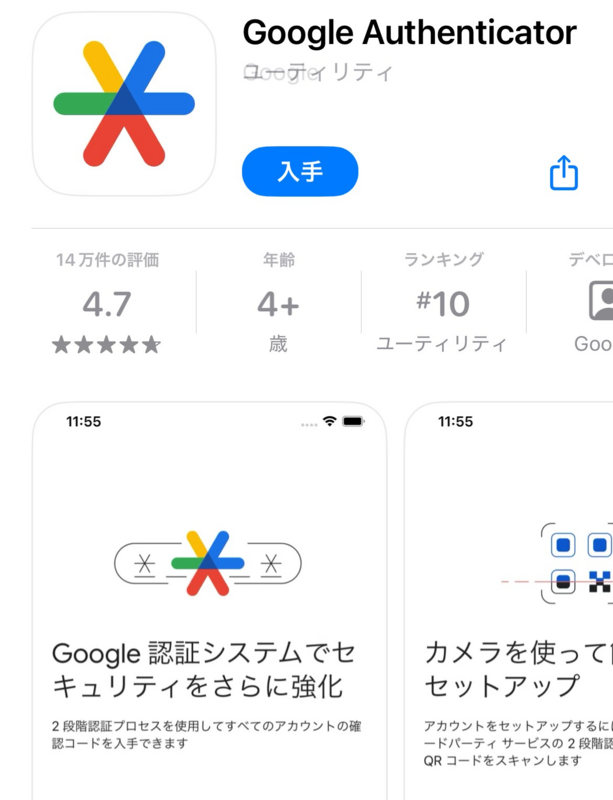
3-2. Download the “Google Authenticator” app to your smartphone.


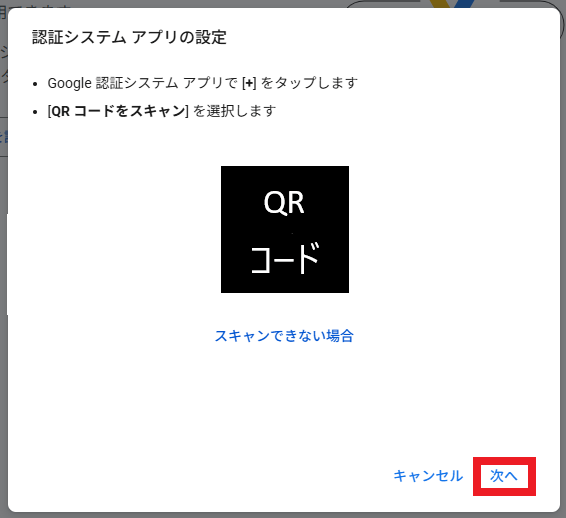
3-3. Select “Set up the authenticator.”
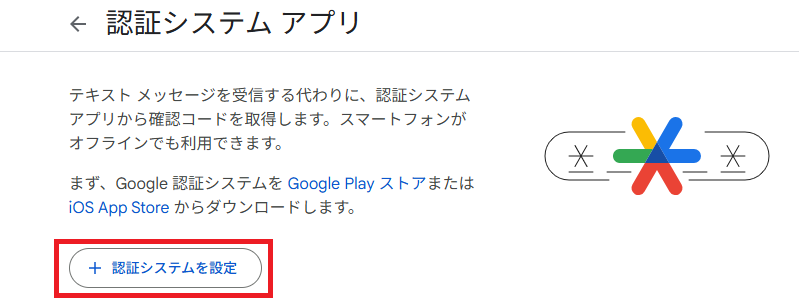
After selecting this option, a QR code will be displayed.
(The image below is for manual purposes only. On the actual screen, a QR code will be displayed.)
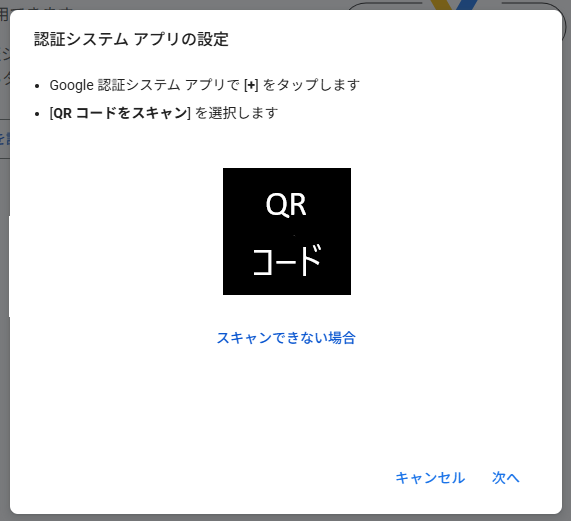
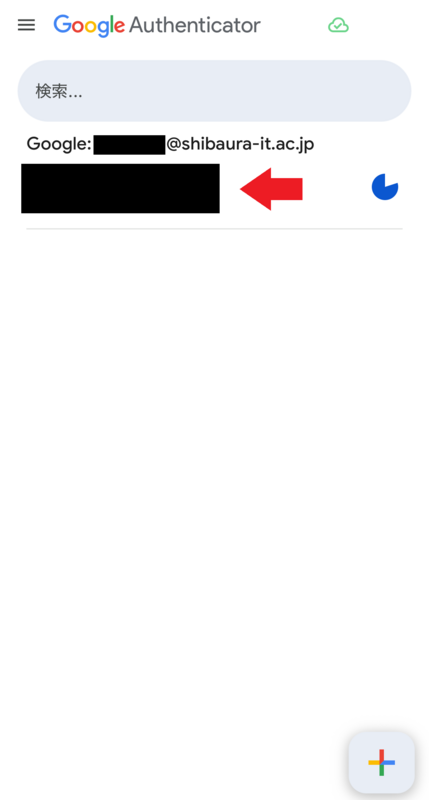
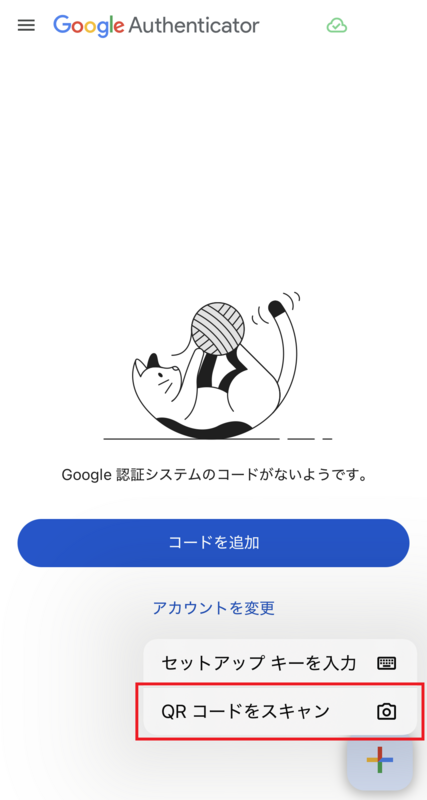
3-4. Open the Google Authenticator app on your smartphone, then select “Scan a QR code.”
Tap the “+” icon in the lower-right corner, then select “Scan a QR code.”
3-5. Once a 6-digit code is displayed on your smartphone, select “Next” on the QR code screen.
3-6. Enter the 6-digit code shown on your smartphone.
Enter the 6-digit code shown at the top of the screen.
(On the actual screen, a 6-digit code will be displayed.)