Home > Service > Class support > General classroom teacher's desk
General classroom teacher's desk
Updated 2025/07/14
This guide introduces how to start up the system and use various devices at the teacher's desk in a standard classroom.
|
Target Users |
graduate student and faculty members |
| Purpose |
This is an introduction to how to use the teacher's desk in a standard classroom. |
| Contact Us |
goiken@sic.shibaura-it.ac.jp |
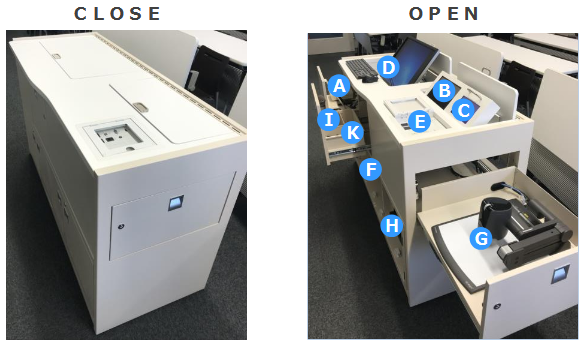
1.Main equipment
2.Basic Operation
2-1.System startup
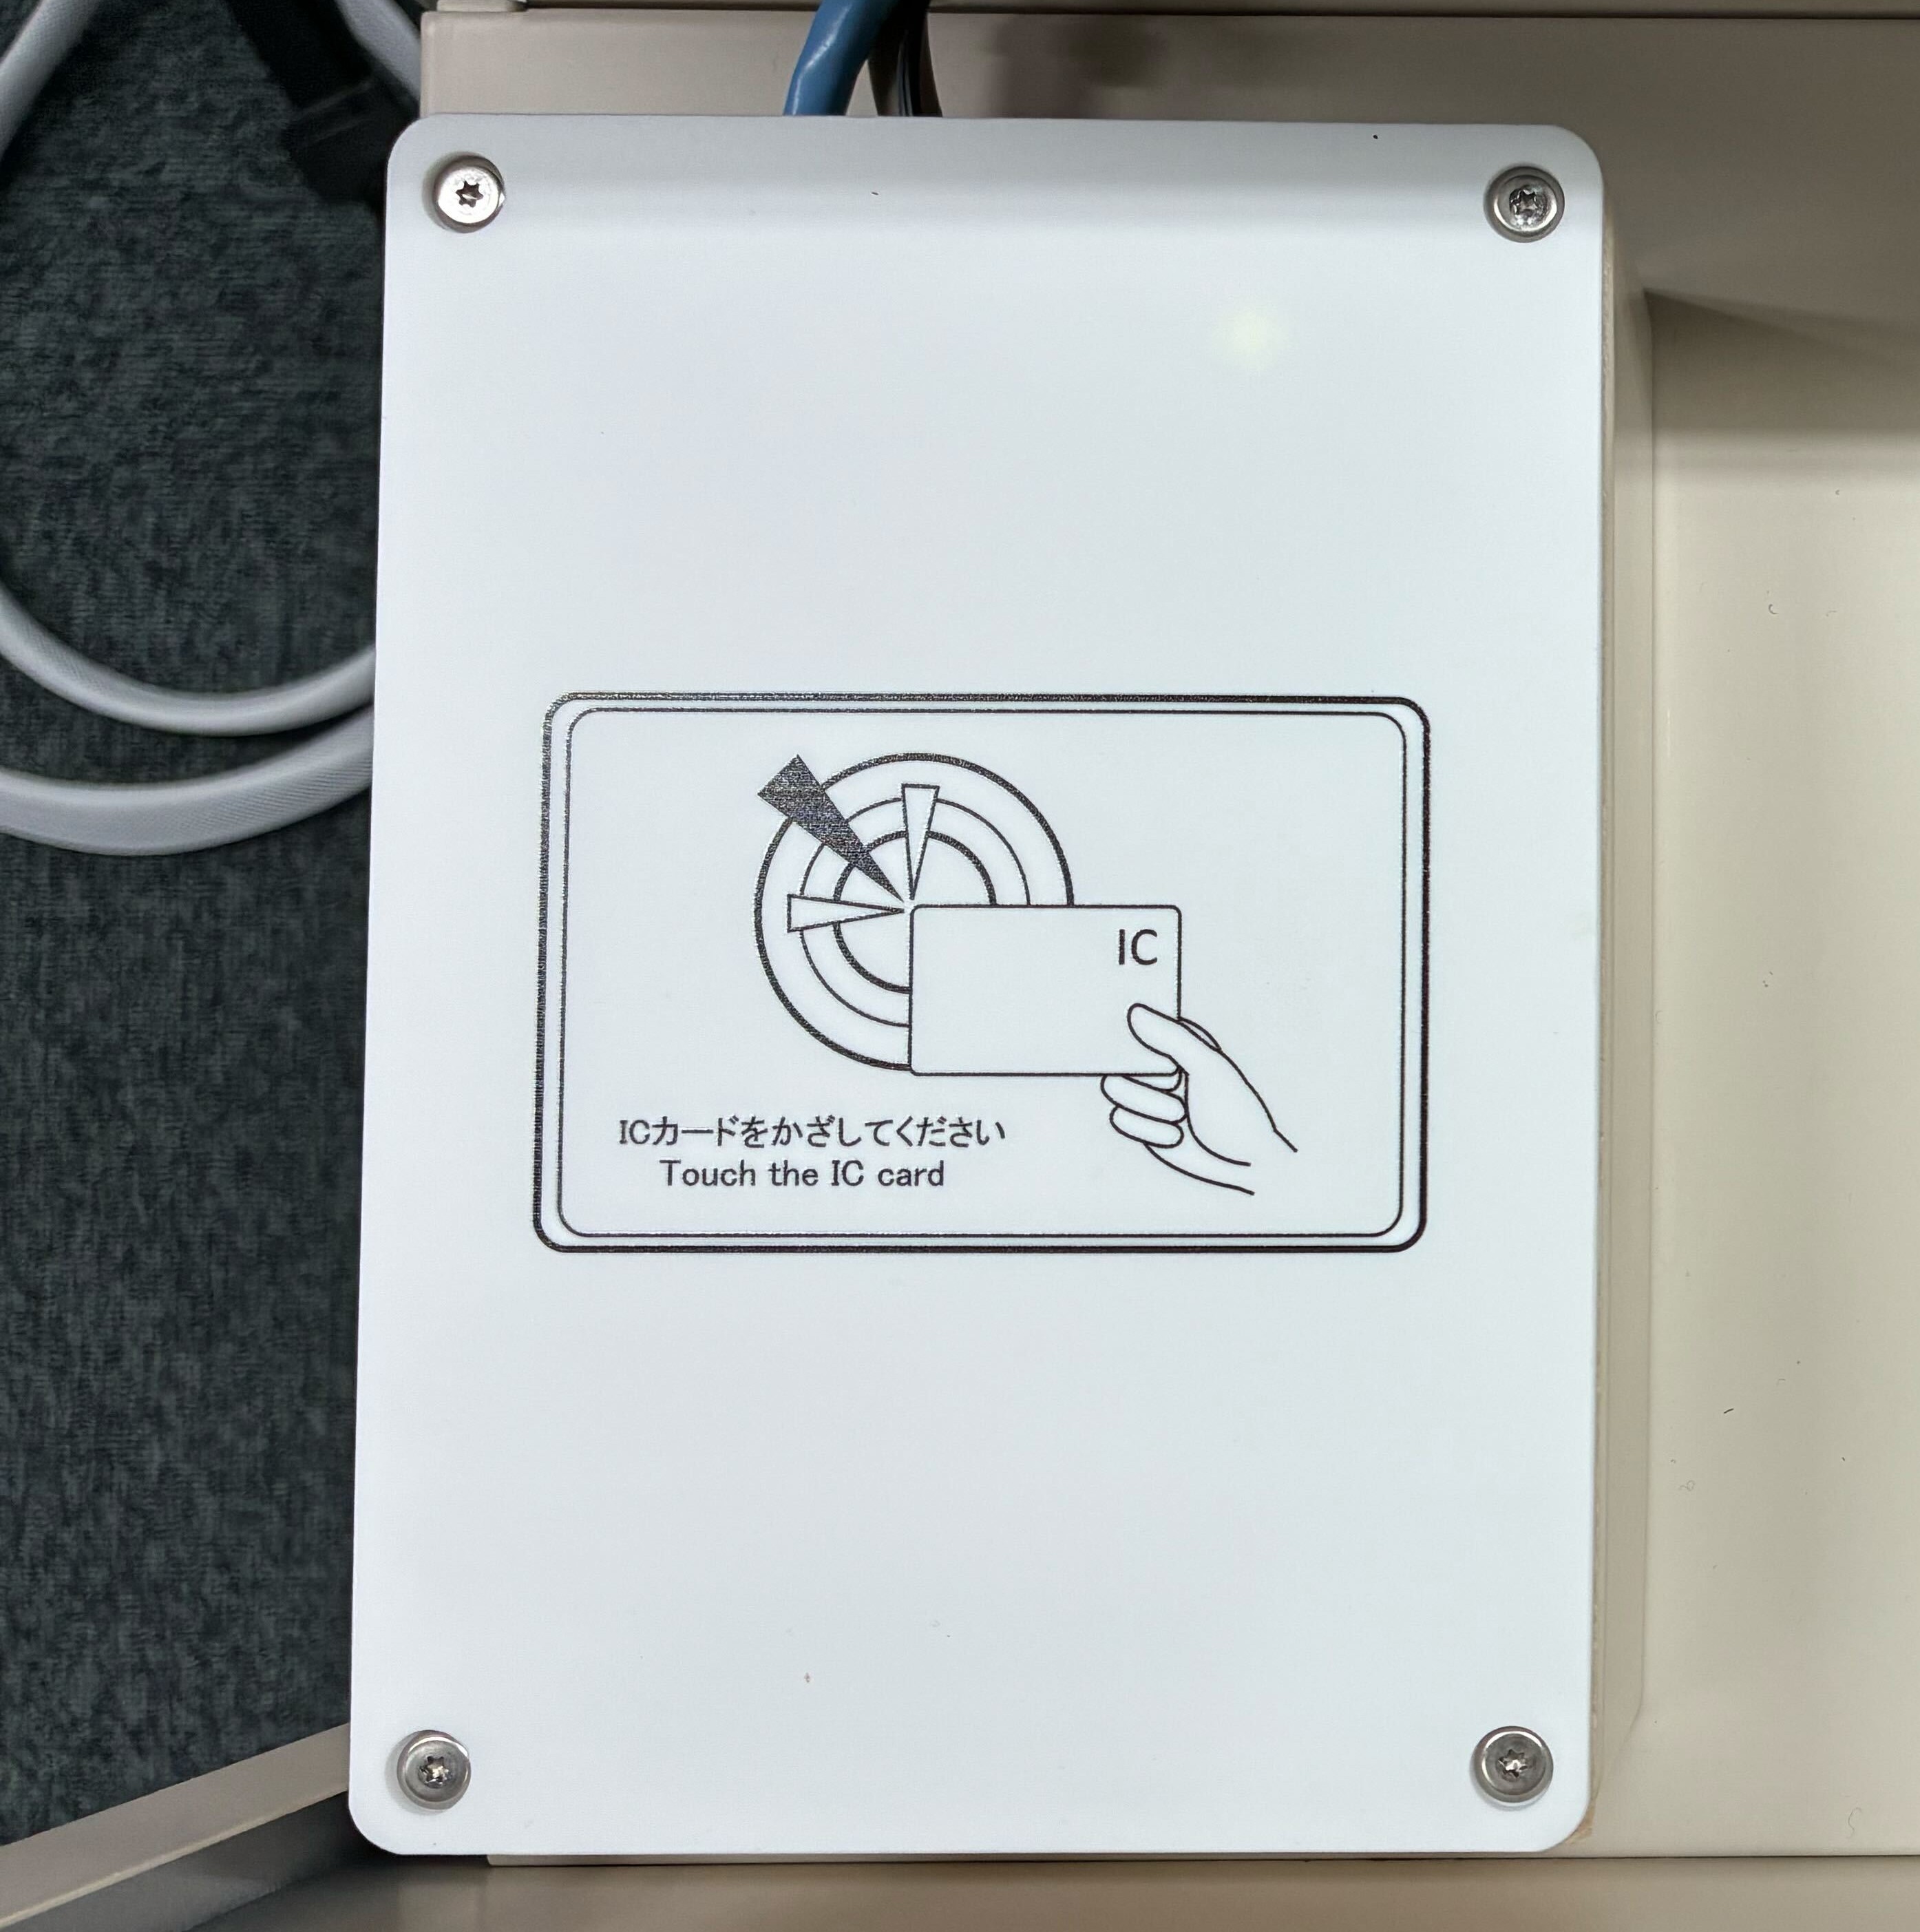
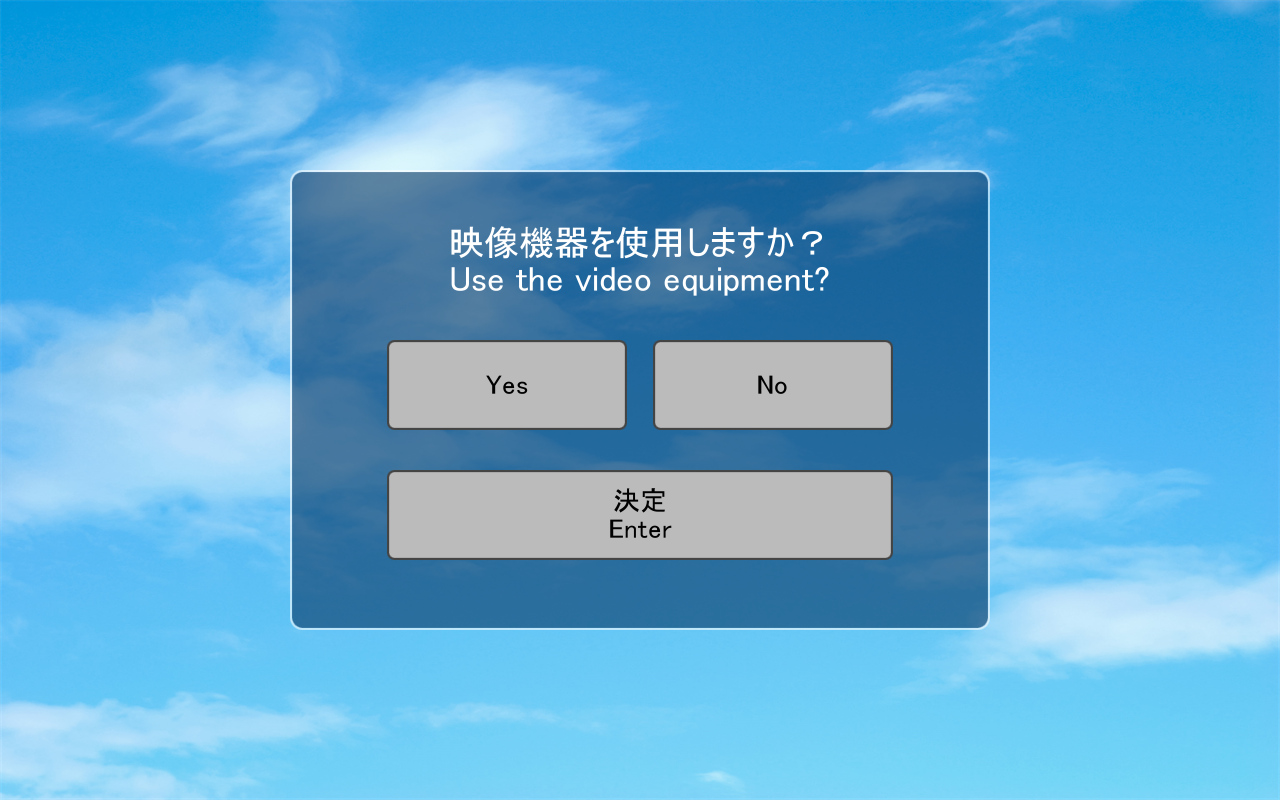
Hold your IC card (student ID or staff ID) over the system startup card reader (), then select whether to use the video equipment on the touch panel (
).
※ When using the video equipment, system startup takes about 30 seconds.
※ If you select “No,” only the microphone will be available.
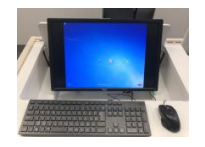
2-2.Prepare the built-in PC monitor
Raise the built-in PC monitor (), and set the keyboard and mouse on the desk.
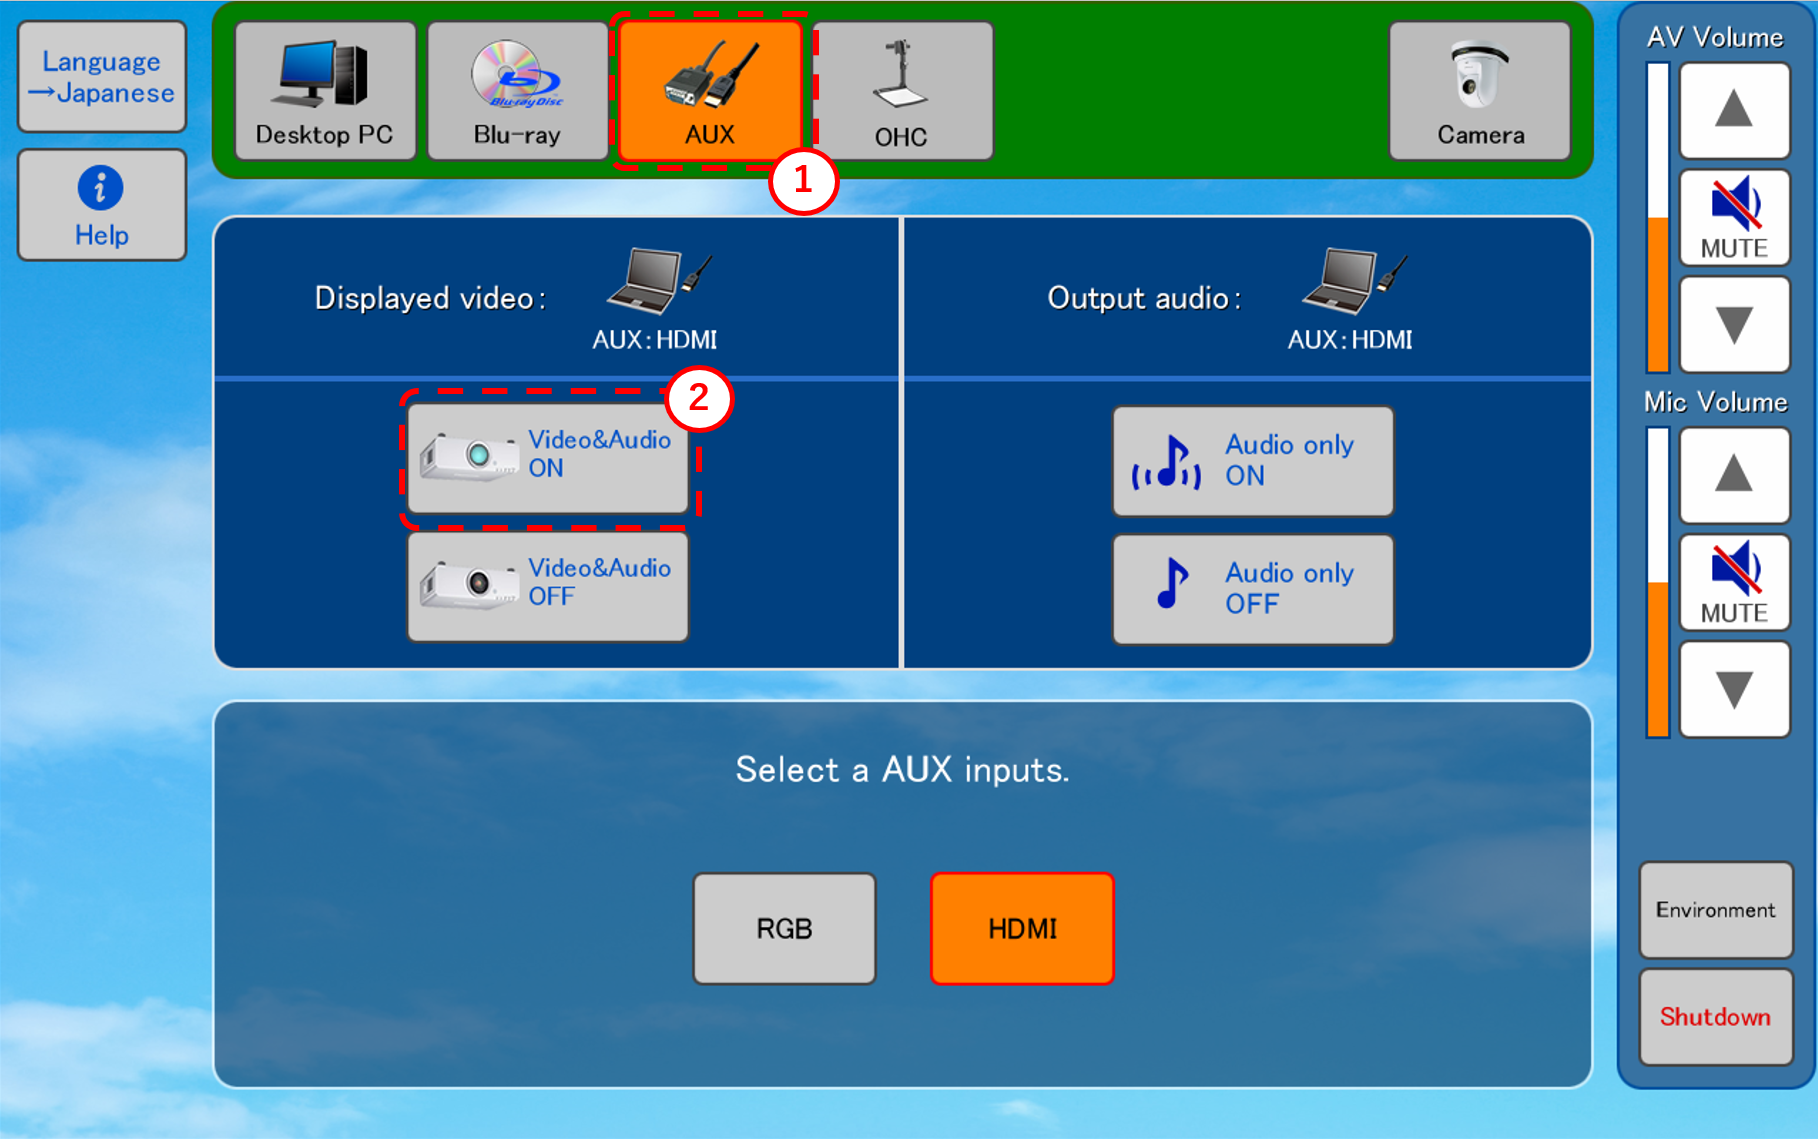
2-3.Use the external input panel
Take the cable () stored inside the drawer and plug it into the external input panel (
). Connect a device with an HDMI output terminal or an RGB output terminal. Use the touch panel (
) to select either the RGB input or HDMI input for the external input.
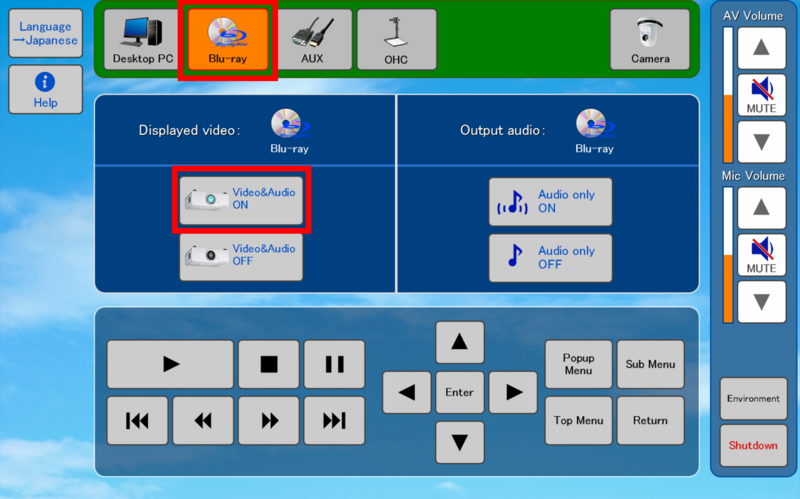
2-4.Use the Blu-ray player
The Blu-ray player is installed inside the door ().
Load the disc by pressing the open button on the Blu-ray player
Operate it using the touch panel ().
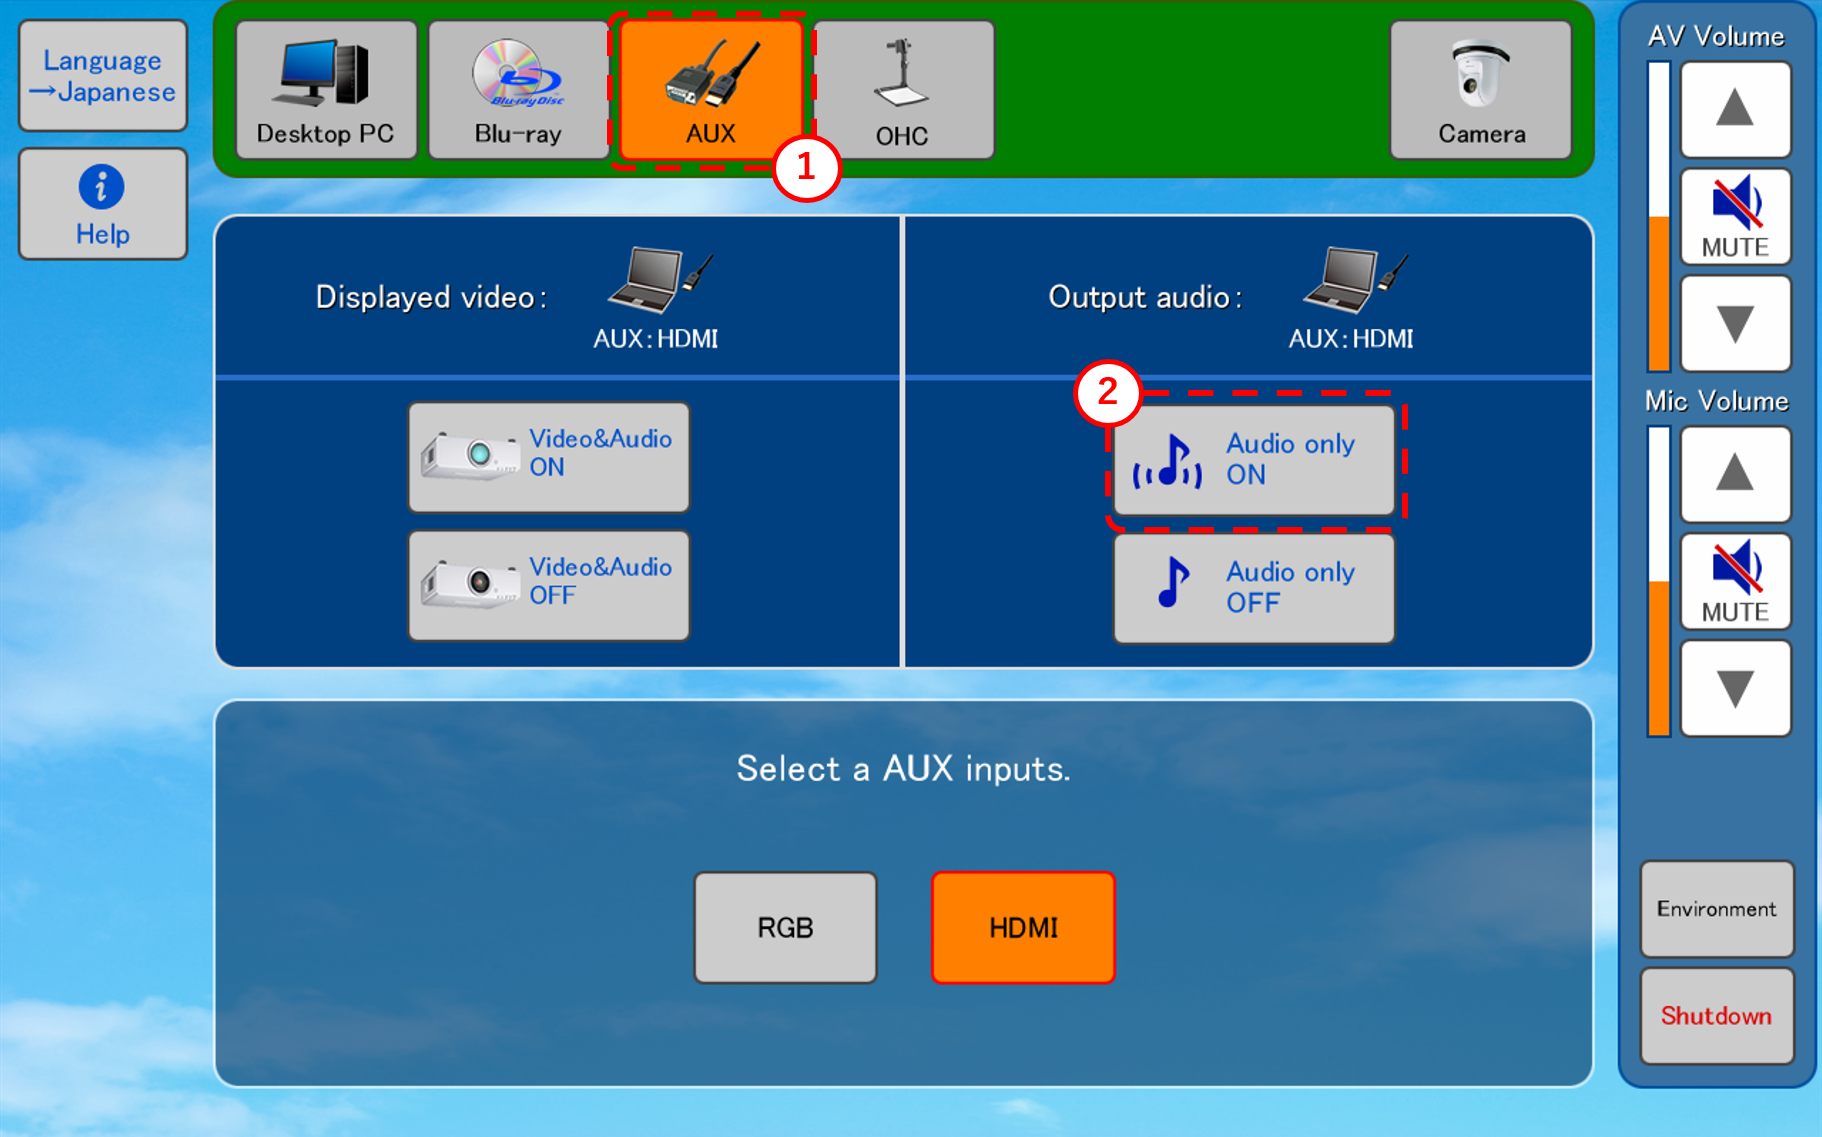
※If you want to use audio only, please select “Audio Only ON.” In this mode, no video will be displayed on the screen.
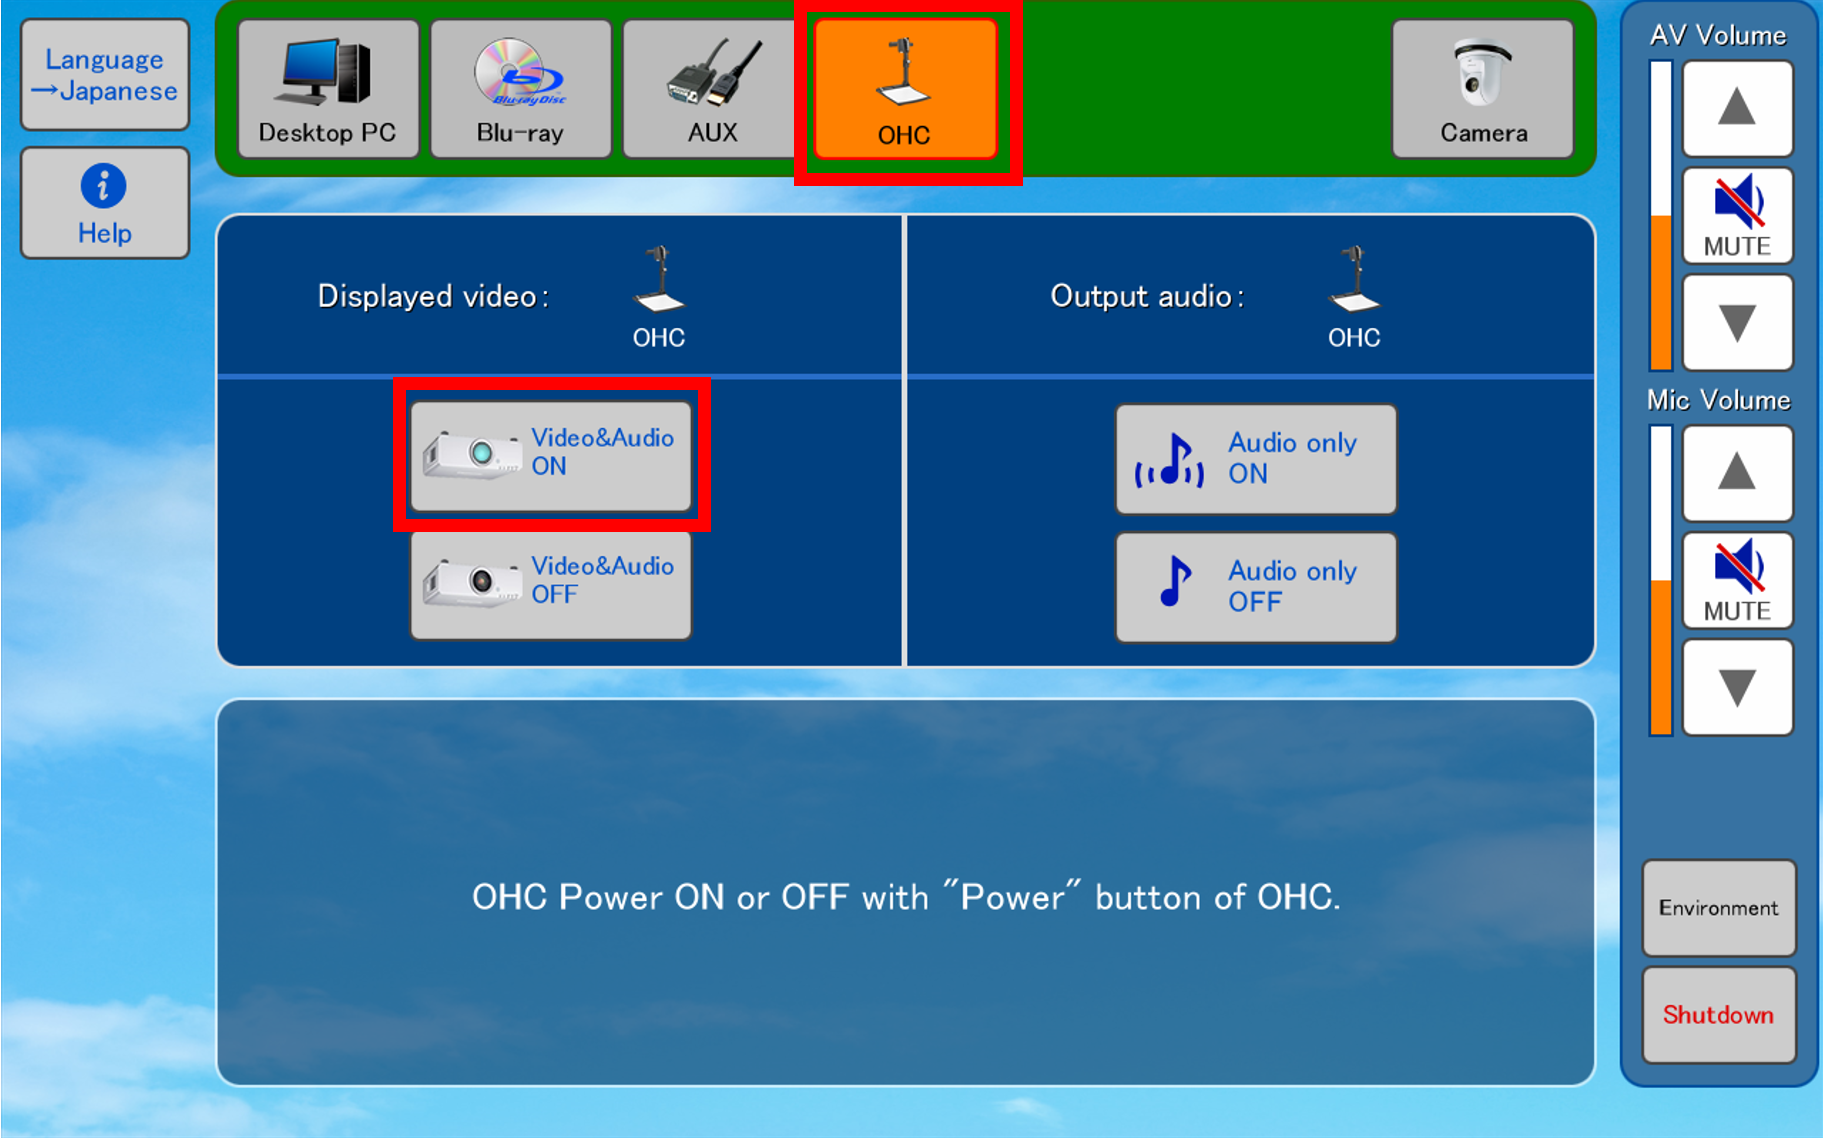
2-5.Use the document camera
It is installed inside the horizontal drawer ().
Raise the document camera body
Select the document camera on the touch panel () to turn on the power.
※ If you want to use audio only, please select “Audio Only ON.” In this mode, no video will be displayed on the screen.
2-6.Wireless microphone
It is installed inside the drawer ().
Use it by turning the microphone talk switch ON.
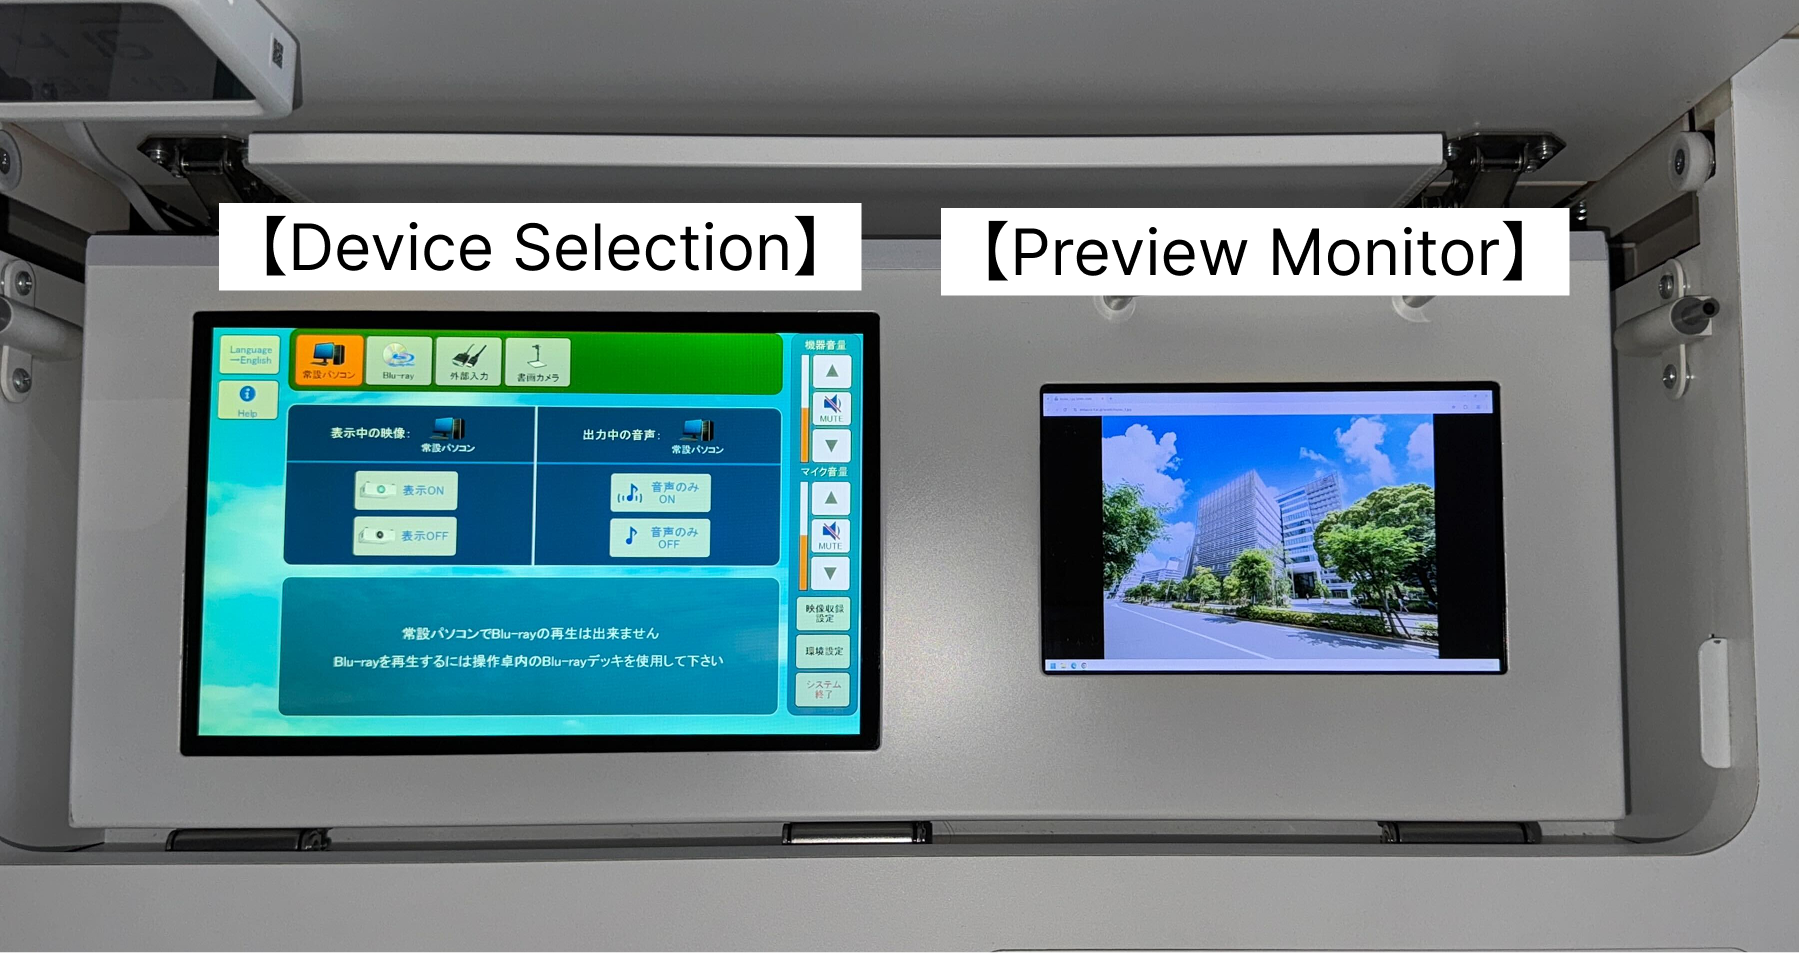
2-7.Preview monitor
It is installed on the desk ().
Check the source to be projected next in advance.
3.Basic operations of the touch panel
3-1.Start the system
Start the system using the system startup card reader.
If you want to use the video equipment, select “YES” → “Enter”.
If you want to use only the microphone, select “NO” → “Enter” In this case, audio output only will be available.
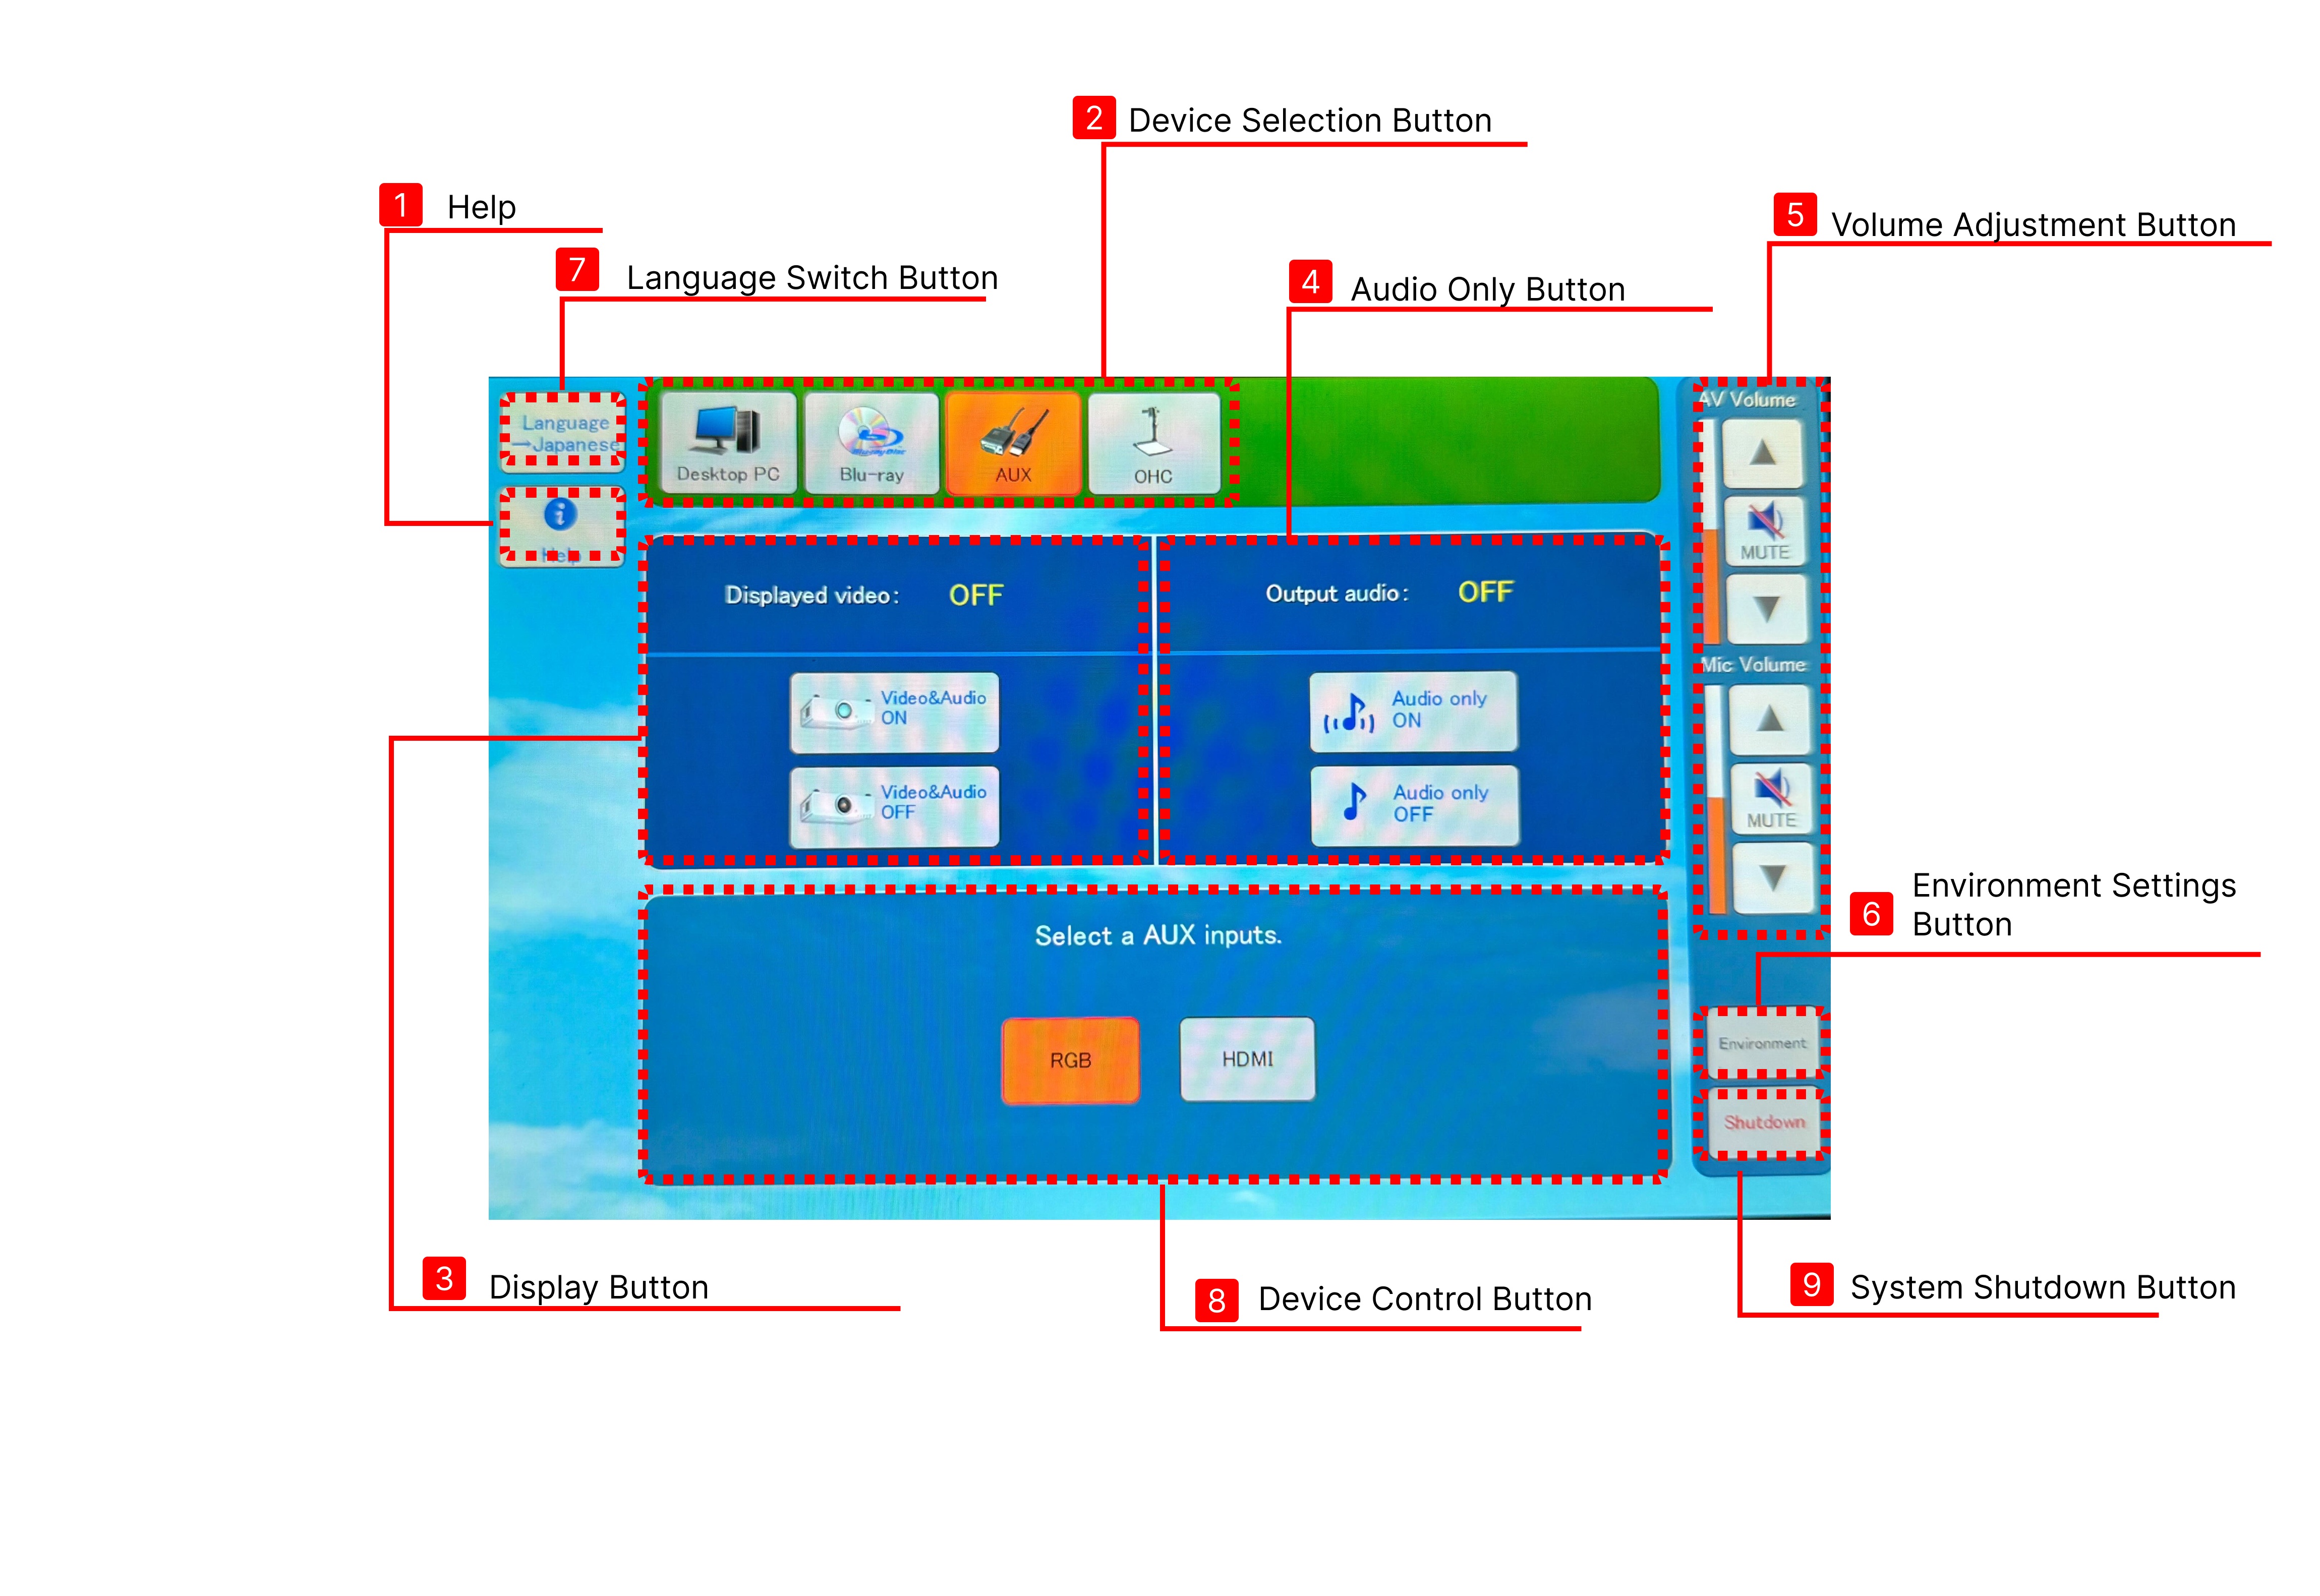
3-2.Display the Image on the Preview Monitor
The video selected with the device selection button () will be displayed on the preview monitor.
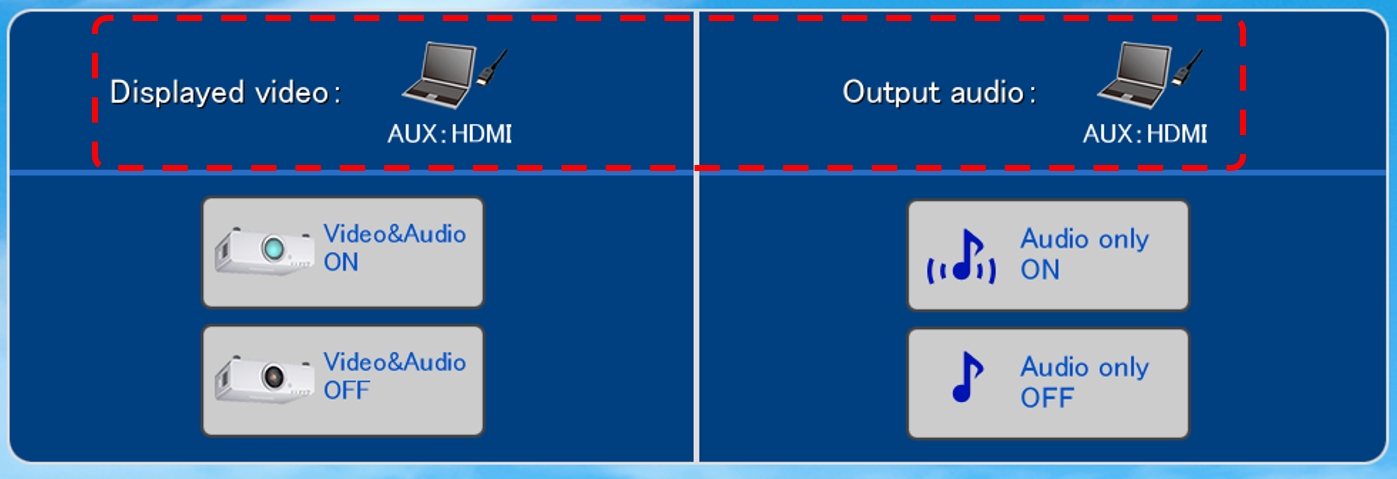
To show the video on the preview monitor, please select “Displayed Video ON”.
3-3.Display Image / Audio Only Playback
【Display video/audio】
To display video and audio, select the “Displayed Video ON” button ().
【Amplify audio only】
To turn off the video and output audio only, select the “Output Audio ON” button ().
【Disuplaying icon】
To display the video again, select “Displayed Video ON” ().
The currently selected device can be confirmed by the icon shown.
3-4.Shut Down the System
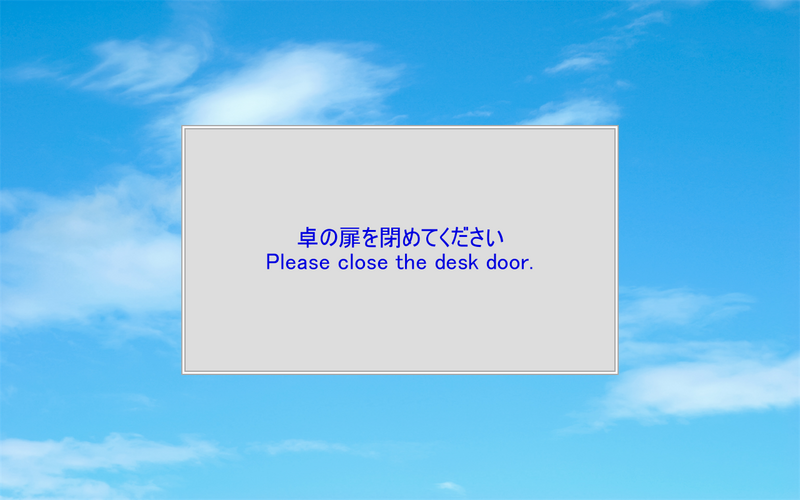
To shut down the system, select “Shut Down” on the touch panel and make sure all doors are closed.
Also, selecting “Initialize system” will reset microphone volume and other settings, but the projector will remain powered ON.
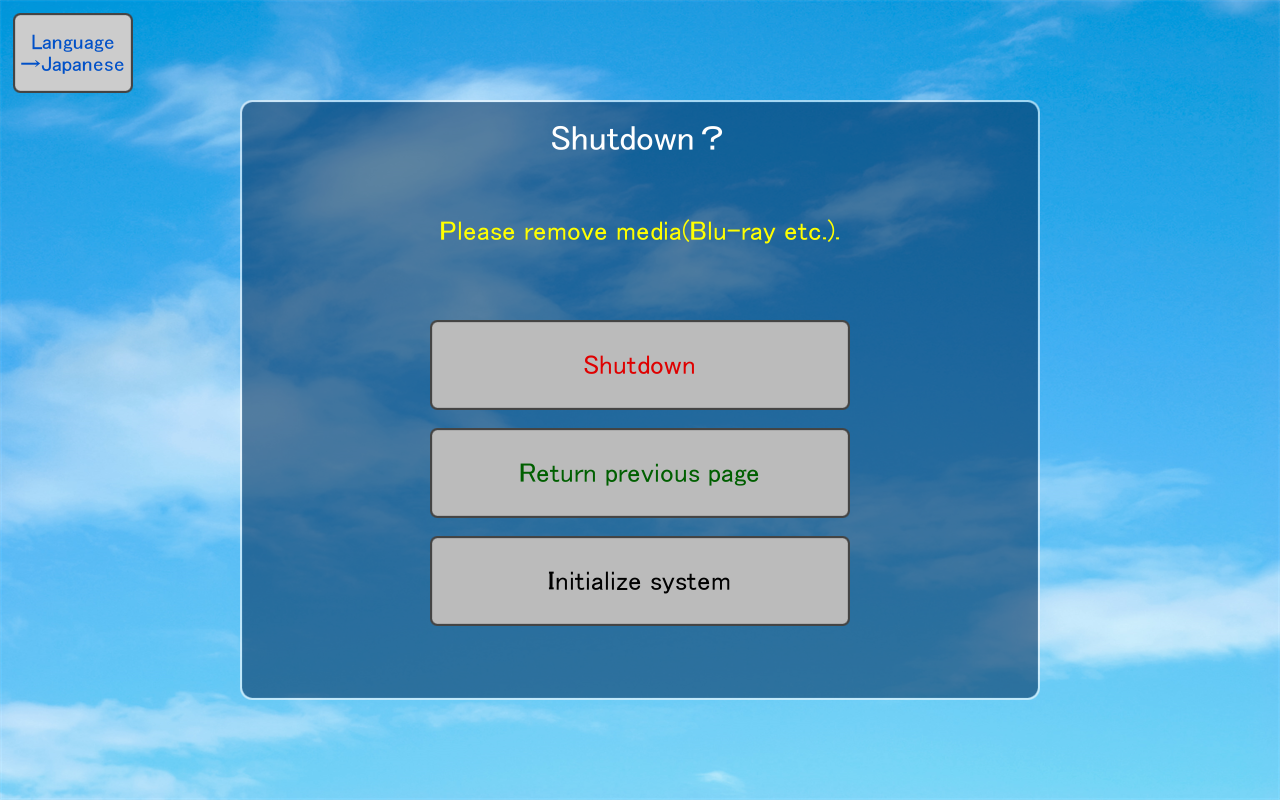
If any door is open, an “Alert” will appear on the touch panel.
For detailed instructions on how to operate the touch panel, please refer to the separate Touch Panel User Manual.
4.How to save the teacher’s PC monitor duplication and extension settings
※After saving the settings, it may take about 30 seconds to apply them each time Windows starts.
※If only one physical display is connected, the extended or duplicate display settings will not be applied.
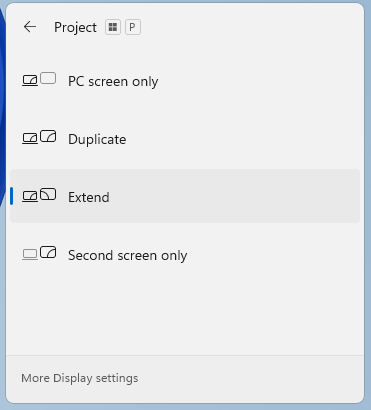
Press the Windows key + P on the keyboard.
> A “Display Mode” menu will appear on the right side of the screen.
Clicking “Extend” will set the system to start in extended display mode from the next startup (after reboot).
Clicking “Duplicate” will set the system to start in duplicate display mode from the next startup (after reboot).