Home > Service > Business Support > SIT STATION > Group
Group
Updated 2025/07/07
In SIT Station, you can create groups for use within on-campus systems. If you want to create a custom mailing list, you must first create a group.
目次
1.Create a group
2.Add a TA to the instructor group for the course
1. Create a group
1.1
Launch your browser and access the SIT Station.
1.2
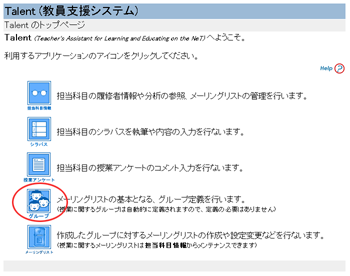
Click the "Talent" icon.
1.3
Click the "グループ" (Group) icon.
1.4
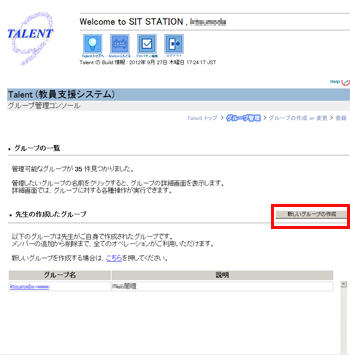
The Group Management Console will be displayed.
Click the "新しいグループの作成" (Create new group) button.
1.5
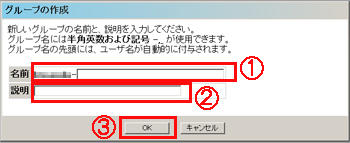
The group creation screen will be displayed.
Enter the group name in text box ①, the description in text box ②, and click the OK button ③.
※Please note that group creation is processed asynchronously, so the group may not appear immediately after registration.
2. Add a TA to the instructor group for the course
2.1
Launch your browser and access the SIT Station.
2.2
Click the "Talent" icon.
2.3
Click the "グループ" (Group) icon.

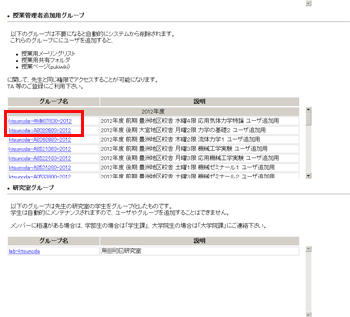
2.4
The course groups in which you are registered as an instructor will be listed under "既存グループの一覧" (List of existnig groups).
Refer to the descriptions to find the group you want, and click the group name link.
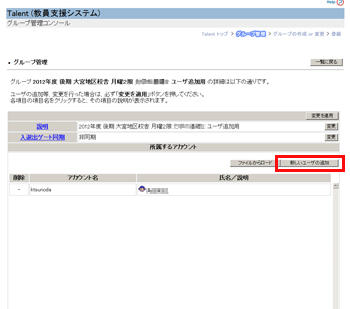
2.5
Click the "新しいユーザーの追加" (Add new user) button.
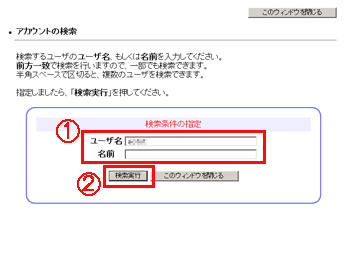
2.6
Search for the user you want to add.
Enter the user's username (such as student ID) or name in text box ①, then click the "検索" (Search) button ②.
When searching by name, if there are many matching users, not all results will be displayed.
In this case, please refine or change your search criteria by searching with the full name or username.
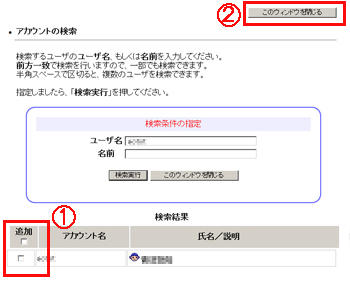
2.7
Check the checkbox ① of the user(s) you want to add (multiple selections allowed), then click the "このウィンドウを閉じる" (Close this window) button ②.
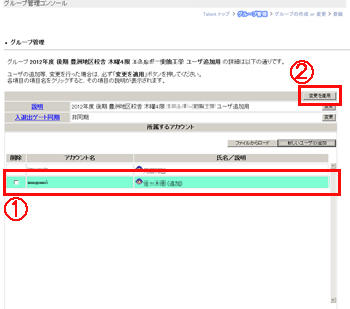
2.8
Confirm that the added user appears in the group list (the added user is highlighted ①), then click the "変更を適用" (Apply changes) button ②.
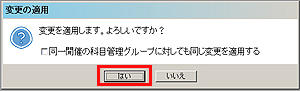
2.9
A confirmation dialog will appear. Click "はい" (Yes).