
Home > Service > Printing > Printing machine > HP Designjet Z6dr(MacOS)
HP Designjet Z6dr(MacOS)
Updated 2023/09/19
| For who | For all SIT students and all SIT teachers |
| Caution |
|
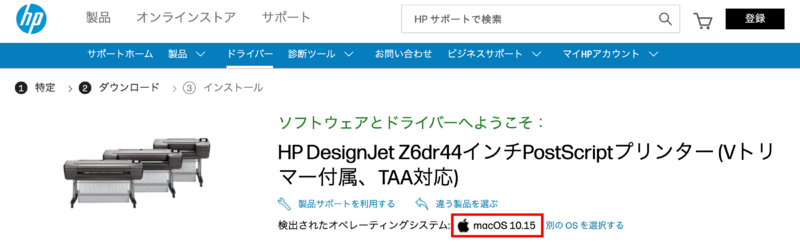
1. Please access here. ※Link might change without notice.
2. On the "Software and Driver Results" page, confirm that the "Detected Operating System" is macOS 10.15 (regardless of whether it is macOS 14 or 15).
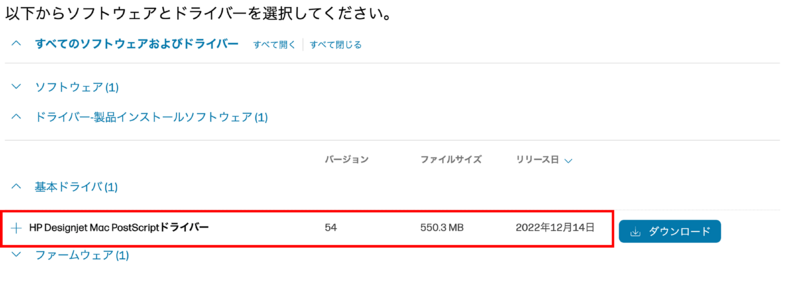
3. Select "All drivers" > "Driver-Product Installation Software" > "Basic Drivers" > "HP Designjet Mac PostScript Driver", and download.
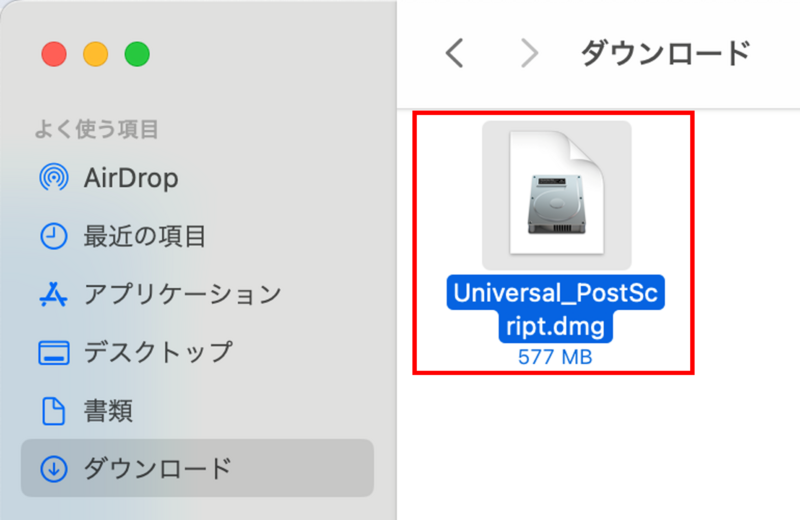
4.Double-click the downloaded file from the Downloads folder in Finder to open it.
5.Double-click "Universal PostScript Driver".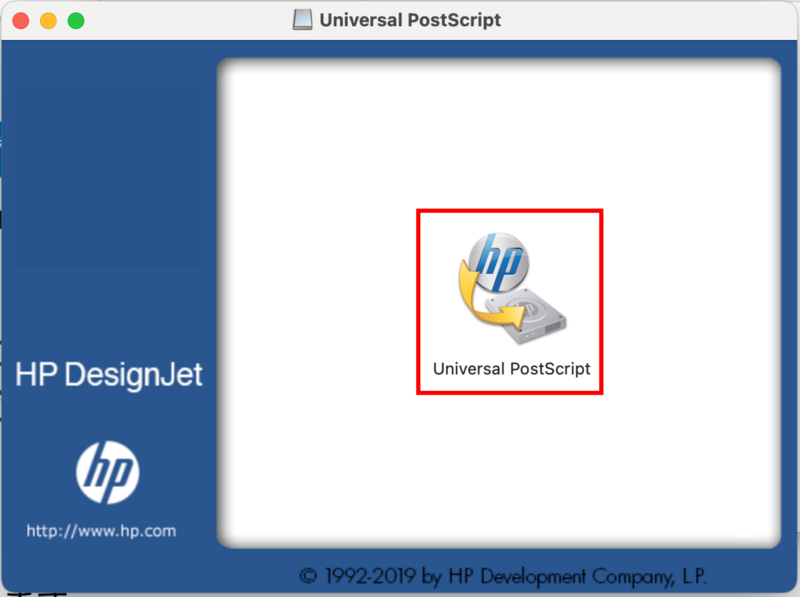
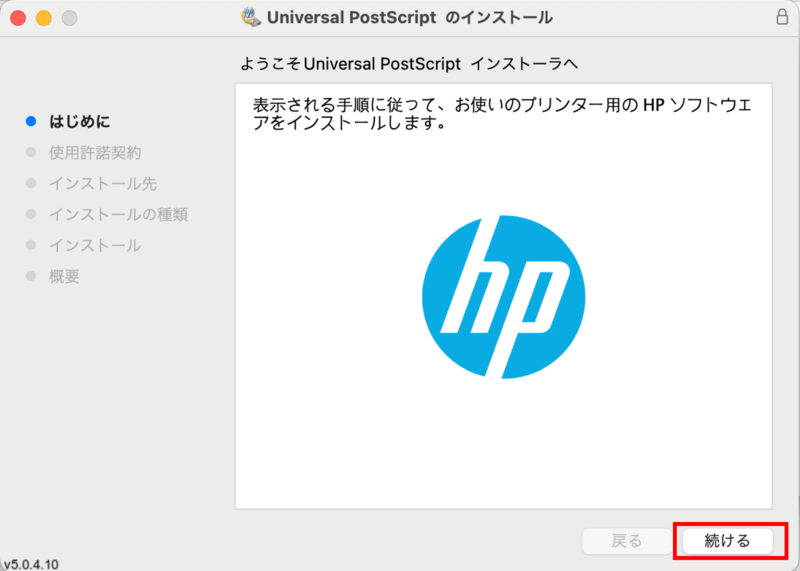
6. When prompted to "Follow the instructions to install the HP software for your printer," select "Continue."
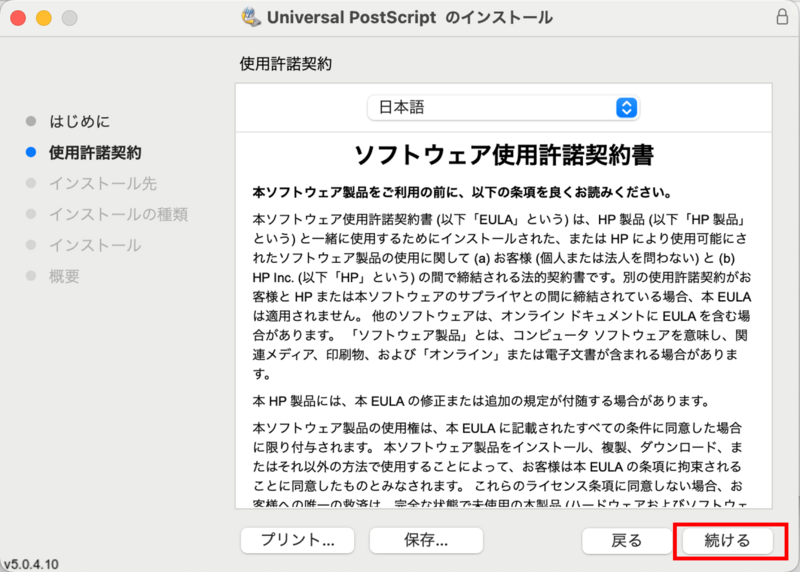
7. Select "Continue" regarding the "Software License Agreement."
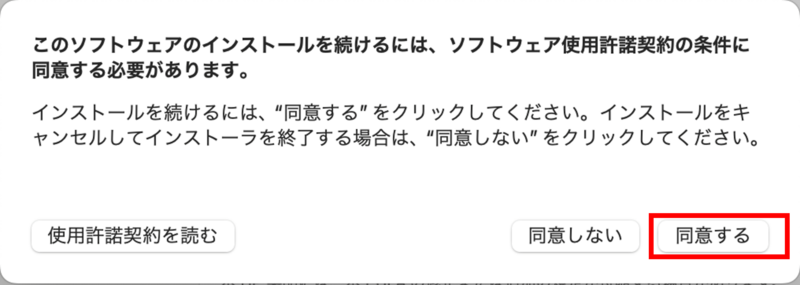
8. Select "I Agree" and then "Continue."
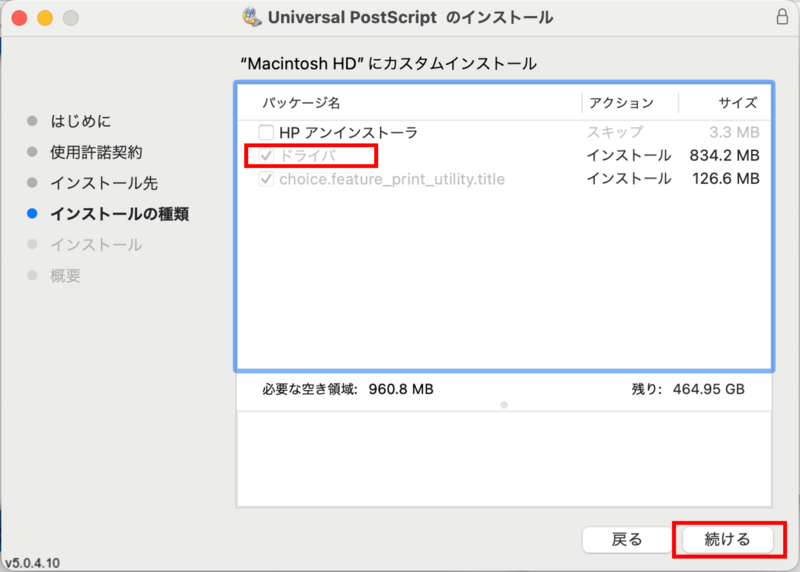
9. Make sure "Driver" is checked and select "Continue."
10. Select "Install" for "Standard installation to Macintosh HD."
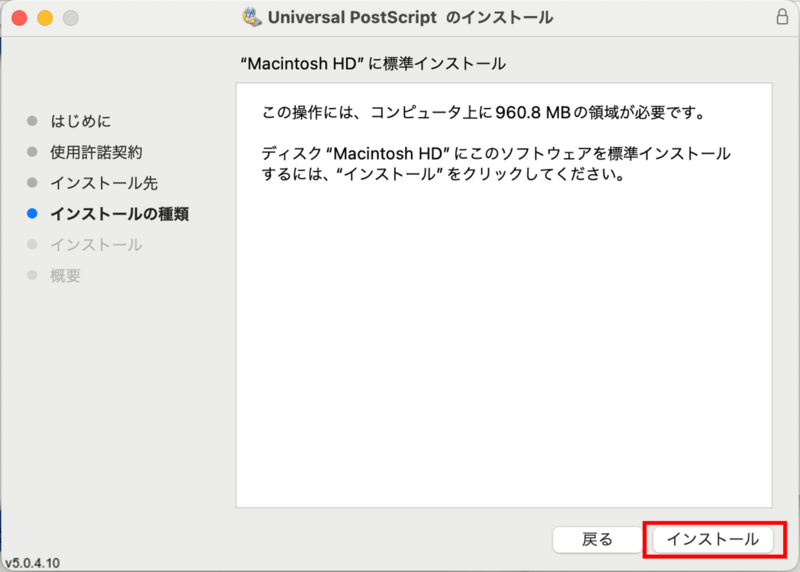
11. Enter your computer's (Mac) login name and password and select "Install Software."

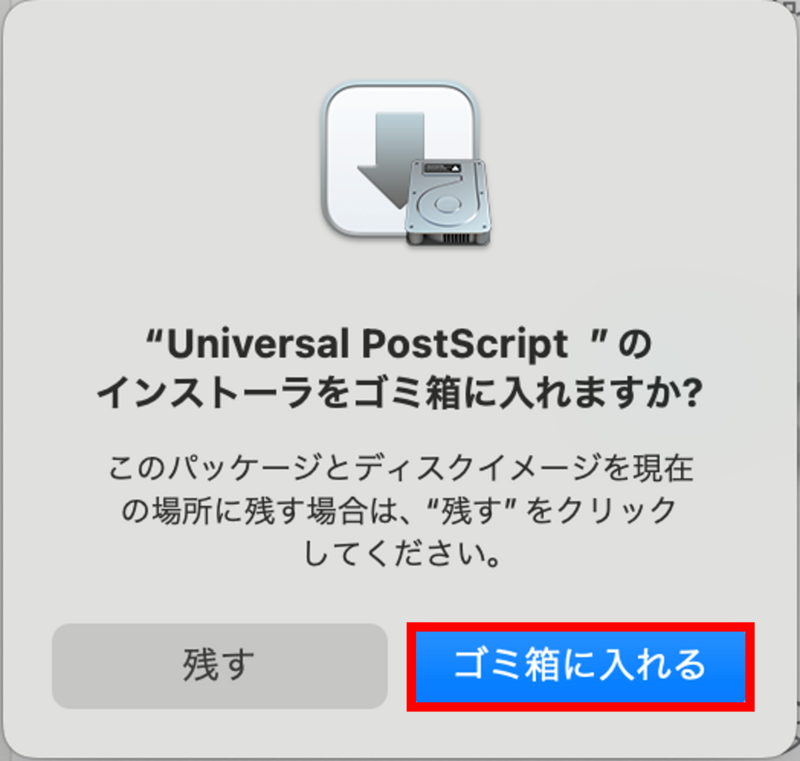
12. When the message "Installation complete" appears, select "Close."

13. When asked "Do you want to put the Universal PostScript installer in the Trash?", select "Move to Trash."
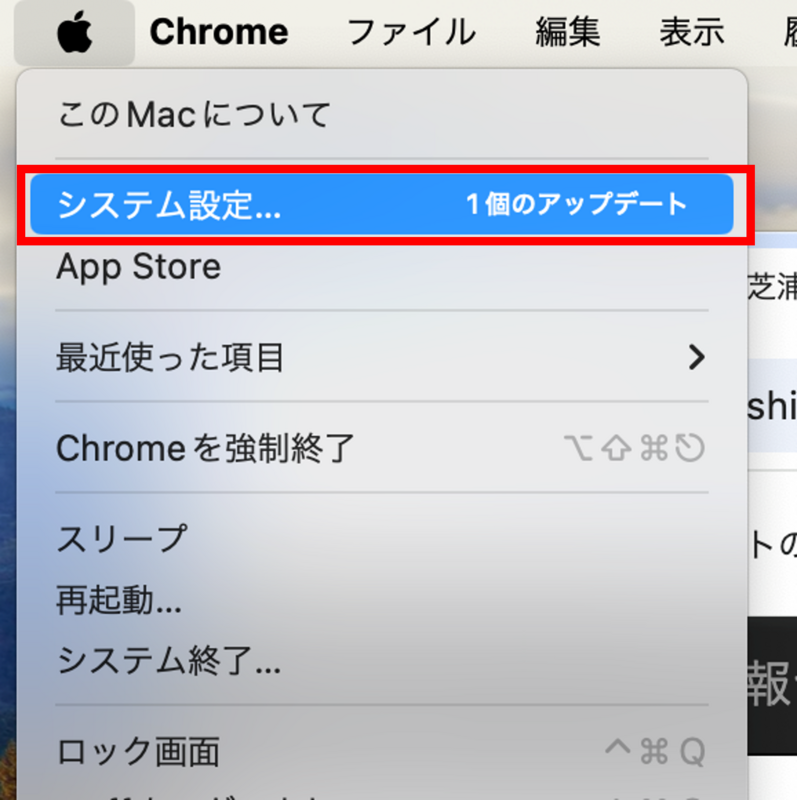
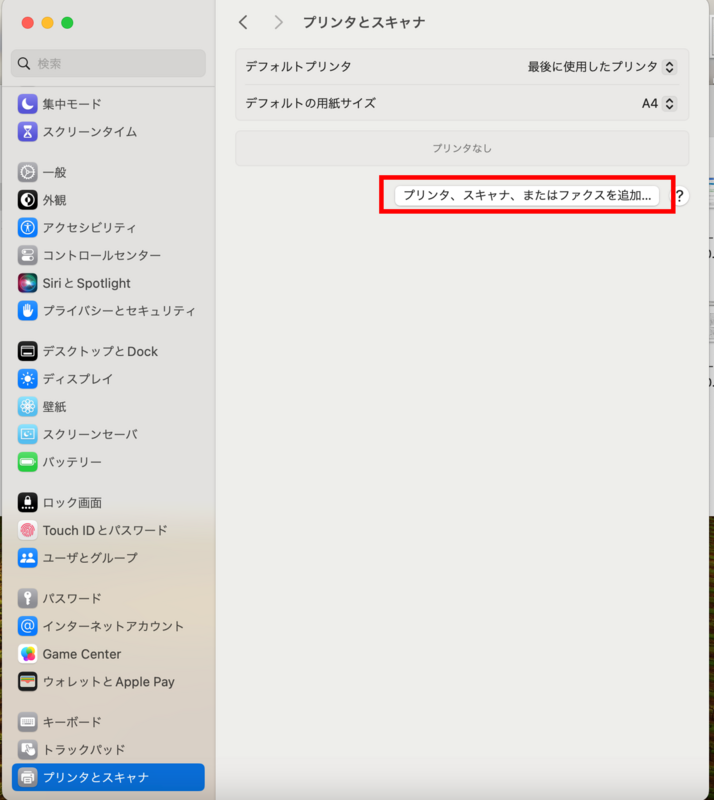
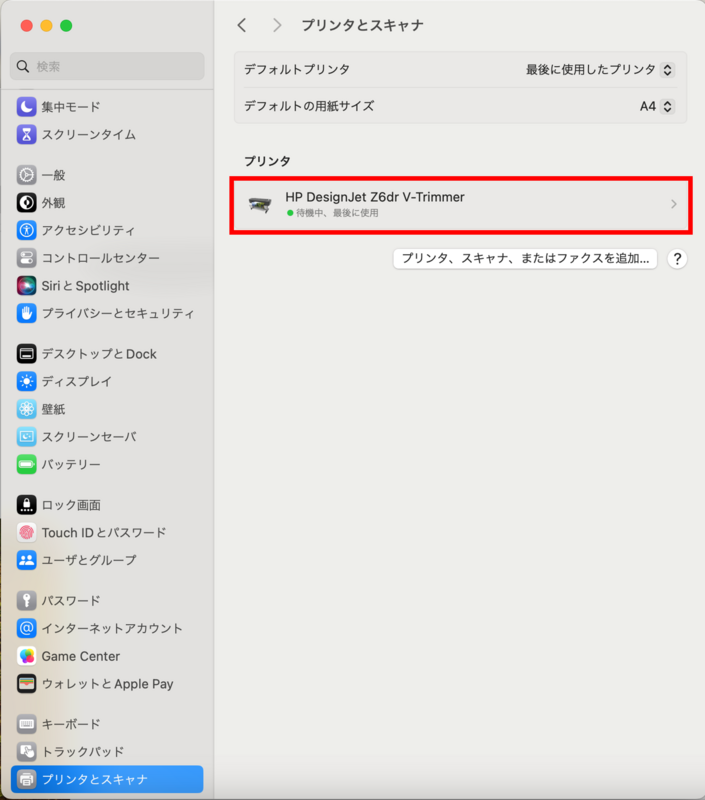
14. From "the Apple menu", choose "System Preferences."
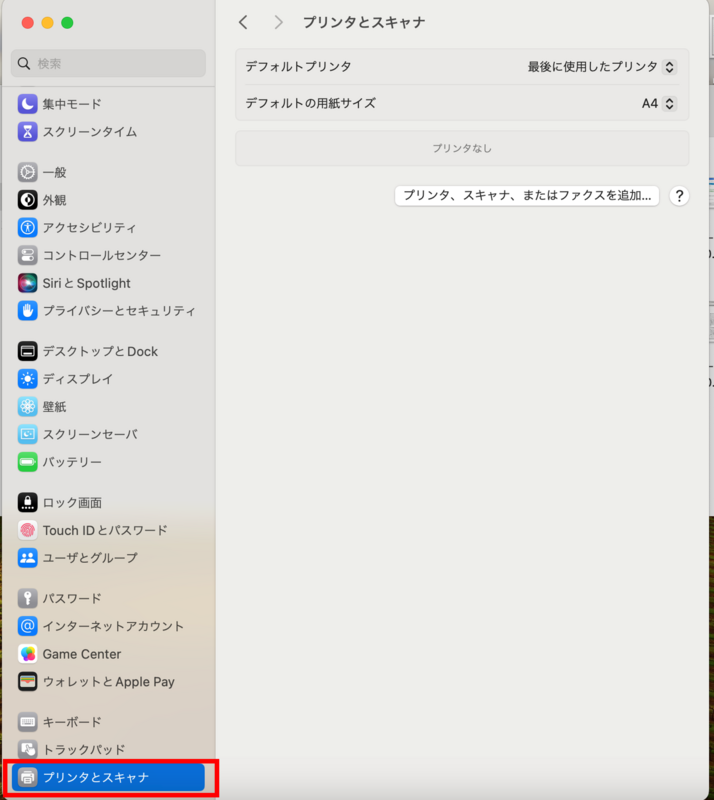
15. Select "Printers and Scanners."
16. Select the "Printer, Scanner or Fax" tab and add a printer.
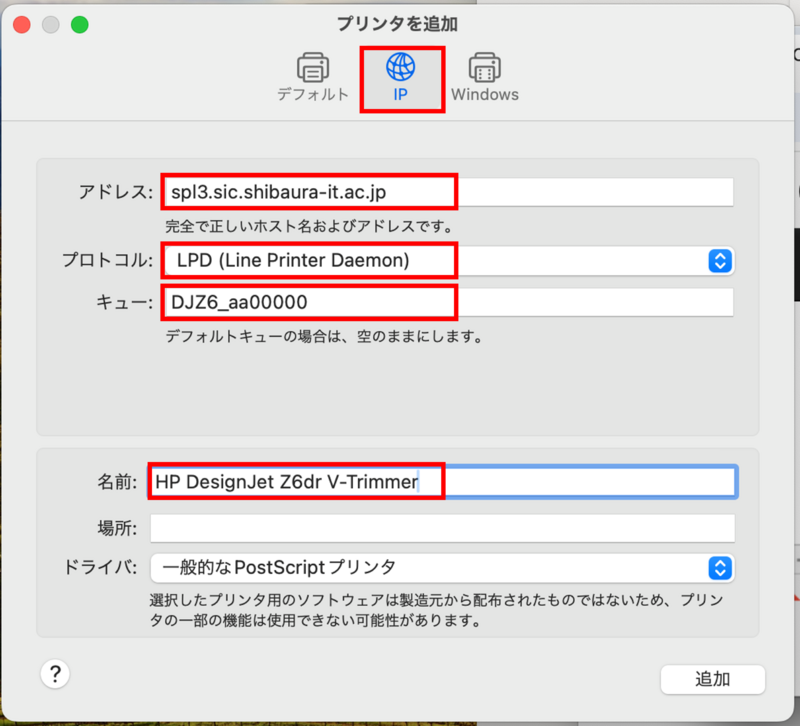
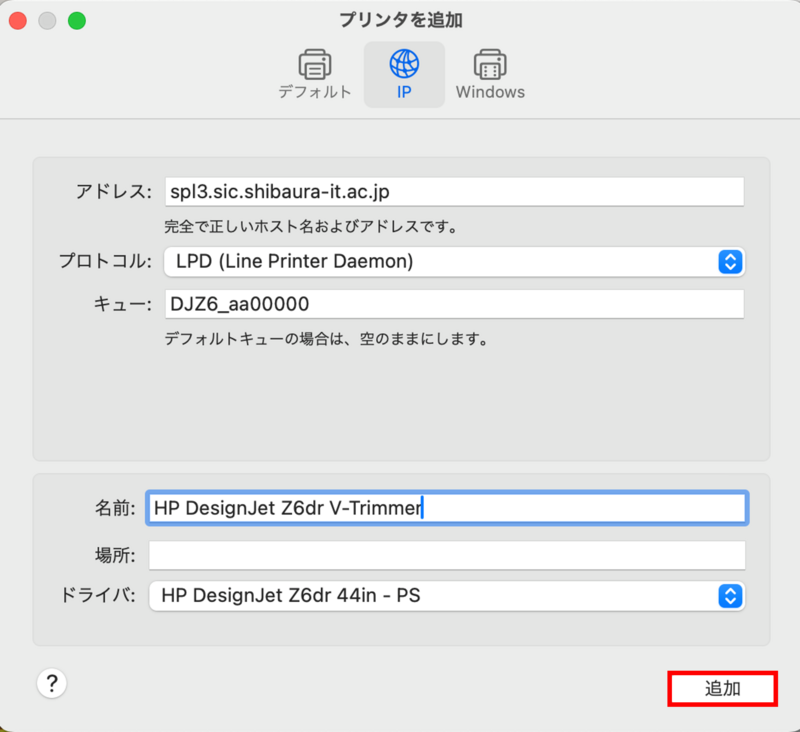
17. Open the "IP" tab and enter and select the following information.
Address:spl3.sic.shibaura-it.ac.jp
Protocol:LPD (Line Printer Daemon)
Queue:DJZ6_aa00000 (SIC ID)
Name:HP DesignJet Z6dr V-Trimmer (Any printer name)
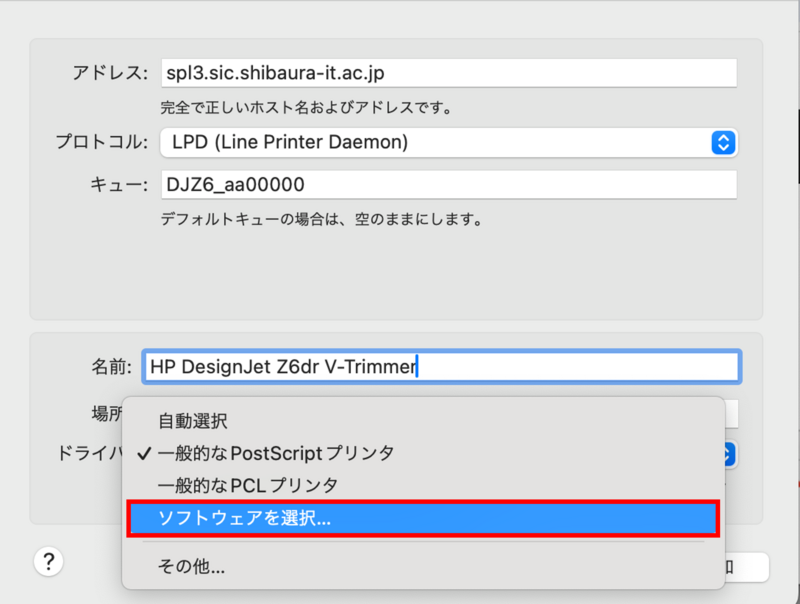
18. Click "Driver" > "Choose Software...".
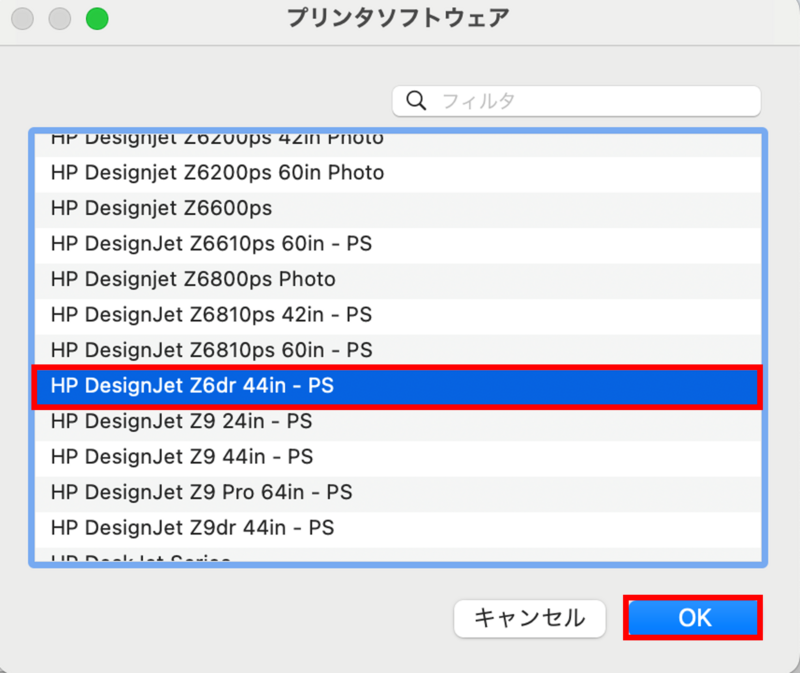
19. Select "HP DesignJet Z6dr 44in - PS" and select "OK".
20. Select "Add".
21.A printer has been added.
22.Please do a test print.
23.Check your print job here

24.Move to the plotter, Load the plotter paper according to the LCD screen of the device, Hold the IC card (student or staff ID) over the card reader,
Touch "Print" on the control screen, and Touch the "Black&White" or "Color" button for the print job. If you can print, installation is complete.