
Home > Service > Class support > Scomb > Creating Questionnaires
Creating Questionnaires
Updated 2020/11/11
Click the [New] button for Questionnaires in the Edit Subject TOP screen to go to the "Create a New Questionnaire" screen.


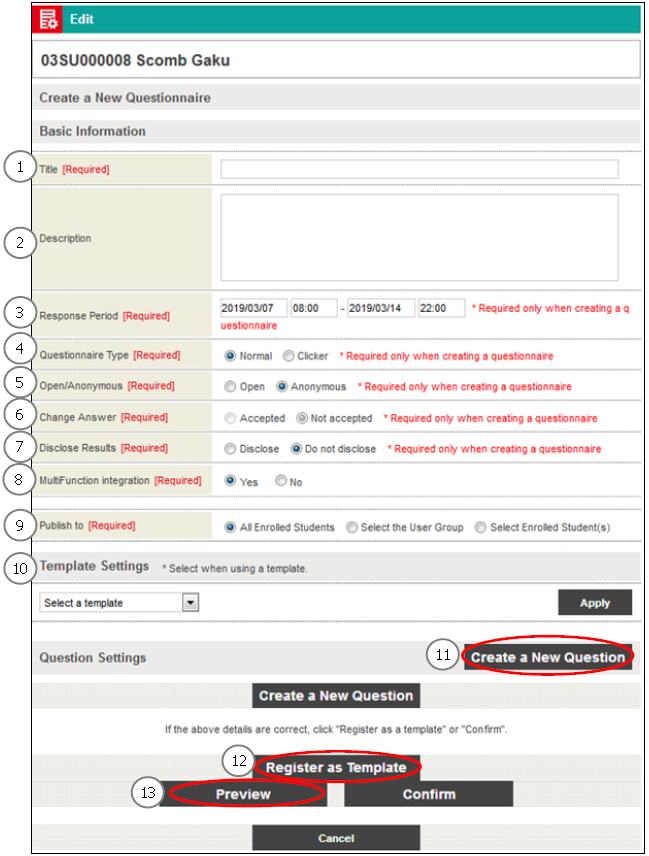


①Title
Enter the title of the questionnaire. (255 characters or less.)
②Description
Enter the description of the questionnaire. (1300 characters or less.)
③Response Period
Set the Response Period for the questionnaire.
(You can specify in the "YYYY/MM/DD" "HH:MM" format.)
<Changing the Response Period>
| Before the Period | During the Period | After the Period | |
| Start date/time | Changeable | Unchangeable | Unchangeable |
| End date/time | Changeable | Changeable | Unchangeable |
④Questionnaire Type
Select Normal or Clicker (normal).
* For questionnaire types, see "Questionnaires: Question Types" in this manual.
⑤Open/Anonymous
Set whether to create an open questionnaire or anonymous questionnaire.
⑥Change Answer
Set whether or not to allow students to answer the same questionnaire again
⑦Disclose Results
Set whether or not to disclose the results to the students.
⑧Period when results are public
Set a period of time to release the results of the survey to the students.
(You can specify in the "YYYY/MM/DD" "HH:MM" format.)
* This item is only displayed when it was set to "Public" in ⑦Disclose Results.
⑨Publish to
Set who can view the questionnaire ("All Enrolled Students," "Select the User Group," or "Select Enrolled Student(s)").
When you select "Select the User Group," a user group list will be displayed. To
use a user group, you need to create one in Manage User Group beforehand.
When you select "Select Enrolled Student(s)," an enrollee list will be displayed.
⑩Template Settings
You can select a template you registered beforehand.
Select a template from the [Select a template] pull-down menu and click the [Apply] button to apply the template.
⑪Create a New Question
You can create a new question
Click the [Create a New Question] button to go to the Create a New Question
screen.
⑫Register as Template
You can register the created questions into a template.
⑬Preview
You can preview the answer screen displayed to students.
After entry, click the [Confirm] button to go to the confirmation screen.
Check the details and click the [Submit] button.
Submission will be completed with a completion message.
* When the Response Period starts, the questionnaire will be displayed in the students' Subject TOP screen.
For 3 days after the Response Period starts, NEW will be displayed with the questionnaire title.
Questionnaires: Creating a New Question

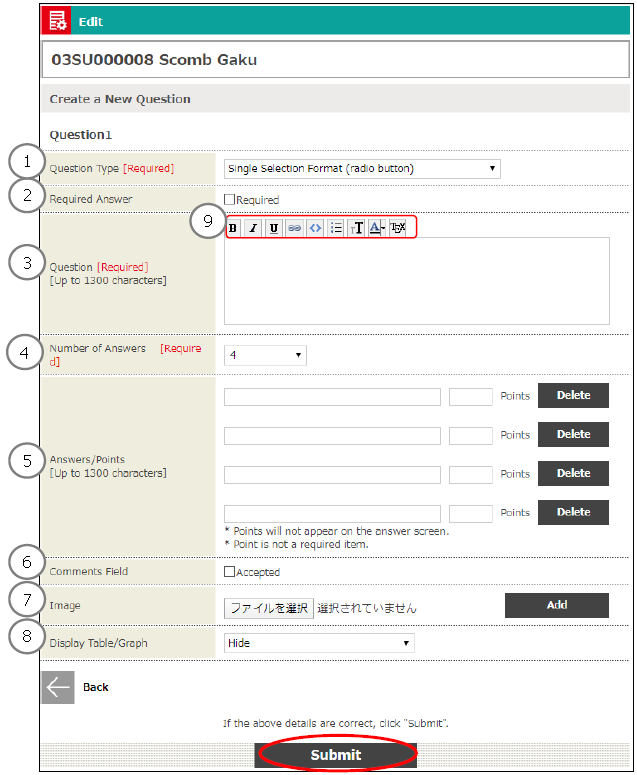

①Question Type
Select a question type from the pull down menu.
* Items displayed in the pull down menu vary by the questionnaire type selected when creating the questionnaire.
For details on the question types, see " Questionnaires: Question Types " .
②Required Answer
Set whether or not to require an answer.
③Question
Enter the question.
④Number of Answers
Set the number of choices.
This is not displayed for descriptive type questions.
⑤Answers/Points
Set the choices and the points.
The number of choices is based on ④.
This is not displayed for descriptive type questions.
Points are used in the summary.
You can set negative values.
(They are not displayed to students.)
⑥Comments Field
Set whether or not to allow students to enter comments (1300 characters or less) for their answers.
⑦Image
You can add an image to the question.
Available file formats are gif, jpg, and png.
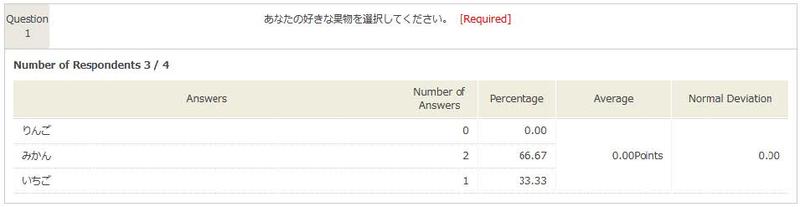
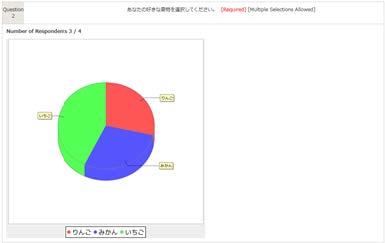
⑧Display Table/Graph
Set whether to display the summary in a table or graph when publishing the questionnaire results.
Tables/graphs can be displayed from the following links.
Subject managers: The [Display] link of each questionnaire in the Subject TOP
(Edit/View)
Students: The [Display Results] link of each questionnaire in the Subject TOP
screen.
There are the following 3 types of table/graph.
<Average + Number of Answers + Standard Deviation (Table Format)>
<Percentage (Pie Graph)>
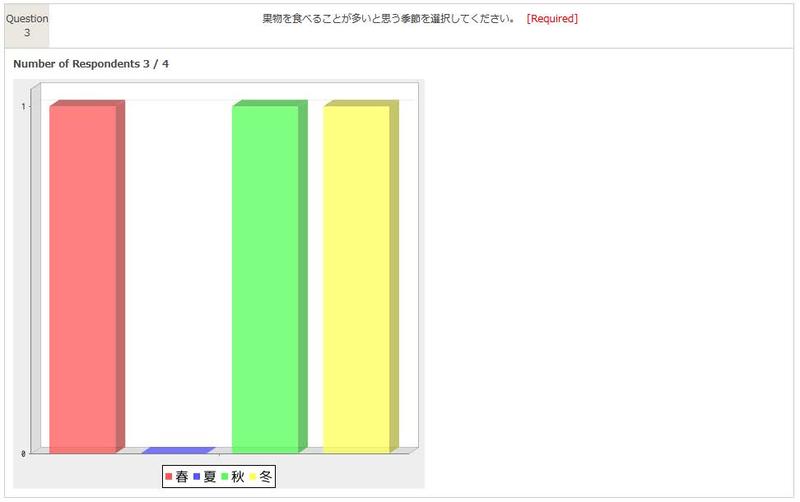
<Total (Bar Graph)>
⑨Markup Functions
You can use the markup functions.
For details on the markup functions, see " Markup Functions " in the manual.
Create a question and click the [Submit] button to register the question to the questionnaire.The order of registered questions can be changed in the "Create a New Questionnaire" screen or Edit Questionnaire screen.
Questionnaires: Question Types
Question types vary by questionnaire type.
- Normal questionnaires
There are 7 question types for normal questionnaires as follows:
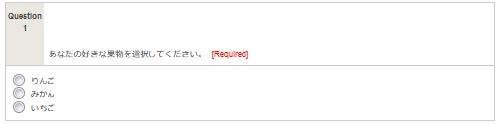
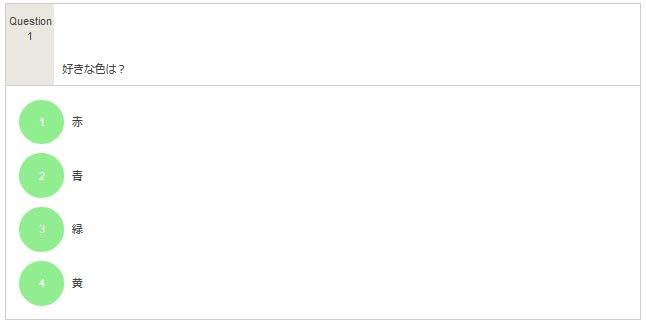
・Single Choice (radio button)
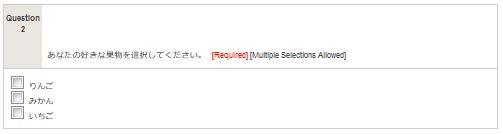
・Multiple Choice (check box)
・Text Format (text box)
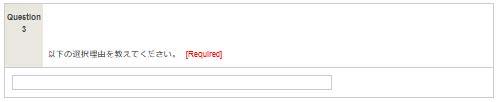
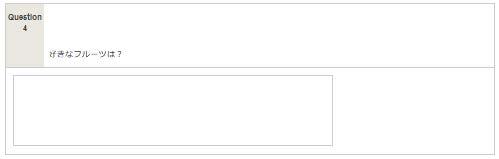
・Free Text Format (text area)
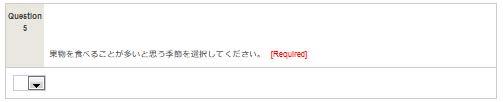
・List Choice (pull down menu)
・Single Selection Table Format (radio button)
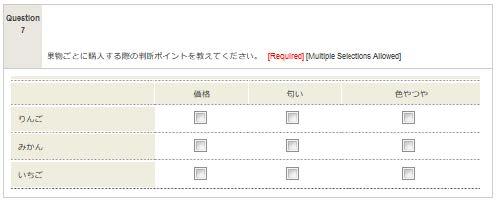
・Multiple Selection Table Format (check box)
Single Choice (radio button)
Students' view:
Multiple Choice (check box)
Students' view:
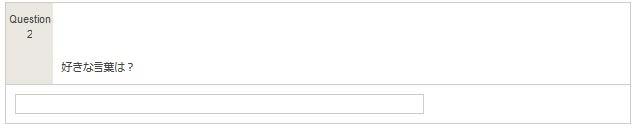
Text Format (text box)
Students' view:
Free Text Format (text area)
Students' view:
List Choice (pull down menu)
Students' view:
Single Selection Table Format (radio button)
Students' view:
Multiple Selection Table Format (check box)
Students' view:
Create a question and click the [Submit] button to add the created question to the questionnaire. - Clicker (normal)
There are 2 question types for clickers as follows:
・ Single Choice (radio button)
・ Text Format (text box)
Single Choice
Students' view:
Text Format
Students' view:

Questionnaires: Creating Templates
You can register the created questions into a template.
* Created templates can be used in other subjects as well.
* You can also use templates that other subject managers created in the same subject.
Click the [Register as Template] button in the "Create a New Questionnaire" screen or Edit Questionnaire screen to go to the Confirm Questionnaires Template screen.
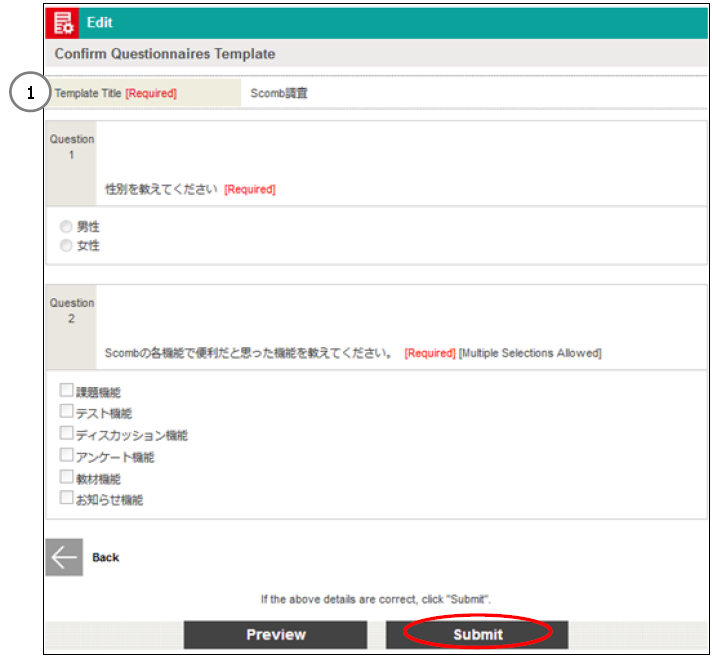
①Template Title
The questionnaire title will be registered as the template title by default.
* Although the same title can be used for more than one template, setting different titles is recommended to avoid confusion.
To change the title, first register the template, and then edit it.
Check the details and click the [Submit] button.
Template registration will be completed with a completion message.
Questionnaires: Editing/Deleting Templates
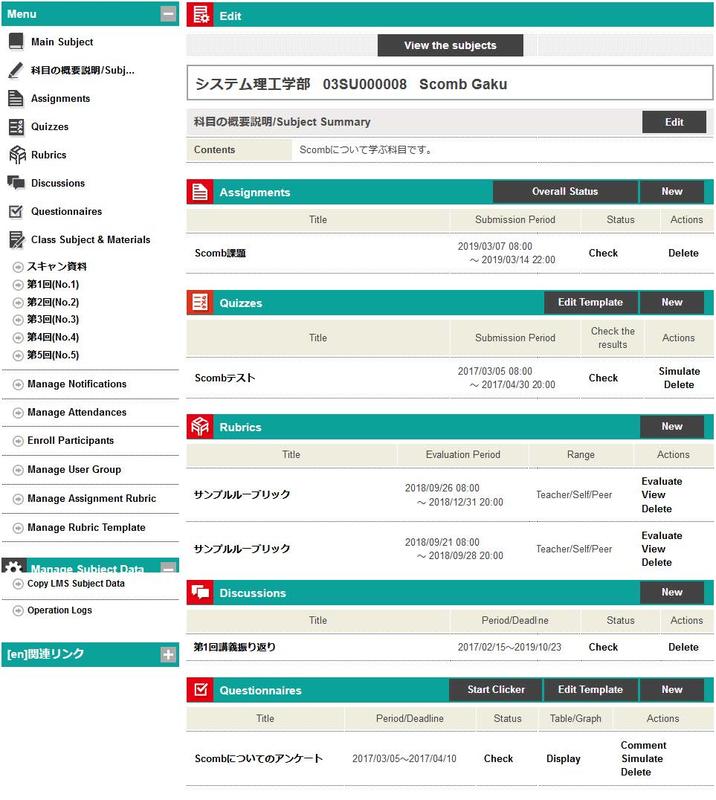
Click the [Edit Template] button for Questionnaires in the Edit Subject TOP screen to go to the Questionnaire Template List screen.
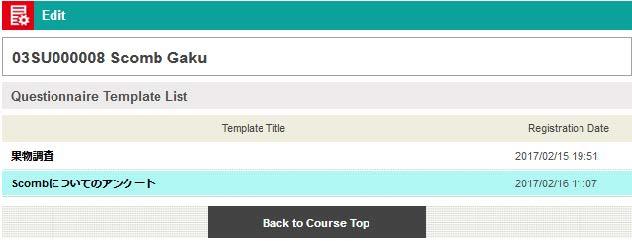
Click the title of the template you want to edit to go to the Create/Edit Questionnaires screen.

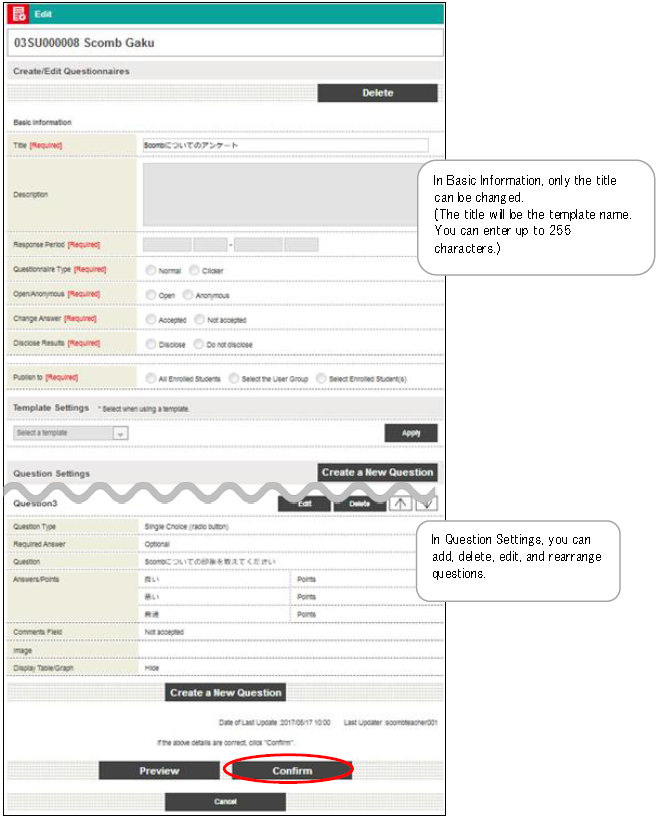
After entry, click the [Confirm] button to go to the confirmation screen.
Check the details and click the [Submit] button.
Submission will be completed with a confirmation message.
Click the [Delete]
button to delete the template.