Home > Services > Class support > Online Classes > Schedule Zoom Meetings and Make Cloud Recordings from ScombZ
Schedule Zoom Meetings and Make Cloud Recordings from ScombZ
Updated 2026/04/14
By launching Zoom from the Zoom link in ScombZ,
you can link a Zoom meeting with the course LMS in ScombZ.
Benefits of linking with ScombZ
・Course instructors, TAs, and enrolled students can join the Zoom meeting simply by accessing it from ScombZ.
・You can automatically create meetings limited to students enrolled in the course LMS.
・You can access recording data through Zoom in ScombZ.
1. Access Zoom in the ScombZ Course LMS |
1.1. Click the “Zoom” link in the “External Tools” table in ScombZ.
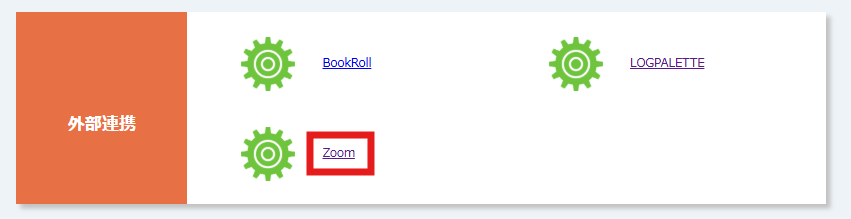
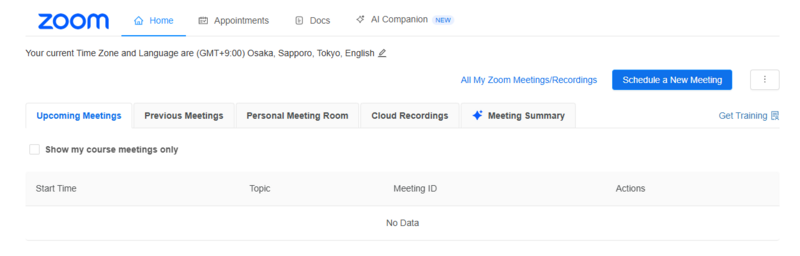
1.2. The Zoom screen will open.
2. How to Configure Meeting Settings |
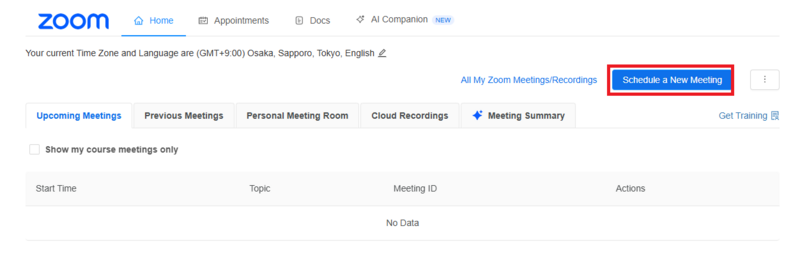
2.1. Click “Schedule a New Meeting.”
2.2. Configure the meeting details.
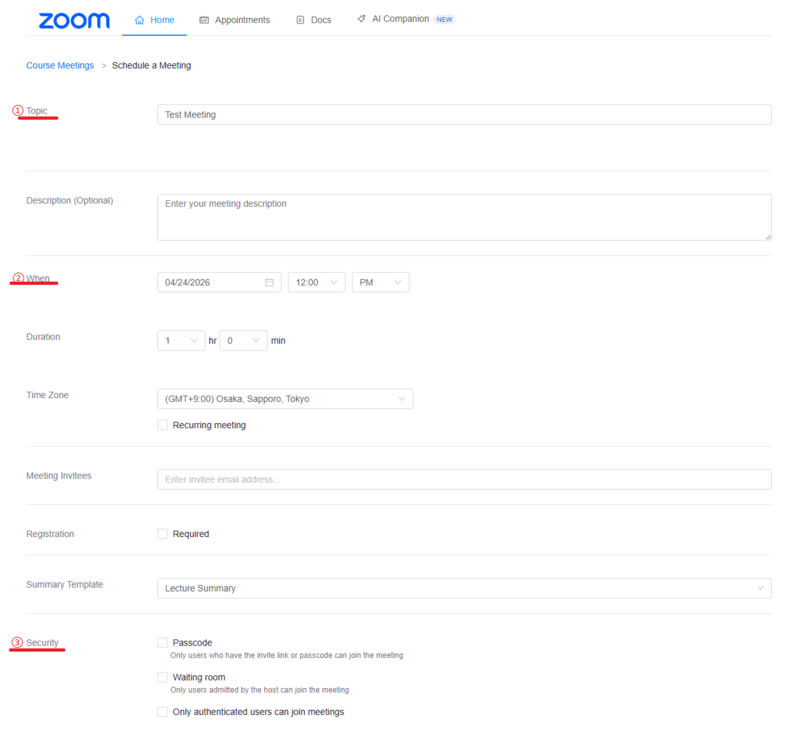
① Topic: the meeting title
② When and Duration: set the meeting date, time, and duration.
For regularly held classes or similar meetings, check “Recurring Meeting” to create a recurring meeting.
③ Security:
・Passcode: only users who have the invitation link or passcode can join the meeting.
・Waiting Room: only users admitted by the host can join the meeting.
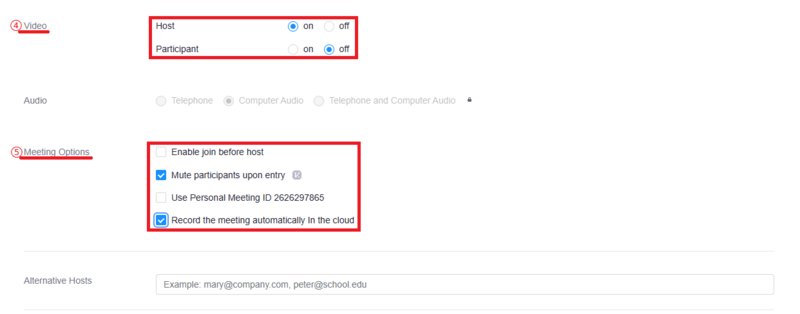
④ Video: choose whether video is on or off when the host and participants join.
⑤ Meeting Options: configure various meeting options.
![]() Check “Automatically record meeting: In the cloud.”
Check “Automatically record meeting: In the cloud.”![]()
・Alternative Hosts: enter alternative hosts here.
After completing all settings, click “Save.”
2.3. Click the “Home” tab to go to the list of Zoom meetings in the LMS.

2.4. Click the “Start” button for the meeting you want to start, and the meeting will begin.
If the Zoom app is installed, the app will launch.

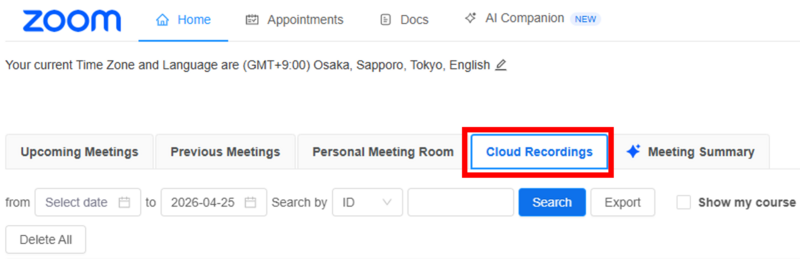
2.5. If you made a cloud recording during the meeting,
access Zoom from ScombZ again and check the recording data from the “Cloud Recordings” tab.
* Depending on the length of the meeting, such as a class, it may take some time for the recording to appear.

Cloud recording data for meetings created through the linked Zoom link in ScombZ
can also be accessed from Cloud Recordings opened through the Zoom link in ScombZ.
* Meetings scheduled or joined from other locations will not appear here.
At this point, the video has not yet been published to anyone.
3. Publish Videos |
You can set the publication destination for the video as needed.
Cloud-recorded videos cannot be downloaded by anyone other than the meeting host.
Even if students access the videos in Cloud Recordings, the videos will not be downloaded.
* They can click the “Download” button below the thumbnail, but an error screen will appear.
3-A. To publish a video to all users in the course LMS where the video was held
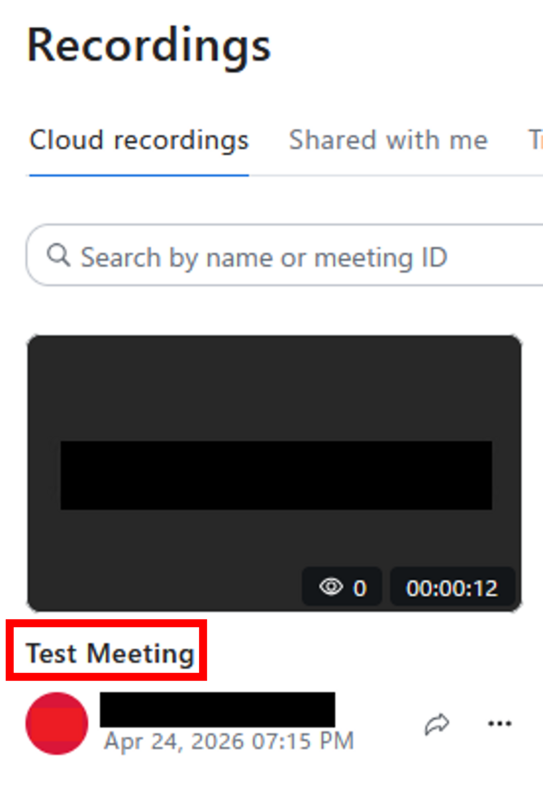
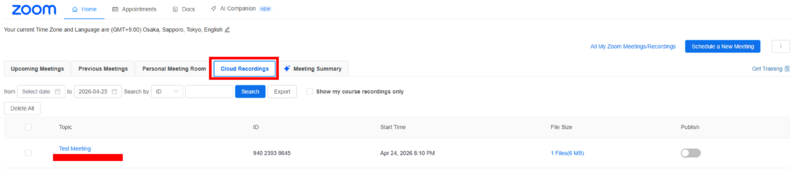
3-A.1. Click the “Cloud Recordings” tab.
3-A.2. Turn on the “Publish” toggle button.
* Depending on the length of the meeting, such as a class, it may take some time for the recording to appear.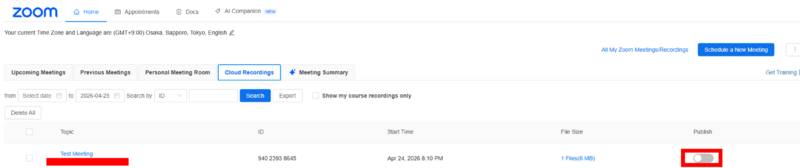
3-B. To publish a video only to specific users in the course LMS
* The recording title and thumbnail will be displayed in “Cloud Recordings,” but
only specified users can view the video.
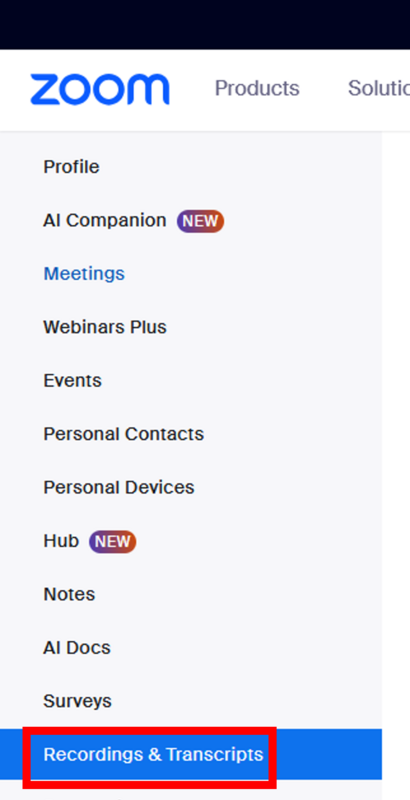
3-B.1. Access the Zoom Web Portal and click “Recordings & Transcripts.”
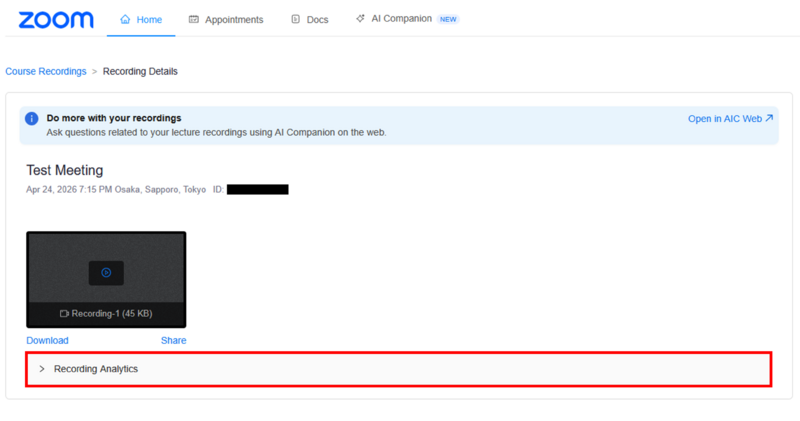
3-B.2. Select the video you want to share.
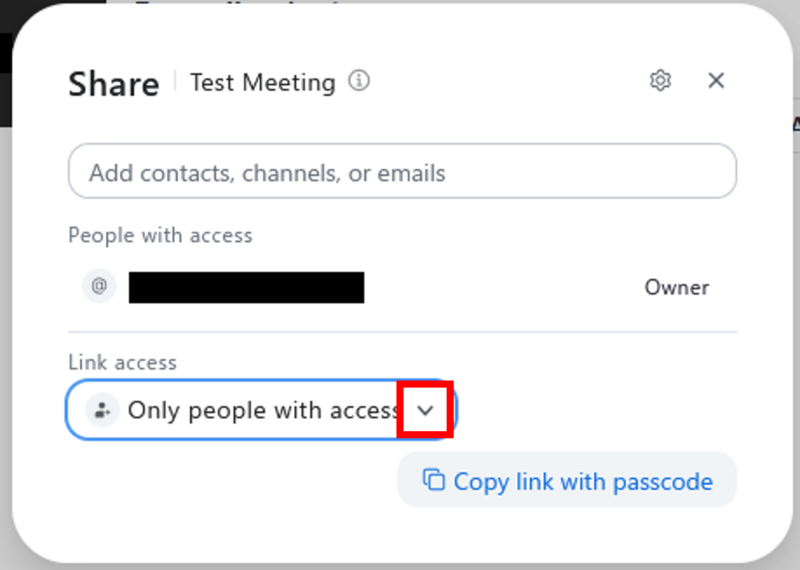
3-B.3. The page for the recording data you want to share will open. Click “Share” in the upper right.

3-B.4. In the pop-up, click “V” under “Link Access,”and select “Only users with access.”
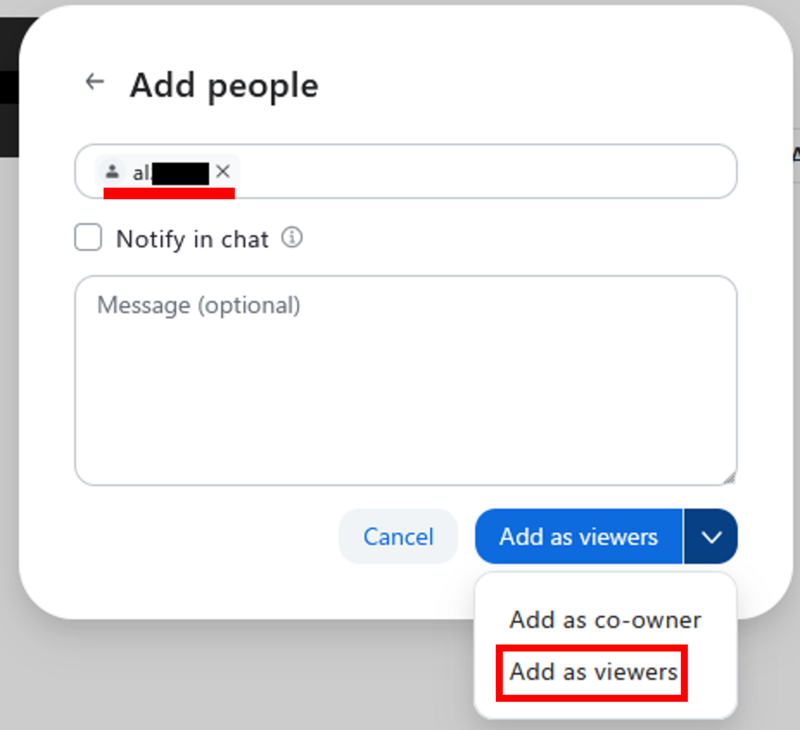
3-B.5. In the “Add contacts, channels, or email addresses” field, enter the student ID number of the student you want to share with.
After entering the user, click the user that appears, then click “Add as Viewer.”
3-B.6. Sharing is now complete. On this screen, you can check who it was shared with and whether they were added as a viewer or owner.
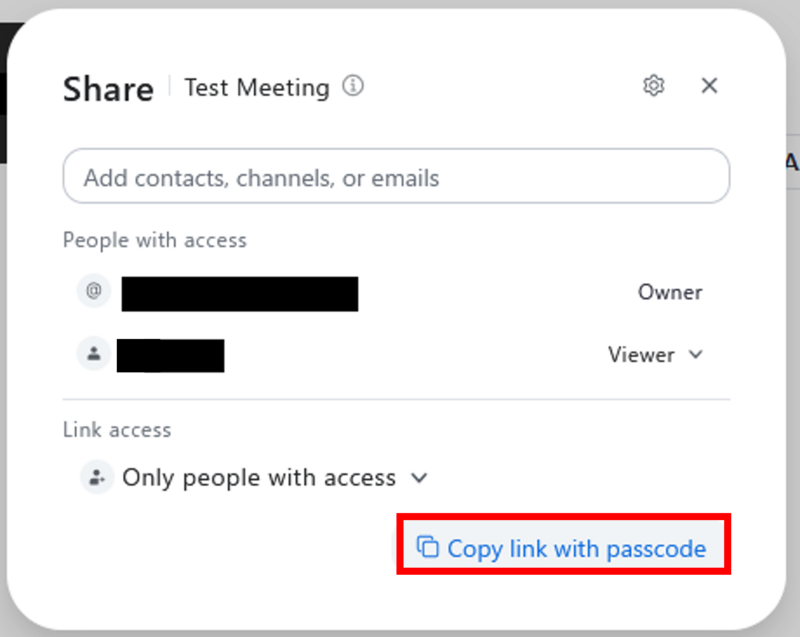
3-C. To share only the link with individual students without displaying it under Zoom “Cloud Recordings” from the course LMS
3-C.1. Follow steps 3-B.1 through 3-B.6.
3-C.2. Click “Copy link with passcode” to copy the link.
If you share the link individually with the user you want to share it with, that user can access the recording data through the link.
4. View Recording Analytics |
You can check who viewed the recording data and when.
* There is a download item, but users other than the host cannot download the video.
4.1. The Zoom screen will open.

4.2. Click the “Cloud Recordings” tab and select the topic of the recording data you want to check.
4.3. Click “Recording Analytics” to view graphs and various analytics.
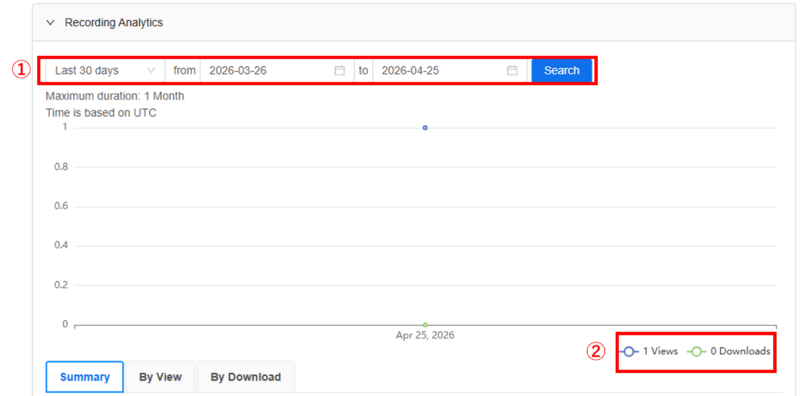
① You can specify a period to search (up to one month).
② Blue: shows the number of views of the relevant recording data by day.
Green: shows the number of times “Download” was clicked by day.
* The video cannot actually be downloaded.
The data in the tabs shown below the graph can be exported as CSV files.
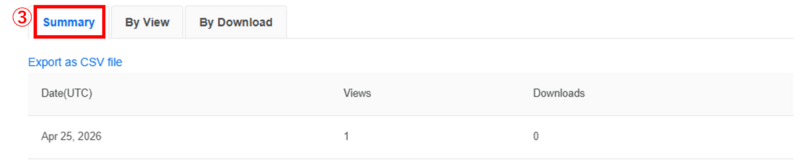
③ “Summary” tab
Shows the number of views of the recording data and the number of download clicks by date and time.
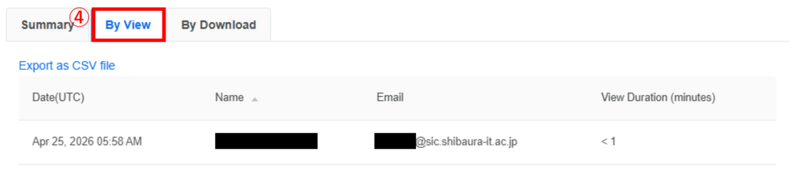
④ “By View” tab
Shows the ID, email address, and viewing time of users who viewed the recording data by date and time.
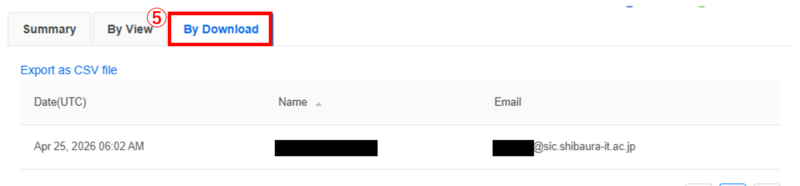
⑤ “By Download” tab
Shows the email addresses of users who clicked “Download” by date and time.
* Since the video cannot actually be downloaded, only users who clicked it are displayed.
5. Use AI Companion |
Using AI Companion during a meeting enables real-time Q&A during the meeting.
If cloud recording is enabled during the meeting, you can use the Meeting Summary generated by AI Companion after the meeting ends.
5-A. Use AI Companion during a meeting
5.A.1. Start the meeting.
Confirm that the REC mark appears in the upper right of the screen and that cloud recording is enabled.
* Note that if cloud recording is disabled, a Meeting Summary will not be created.
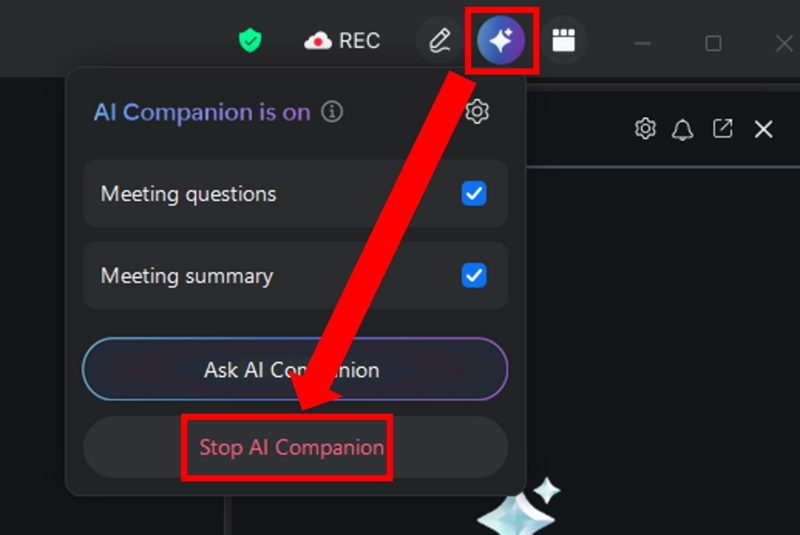
5.A.2. Click the in the upper right of the screen, select either “In-meeting Questions” or “Meeting Summary,”
then click “Start AI Companion.”
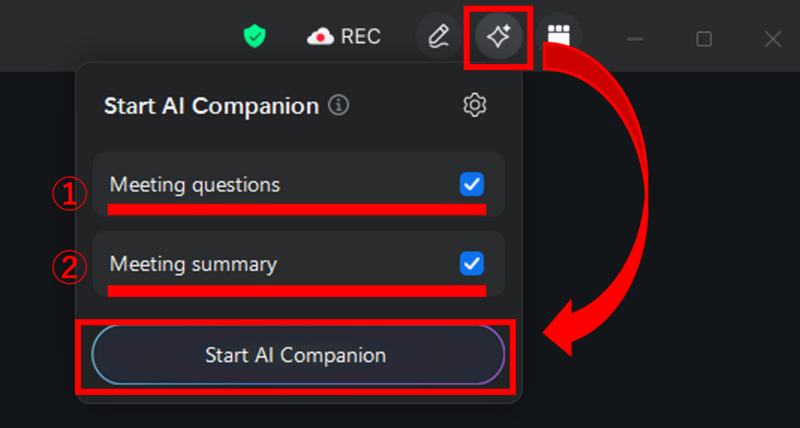
① In-meeting Questions: During the meeting, a chat appears on the right side of the screen, allowing participants and the host to ask AI questions about the meeting content.
AI answers based on the content from the point when the participant joined.
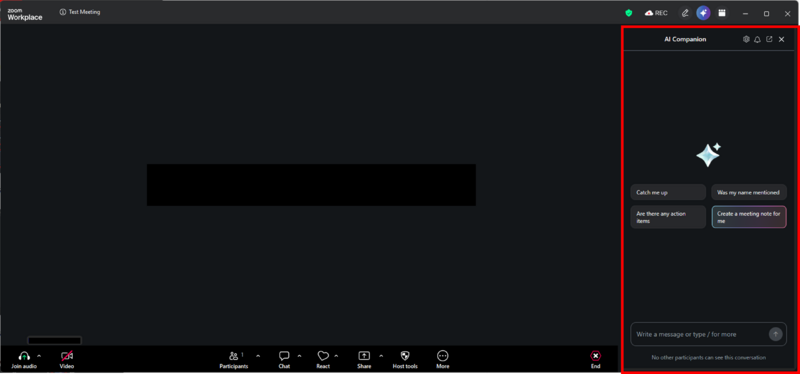
② Meeting Summary: After the meeting ends, AI summarizes the meeting content in AI Summary.
For details, see the next section, “5-B. View the Meeting Summary after the meeting ends.”
5.A.3. AI Companion can be stopped at any time from the upper right of the screen (only the host can stop it).
5-B. View the Meeting Summary after the meeting ends
* This is available by enabling both cloud recording and AI Companion during the meeting.
This feature allows AI to automatically summarize the meeting based on the recorded data.
You can set the publication scope for users.
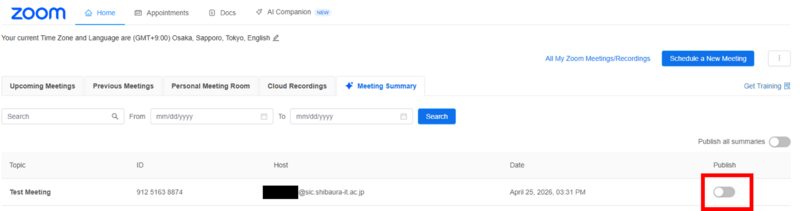
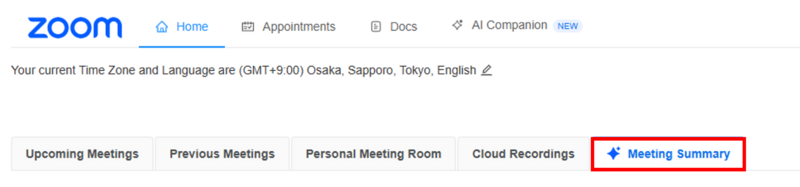
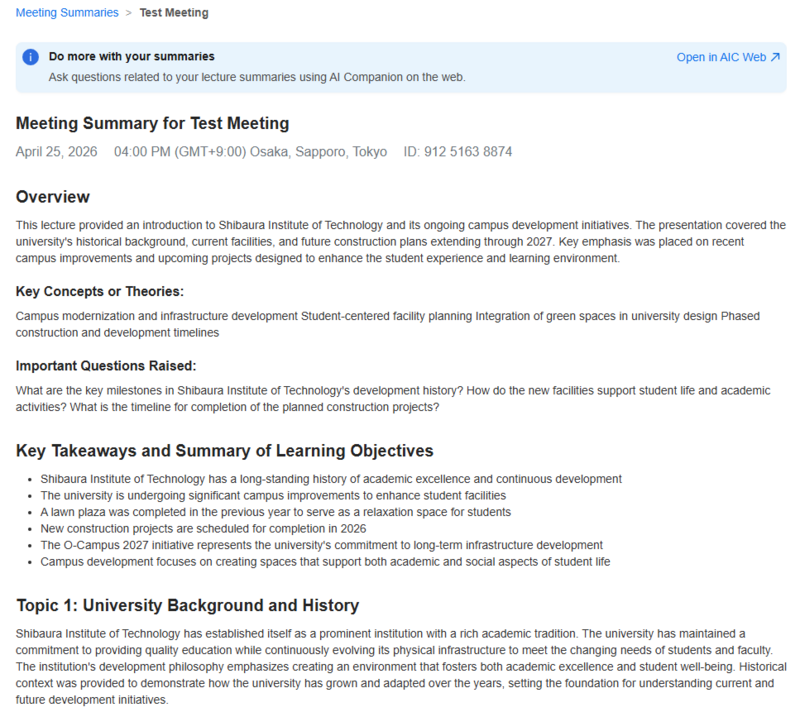
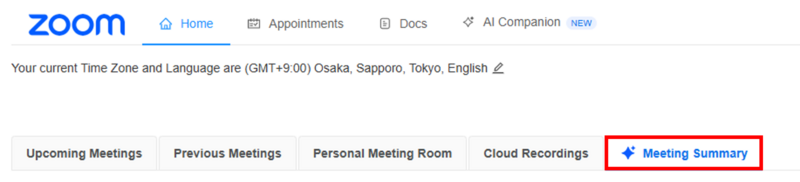
5.B.1. Click “Meeting Summary” on the Zoom Home screen opened from ScombZ.
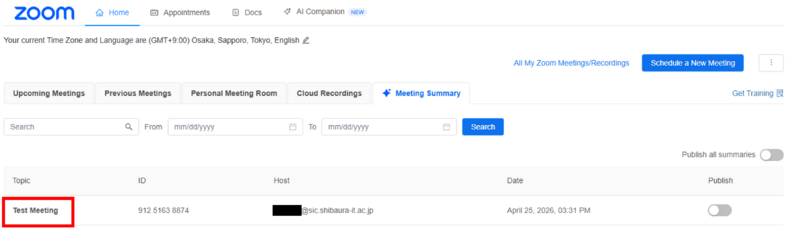
5.B.2. Click the meeting title displayed under Topic.
* Depending on the length of the meeting, such as a class, it may take some time for the generated summary to appear.
5.B.3. The summary will be displayed.
* Some items may not be generated depending on the length or content of the meeting.
5.C. Publish the Meeting Summary
By default, the Meeting Summary is not visible to enrolled students.
The host can publish the Meeting Summary to enrolled students as needed.
5.C.1. Click “Meeting Summary” on the Zoom Home screen opened from ScombZ.
5.C.2. Turn ON the toggle button to the right of the topic you want to publish.