Home > Service > Printing > Printing machine > HP Designjet Z5600ps(Windows)
HP Designjet Z5600ps(Windows)
Updated 2020/12/02
| Target Parsons | For all SIT students and all SIT teachers |
| Cautions |
|
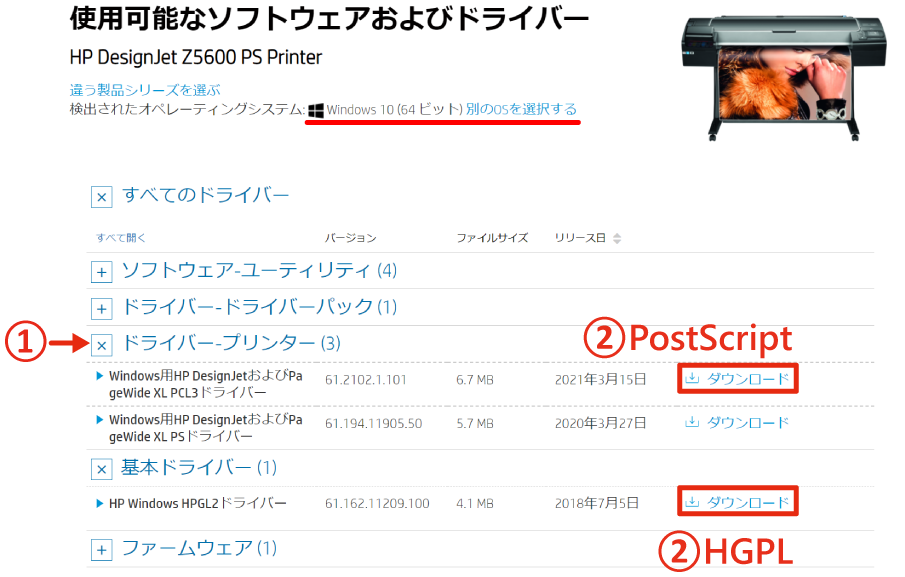
1.Please access here
Confirm that "detected operating system" is correct on page of " result of software and driver ".
2.After scrolling below, please select and download the driver that you want to install in the list of " basic dirver " on " driver-product install software ".
HPGL driver →" HP Designjet Z5600 44inch PostScript printer HP-GL/2 driver "
PostScript driver → " HP DesignJet Z-Series PS3 driver "
※In this page, the example of installing "HP Windows HPGL2 Driver" is shown after this section.
3.Right-Click the compressed file and select " extract all file ".
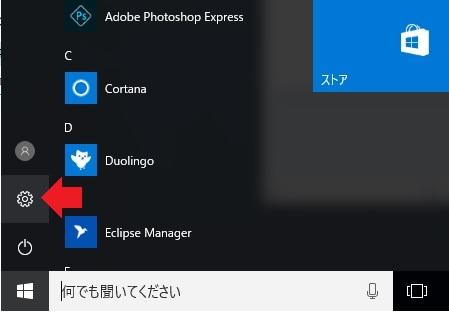
4.Select " setting " from "start menu".
5.Click the "device".
6.After selecting "printer and scanner", select " add a printer or scanner ".
After " searching the printer and scanner " showed, click the " in case of no printer on the list ".
7.Select " add the printer by using TCP/IP address or host name". Click "continue".
8.Type in " host name or IP address " and " port name "as blow. Click "continue".
host name or IP address : dspl2.sic.shibaura-it.ac.jp
port name : dspl2.sic.shibaura-it.ac.jp_Z5600
9.Please wait for a moment while "detection of TCP/IP port" displayed .
10.Click " custom " and " setting ".
11.Select " LPR "and type in " Z5600_SIC user login name" in queue.
Set checked in " LPR byte count ". Click " OK ".
12.Click " next " button.
13.Click the " disk usage " button. Click " reference " button.
14.Select the file whose filename extension is " .inf " in extracted folder on " step 3 " and click " open " button.
※File is changed according to version of driver.
15.Click " OK " button.
16.Select " HP DesignJet HPGL2 Driver " in list of printer and click " next " button.
※When you want to install PostScript, select the appropriate driver here.
17.Type in the name that is easy to recognize in " priter name " box.
Click " next " button.
18.Confirm the print job here
※Print job can be sent if own user name displayed.
19.Move to printing equipment > Setting plotter paper according to instruction on display > Hang own IC card(student's identification card or staff ID card) over card reader > Touch " print " on control display > Touch " black and white " or " color " button in print job
Completed if you can print.


