Home > Service > Printing Paper > How to load plotter paper
How to set up the plot printer for printing?
Updated on 2023/9/21
Table of Contents :
6. How to set single sheet paper
7. How to unload single sheet paper
1. Please confirm that your print paper is compatible with the printer
Please prepare your own paper.
Paper types that are compatible with the printer:
・Rolled paper (plain paper, cloth)
・Coated paper (bond, coat, thick coat, super thick coat matte, color)
・Technical paper (natural tracing, translucent bond, vellum)
・Film (clear, frosted, polyester)
・Photo paper (satin, gloss, semi-gloss, matte, high gloss)
・Backlight type
・Sticker (Two-View Cling, Indoor, Polypropylene, Vinyl)
【Caution】Do not use imitation paper as it may cause paper jams.
2. Paper sizes
There are several standards for paper sizes.
As an example, A type of paper is shown below.
【Caution】Larger sizes than the standard size are also available, such as A0 size.
Example)Use A1 size paper to print in A2 size
By changing the orientation of the image horizontally it's possible to print without cutting the paper
To change the orientation of the paper, look at here
3. Printing Process
- In the printing menu, click the property button of the plotter.
- In "Paper feeding method" choose "roll 1" and then click "OK" to start printing
(Left)HP DesignJet Z6 44in PCL3, PDF property (Right)HP DesignJet HPGL2 property - Go the plotter and set set roll paper in roll 1 (the top one)
※Please Check [How to set roll paper] or [How to set single sheet paper] - Hold up the ID card (Student Card or Staff Card) on the card reader. Press printing button on the panel.
- After the print is done, unload the roll paper from the roll 1
※Please Check [How to remove roll paper] or [How to remove single sheet paper]
4. How to set roll paper
The paper is set automatically, but if an error occurs, follow the instructions on the screen
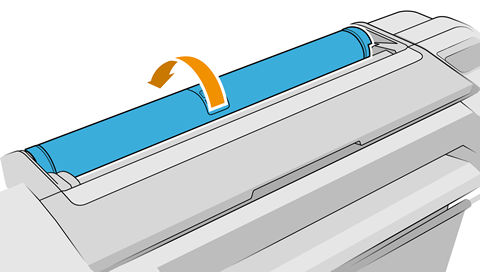
- Open the cover of roll 1 cover
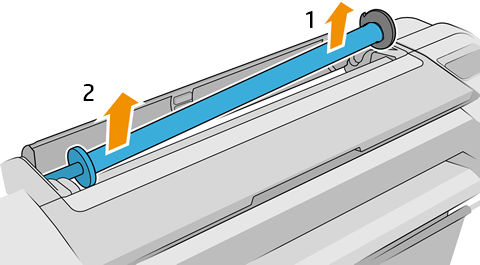
- Remove the spindles (sticks) in the order of black side and blue side.
-
Remove the light blue stopper from the spindle and attach it to the roll paper core.
*Take care of the direction of the roll paper as shown in the image.*Insert the paper roll firmly so that there is no gap between the side of the paper roll and the black surface at the spindle end. Make sure the blue stopper is also fully inserted.
- Rest the black end of the spindle, then the blue end.
As shown in the photo on the left, turn the spindle and insert the end of the paper into the plotter until the paper enters no further and is slightly bent. When the plotter detects the paper, it beeps and the paper is automatically fed.*As shown in the figure on the right, there is a protrusion where the paper is inserted, but the roll paper should pass under it.
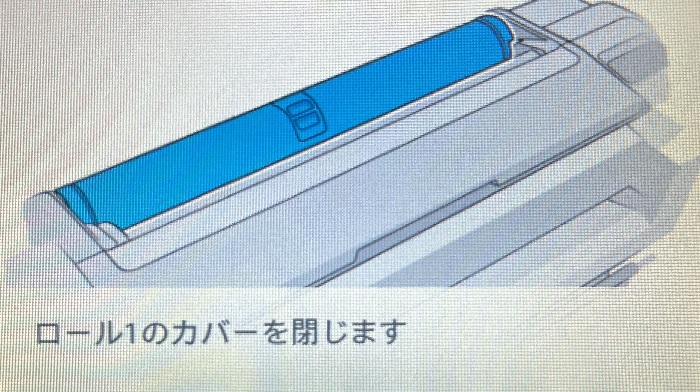
*After inserting the paper, the Windows terminal screen next to the plotter will display "Close the printer cover," but do not close the cover until the touch panel on the plotter displays "Close cover.
- Select the paper category and type on the touch panel on the plotter.
For plain paper
Select "[普通とコート紙] or [Normal and Coated paper] then [普通紙] or [Normal paper]r" in that order.
For cloth roll paper
Please be sure to read the detailed description on this page.・Please select "Art Paper > Canvas" for the paper.
・Please be sure to disable the horizontal cutter.
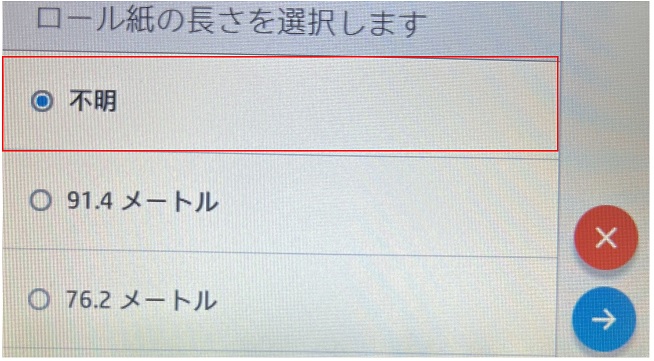
・Please make sure to disable the horizontal cutter. Please prepare scissors or cutter to cut the paper. - On the roll's length window choose, [不明] or [Unknown]
- Close the cover.
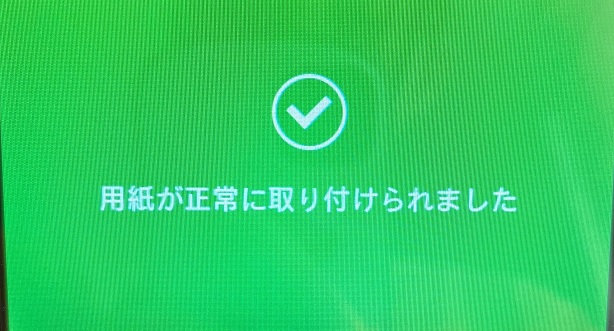
- When [紙が正常に取り付けられました] or [Paper has been loaded] (with a green background) is shown, The loading process is completed.
5. How to unloade roll paper
- On the panel, press the top left button [給紙方法] or [Feeding method] then press [取り外し] or [unload].
※When a message saying [使用中のために取り外せない] or [Cannot be unloaded while in use], please wait a while then try again. - Open the cover, and unload the roll paper.
- Remove the blue stopper and remove the paper roll.
- Return the spindle to its original position and leave the blue stopper attached to the spindle.
6. How to set single sheet paper
- Confirm that the roll paper is closed.
- On the front panel tap
, then choose [カット紙] or [single sheet] > Then tap[取り付け] or [load].
- Choose the paper's category or type.
- When a direction appears on the front panel, insert the paper to the slot of the plotter.(align in to the right side of the slot)
- Install the cut paper in line with the mounting line, and insert thick cut paper until it will not fit.
- Pressing the OK button on the front panel causes the printer to retract the cut paper and adjust its position.
- Installation is complete. Follow the instructions if a message appears on the front panel.
7. How to unload single sheet paper
When removing the paper without printing, follow the instructions below.
- On the front panel press
.
- Choose unload single sheet card.
- The paper will be unloaded by the printer.
Caution
Pay attention the points below when using the plotter.
- Never remove the ink cartridges under any circumstances. This may cause malfunction.
If you run out of ink in the middle of printing, please come to the counter. - If the tip of the paper is torn or not straight, the paper cannot be installed correctly. Please cut and clean the tip of the paper before installation.
FAQ
- The paper is jammed
Please come to the counter.
- I want to trim the edges of the paper.
1) On the front panel, tap
ア, [給紙方法] or [Feeding method] > Then choose [排紙およびカット] or [Remove or cut]
2) On the status center, choose
.
- Which driver should i use?
The following drivers are installed on university PCs
| Driver name | Use | Compatible Software |
| PCL3 | Basic driver to print Inkjet | Most of the software (ex : Microsoft Office) |
| HPGL2 | Driver to print CAD files | CAD softwares |
| Driver for PDF or images | Adobe softwares |
The above table is only an example and may not be printed correctly depending on the environment.。
In that case, try printing using another driver.
-
I want to change the orientation of the paper.
The print orientation on the application side, such as Adobe Acrobat Reader or Adobe Acrobat DC, is set to "Auto".
Open the properties of the plotter driver and specify the printing direction.
If the settings are made on the application side rather than in the driver properties, unintended printing may occur.


