
Home > Servise > Software > Site Locense Software > Microsoft Office > Microsoft Office On-campus download > Microsoft Office On-campus download (Windows)
Microsoft Office On-Campus Installation Guide (Windows)
Updated 2021/01/28
This is how to install Office on Windows devices on campus.
1.Log on to Windows 10 with an account that has administrative privileges.
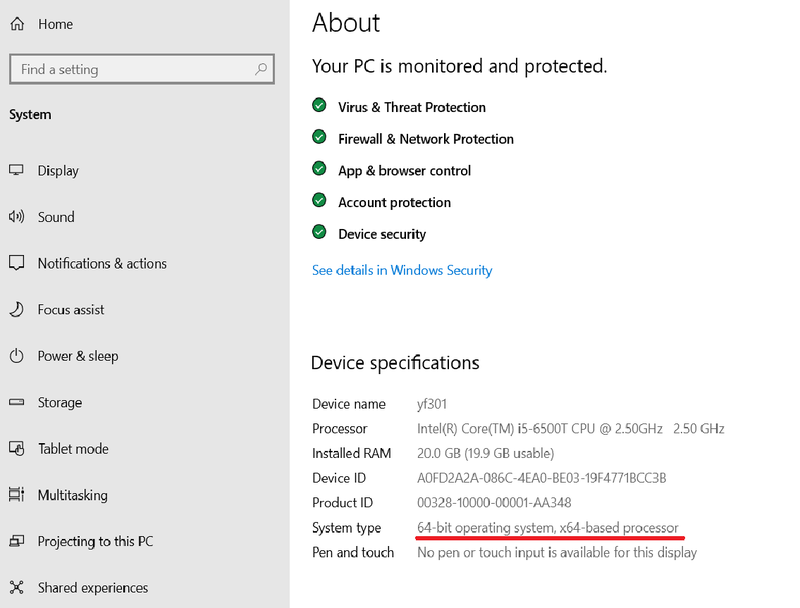
Check the OS version beforehand.
(In Windows 10, you can check the OS version by clicking the "Start" button, then "Settings", then "System", then "About".
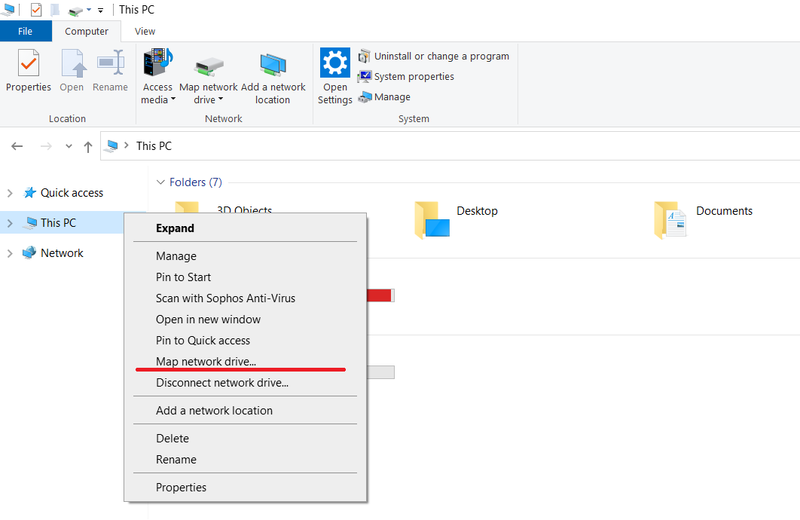
2.Open Explorer, right-click "This PC", and click "Map Network Drive".
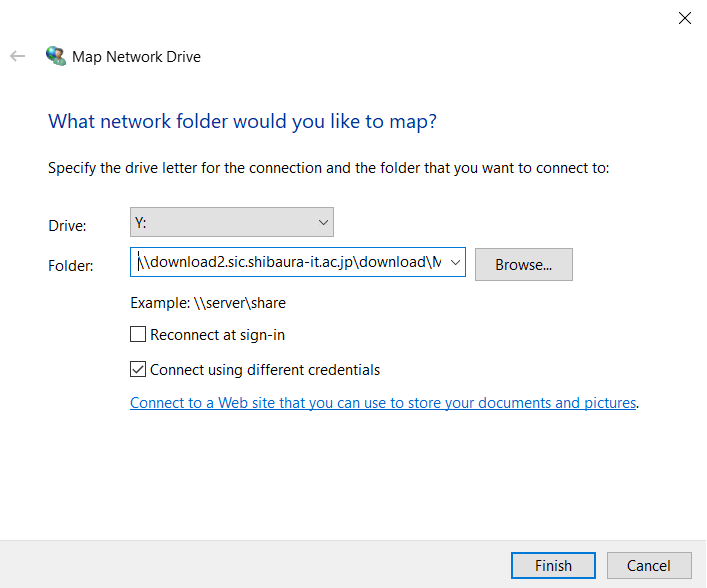
3.In the "Assign Network Drive" window, enter [\\download2.sic.shibaura-it.ac.jp\download\MCA] in the "Folder" field.
Check the "Use different credentials to connect" checkbox.
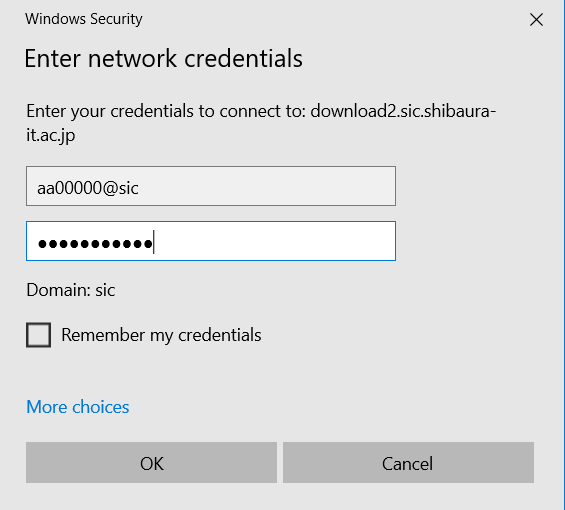
4.Enter [SIC\ Center for Science Information Account Name] for the User Name and [Center for Science Information Windows Password] for the Password and click "OK".
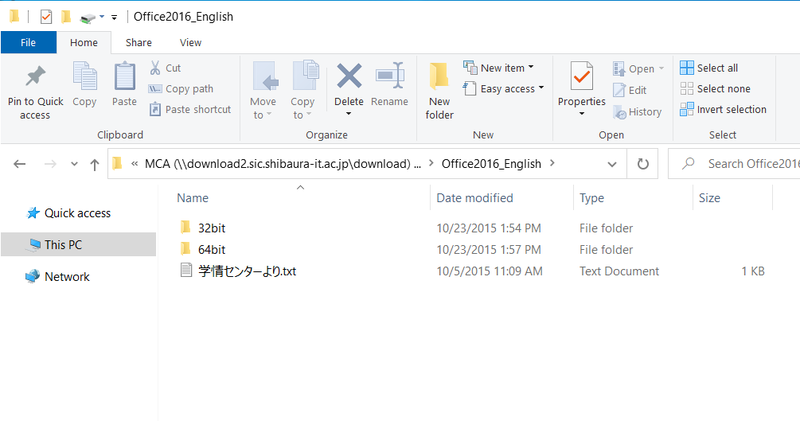
5.To connect to the download site, select the folder for the version of Office you want to install and double-click it.
Here, select Office2016_English.

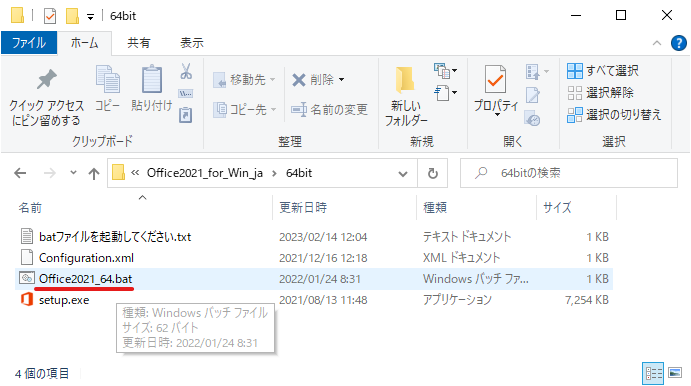
6.Select the folder (64bit or 32bit) that matches the version of the OS to be installed and double-click it.
7.Double-click "Officexxxx.bat".
8.Click Run.
9.Click "Install Now".
10.Click the "Close" button. This completes the Office installation.
※Office 2016 requires kms certification. If you do not obtain a license within 30 days after installation, the functionality will be limited.