Home > Service > Printing > Printing machine > Install Kyocera TASKalfa 5054ci Driver for Windows11
Install Kyocera TASKalfa 5054ci Driver for Windows11
Updated 2025/12/23
| For who | For all SIT students and teachers |
| Caution |
|
If you have installed the driver for the TASKalfa 5052ci multifunction printer that was in use until September 2023, please uninstall the TASKalfa 5052ci driver first.
Installing a driver for TASKalfa 5054ci
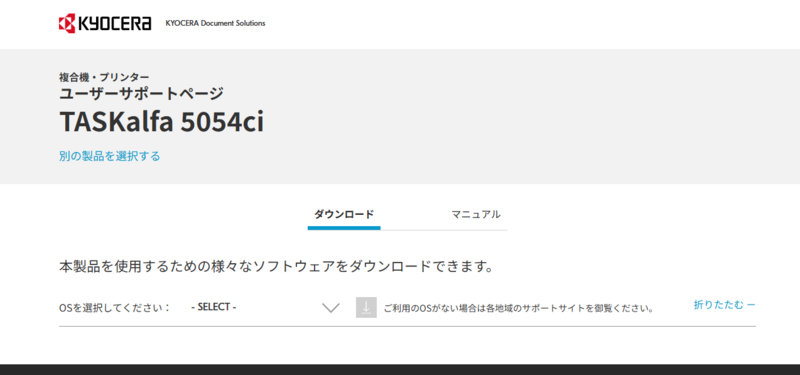
1.Click here 
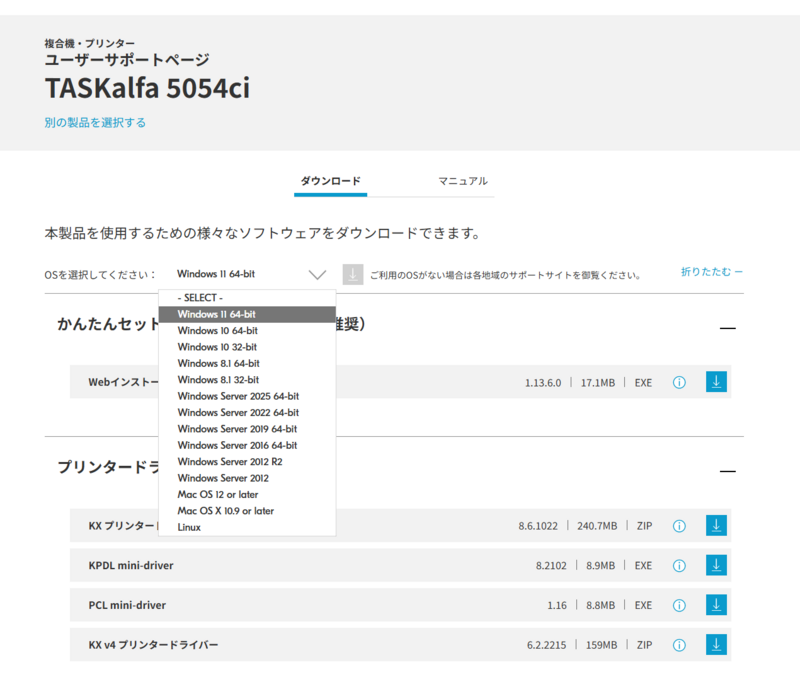
2.Select "Windows 11 64-bit" from "Please select the OS".
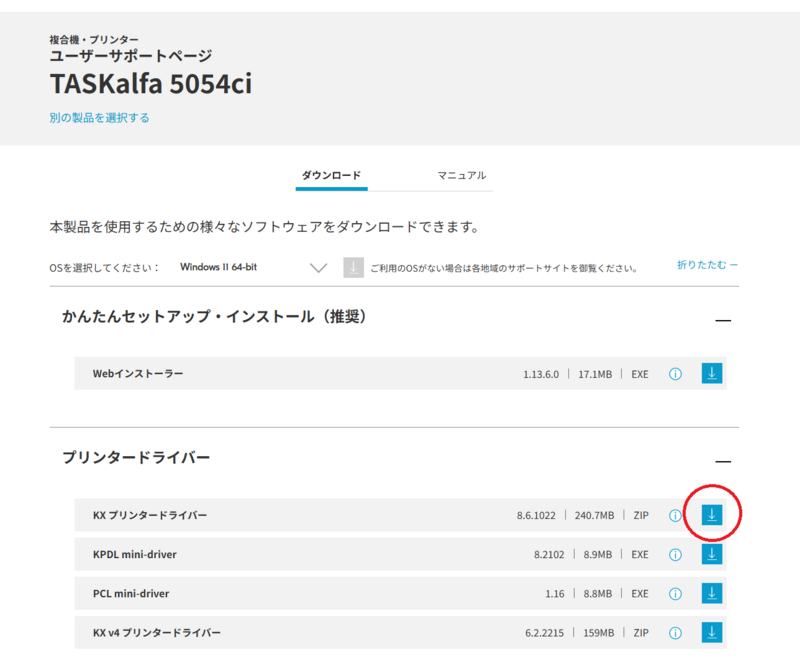
3.Click "KX printer driver" under "Printer Driver".
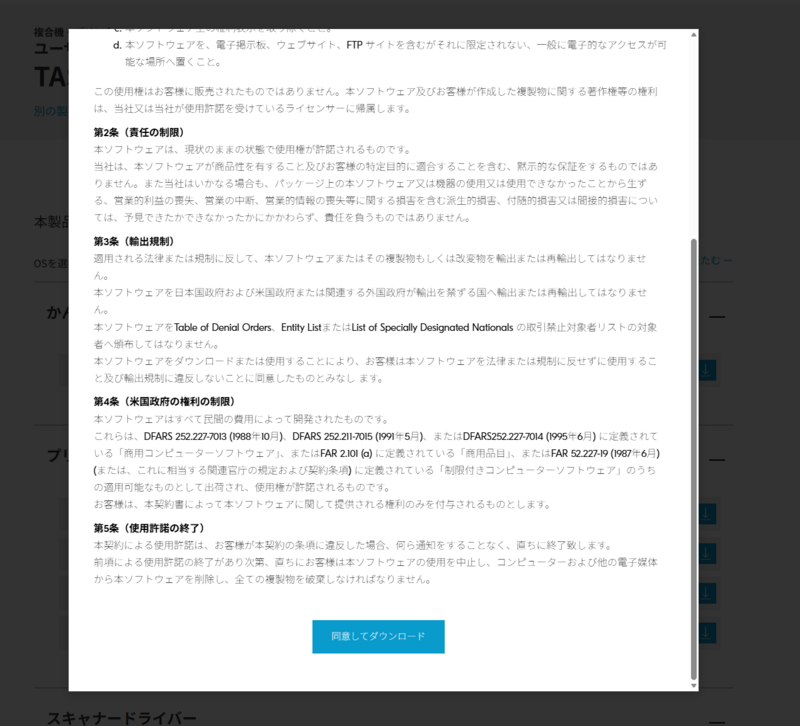
4.Click "Agree to the agreement and download".
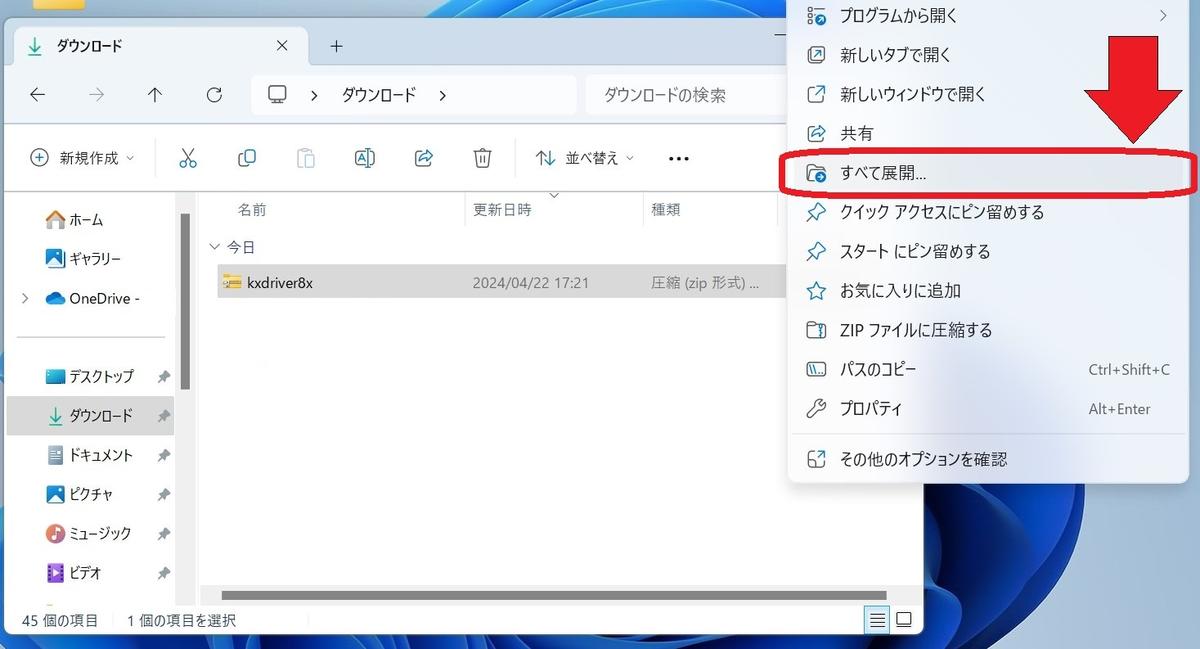
5.The file is downloaded to the Download folder on your PC.
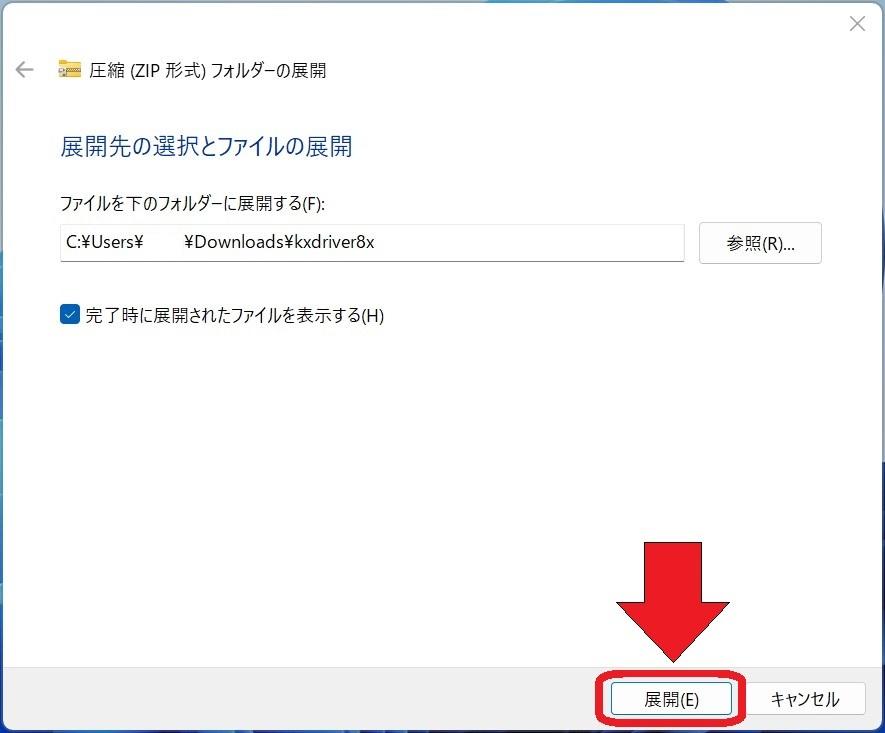
6.After downloading the file, Extract all...
7.Click "expand(E)".
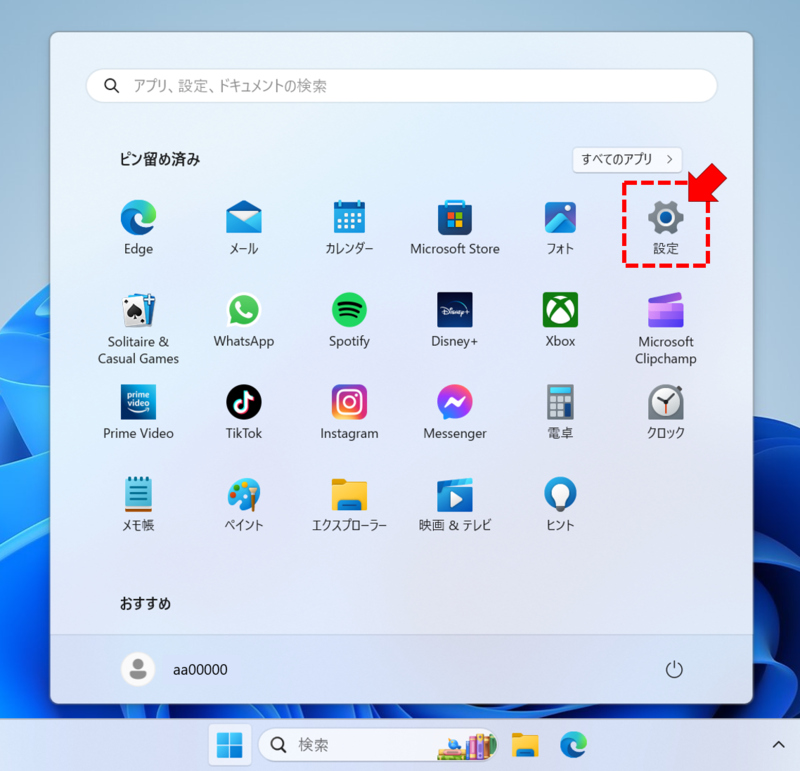
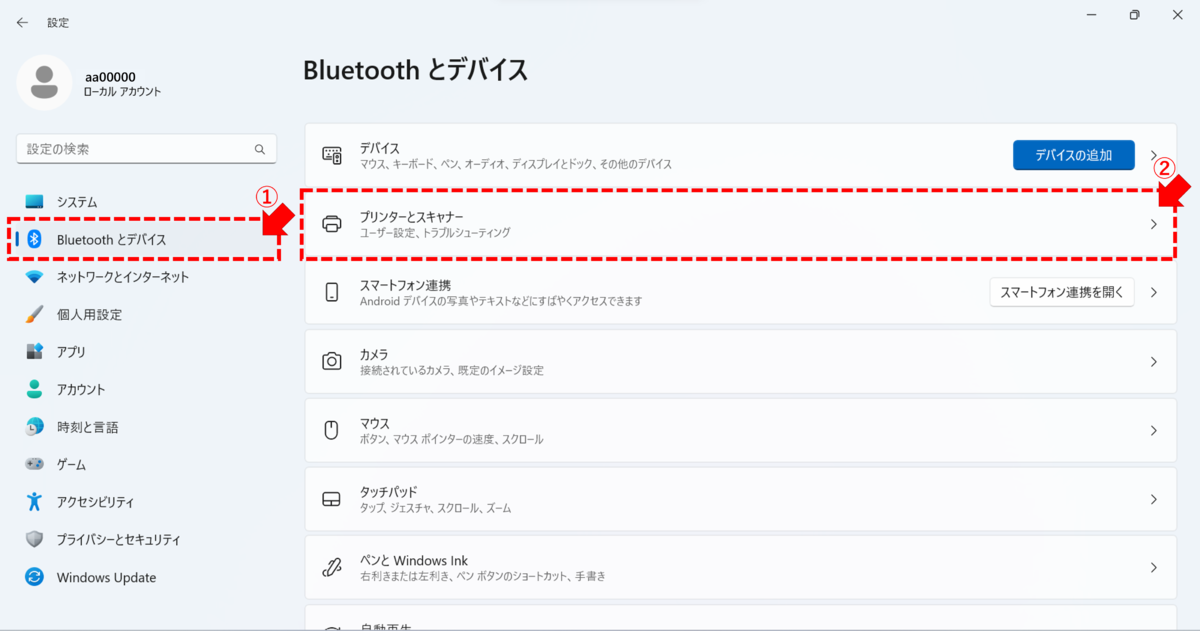
8.Choose "Settings" (Red Arrow)from start menu.
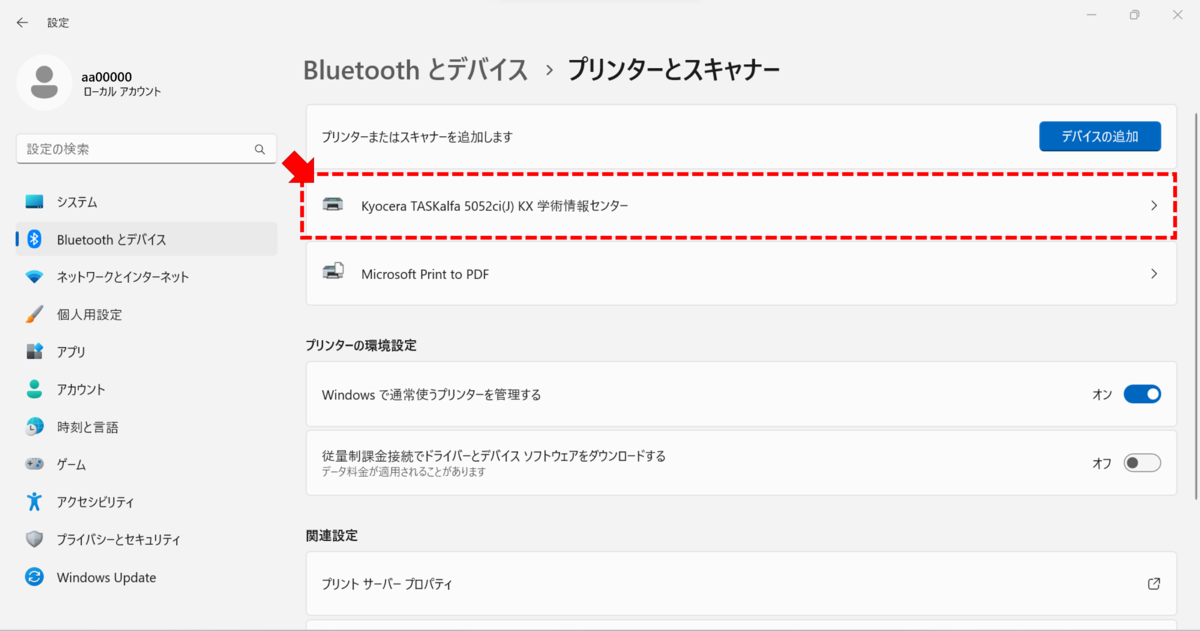
9.Select "Printers and Scanners" (Red Arrow 2) under "Bluetooth and Devices" (Red Arrow 1).
10.Click “Add device” under “Add a printer or scanner.” After a short wait, click “Add Manually” under “If your printer is not listed” that appears below.

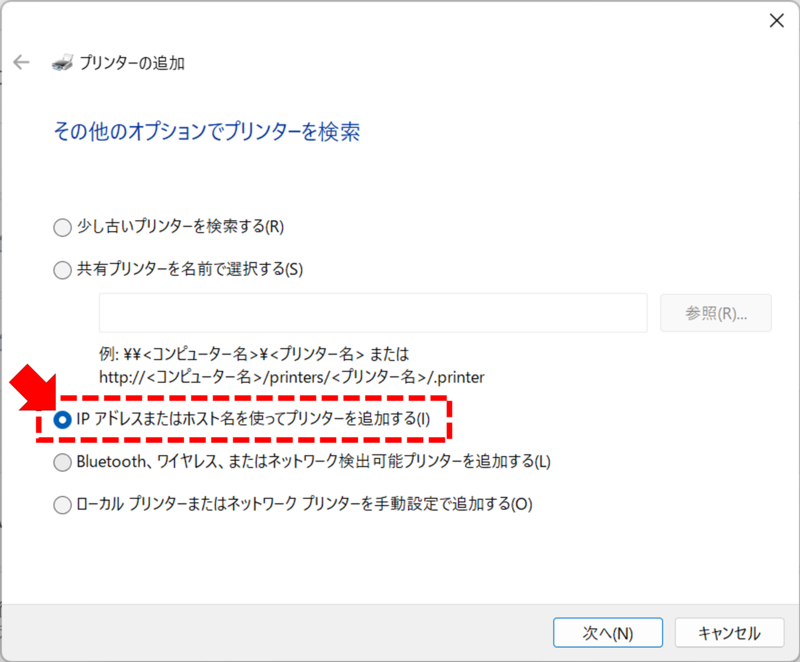
11.Choose "Add printer with TCP/IP address or host name" (Red Allow) and click "Next".
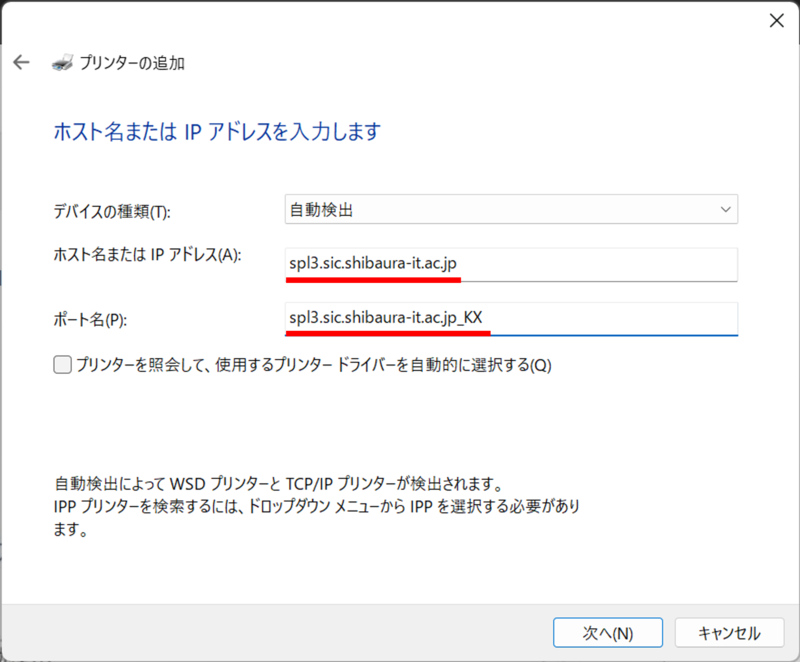
12.Enter "host name or IP address(A)" and "port name(P)" and click "next", as follow...
spl3.sic.shibaura-it.ac.jp
spl3.sic.shibaura-it.ac.jp_KX Please enter "_KX" !
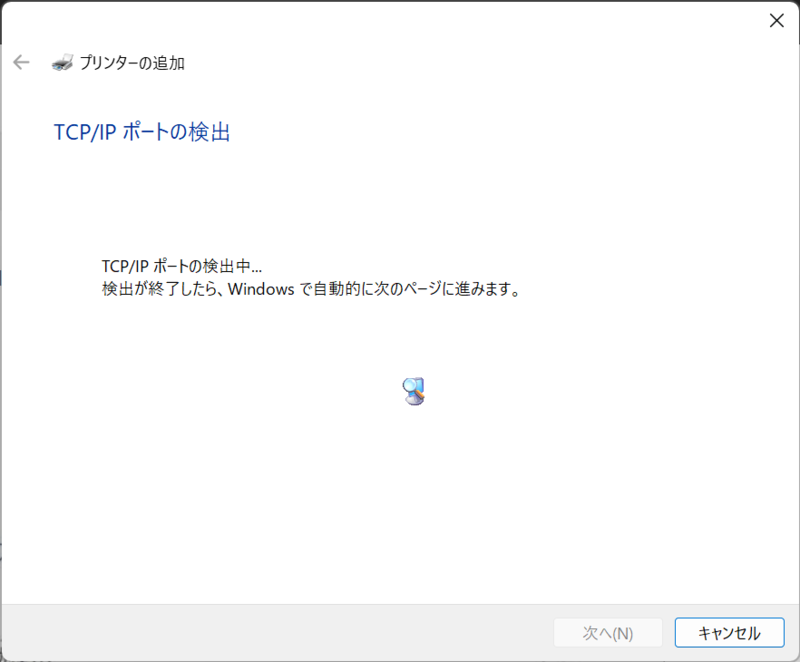
13.Wait for a moment when your PC is searching TCP/IP port.
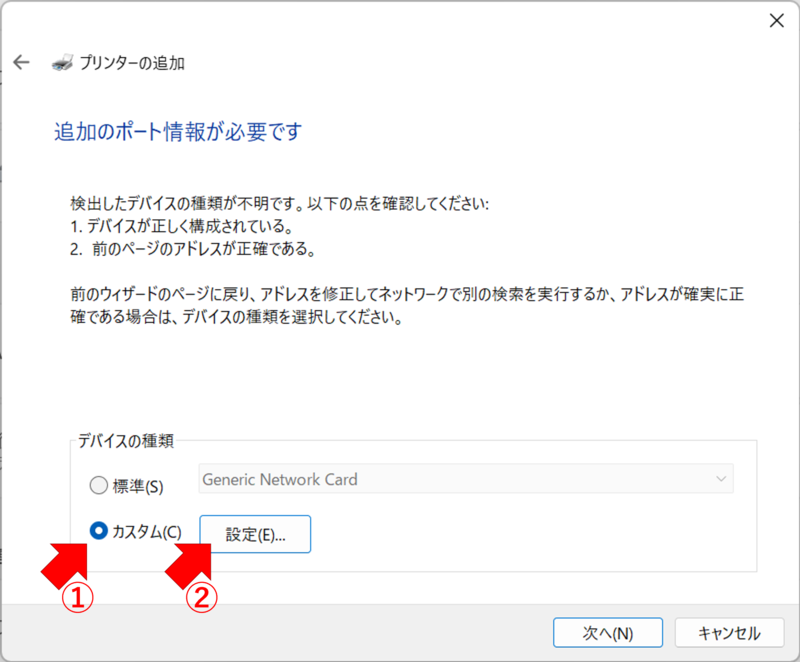
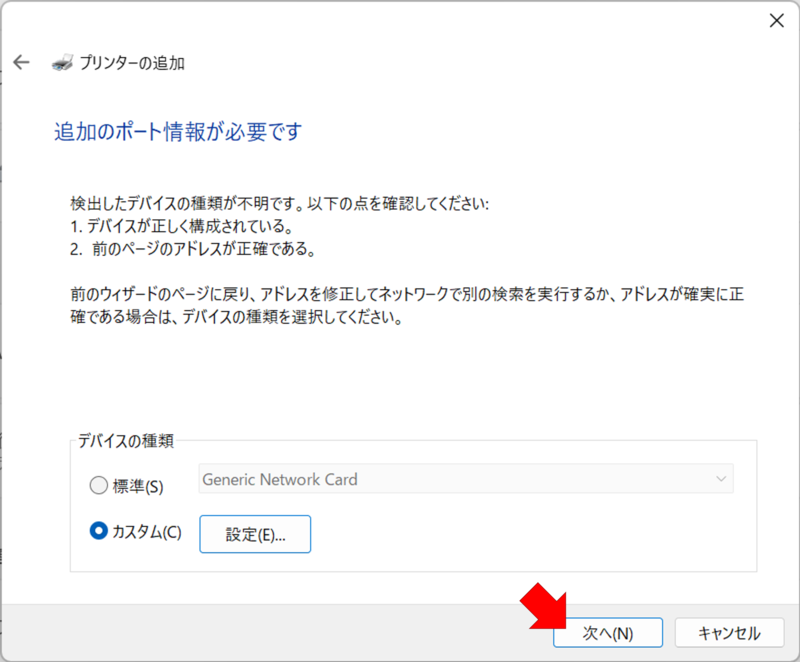
14.Click "custom" and "control" button.
15.Choose "LPR". Queue name is "KX_(your SIC-ID)"
Choose "Valid LPR byte count(B)" and click "OK".
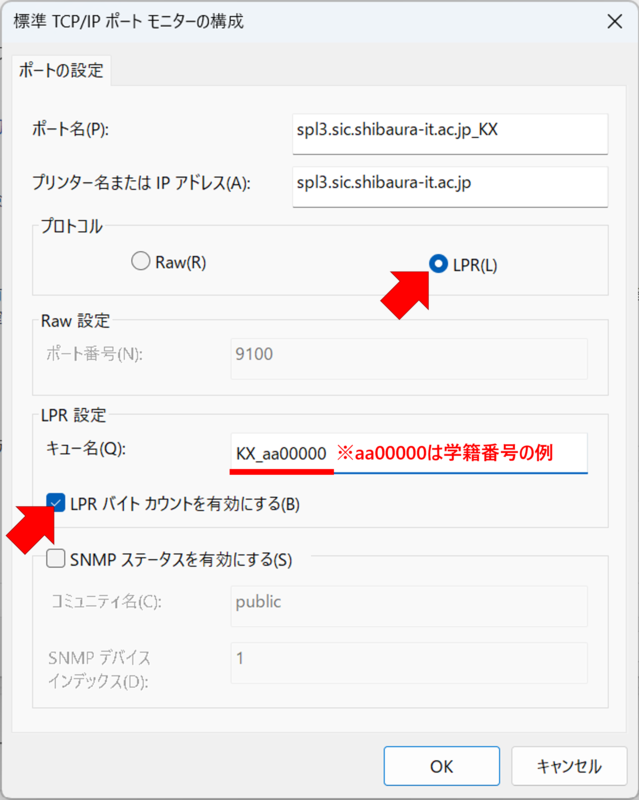
(The SIC-ID must be entered in lower case. )
16.Click "Next".
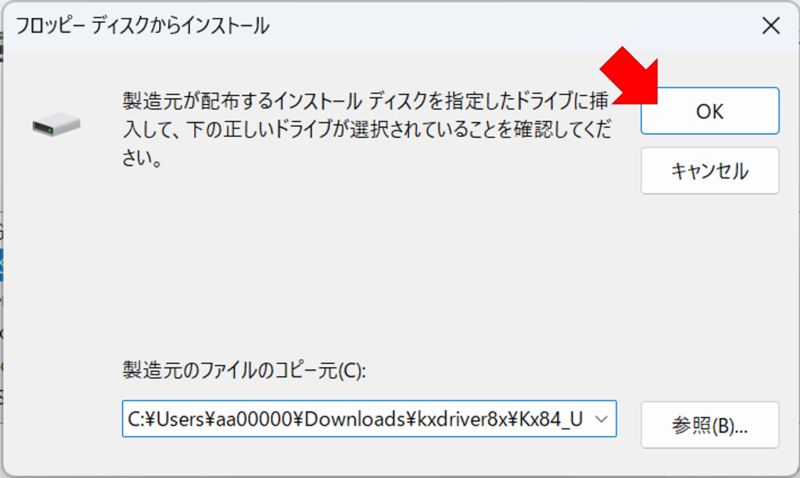
17.Click "Disk(H)".

18.Click "reference(B)".
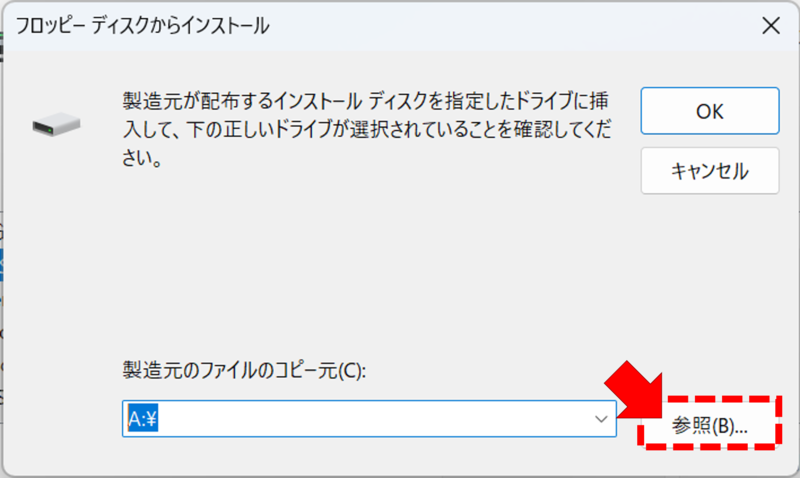
19.Choose OMESETUP file from the folder when you expand downloaded file in 5 section.Then click "Open(O)".
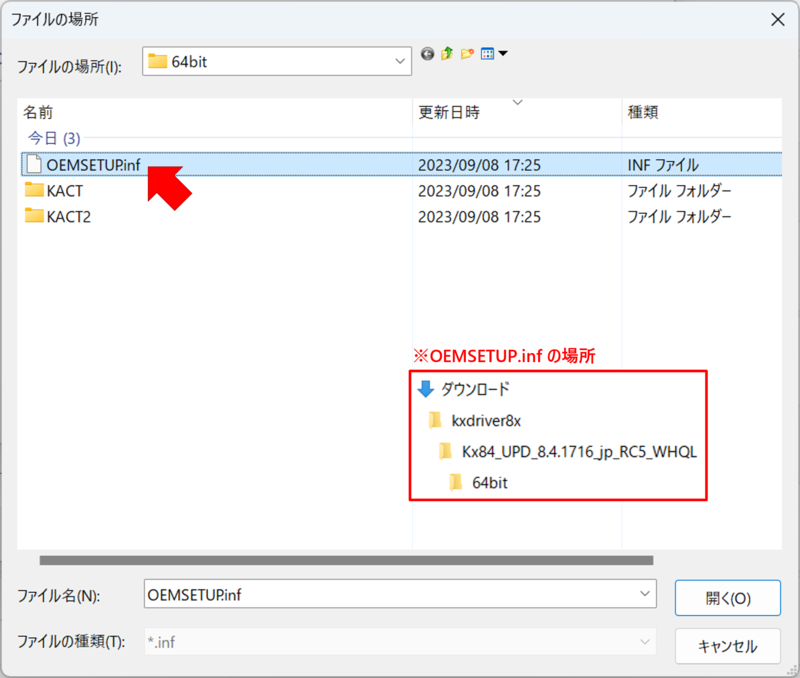
20.Click "OK".
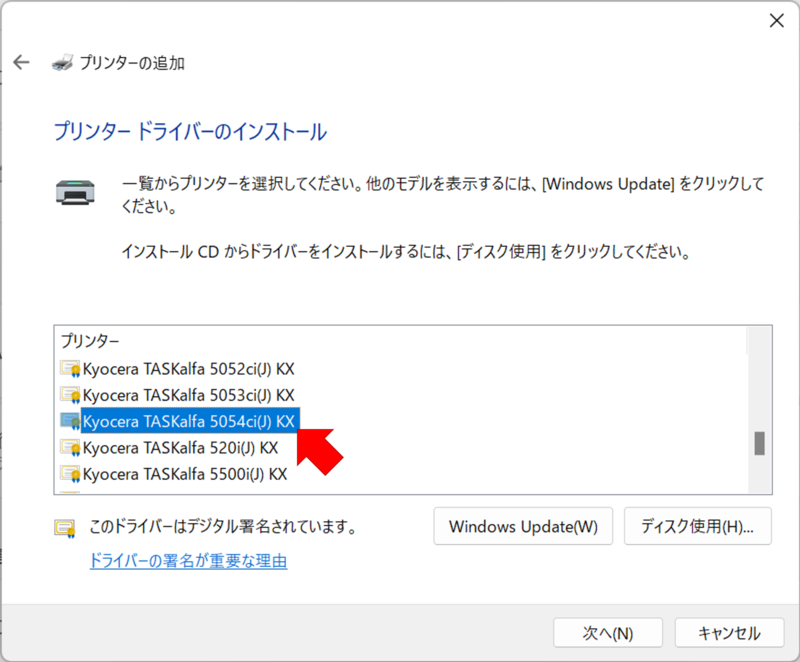
21.Choose "Kyocera TASKalfa 5052ci(J)KX" and click "Next(N)".
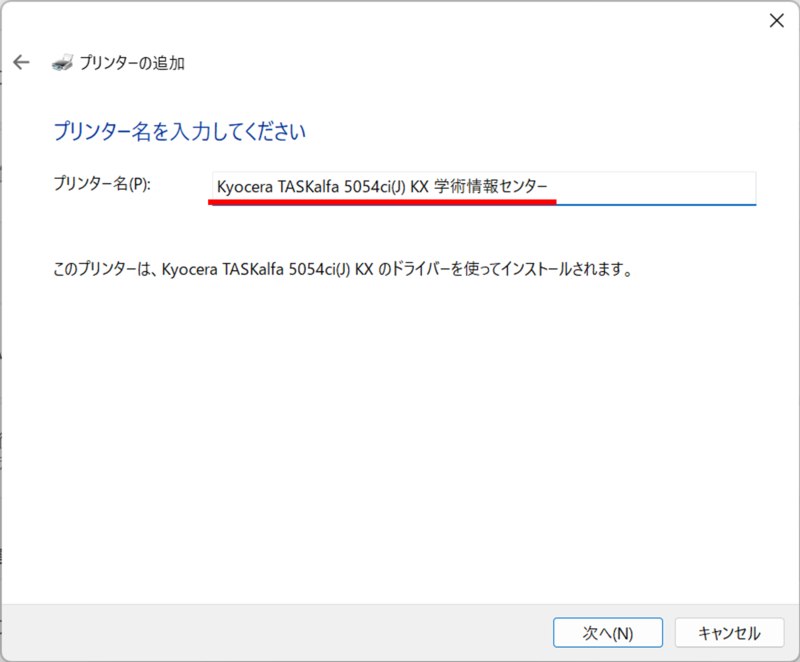
22.Enter the name which is convinience for you in "printer name(P)". Click "Next(N)".
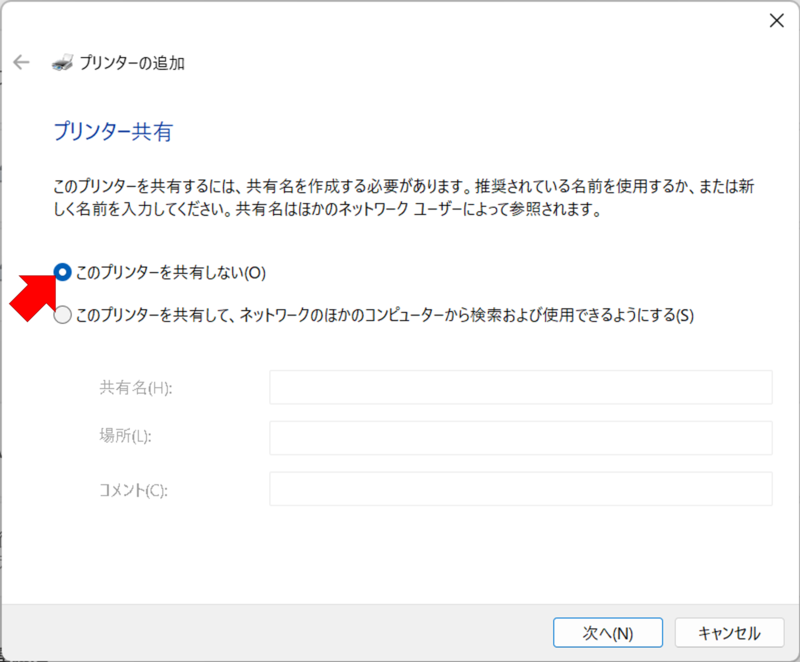
23.Choose "Don't share this printer (O)" and click "Next(N)".
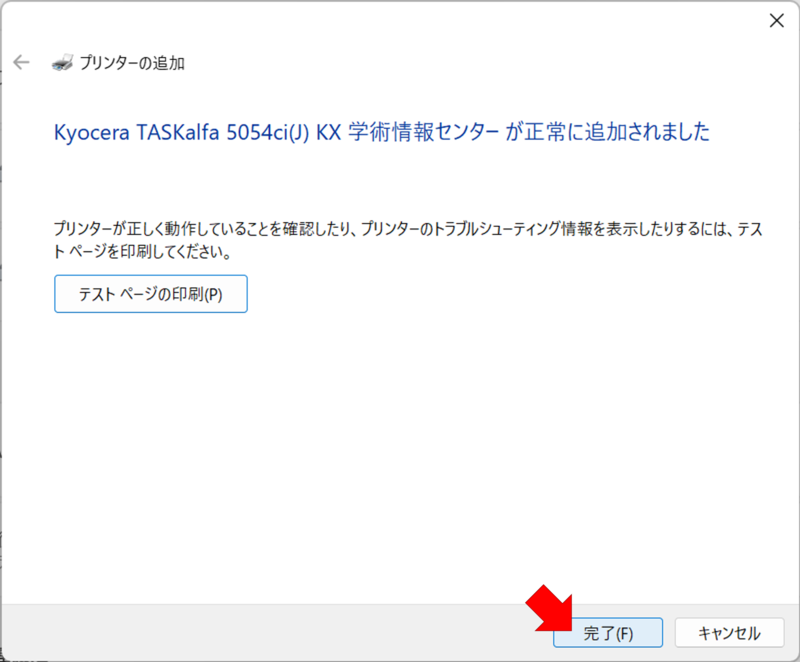
24.Click "Finish(F)".
25.Click on the printer added in "Printers and Scanners".
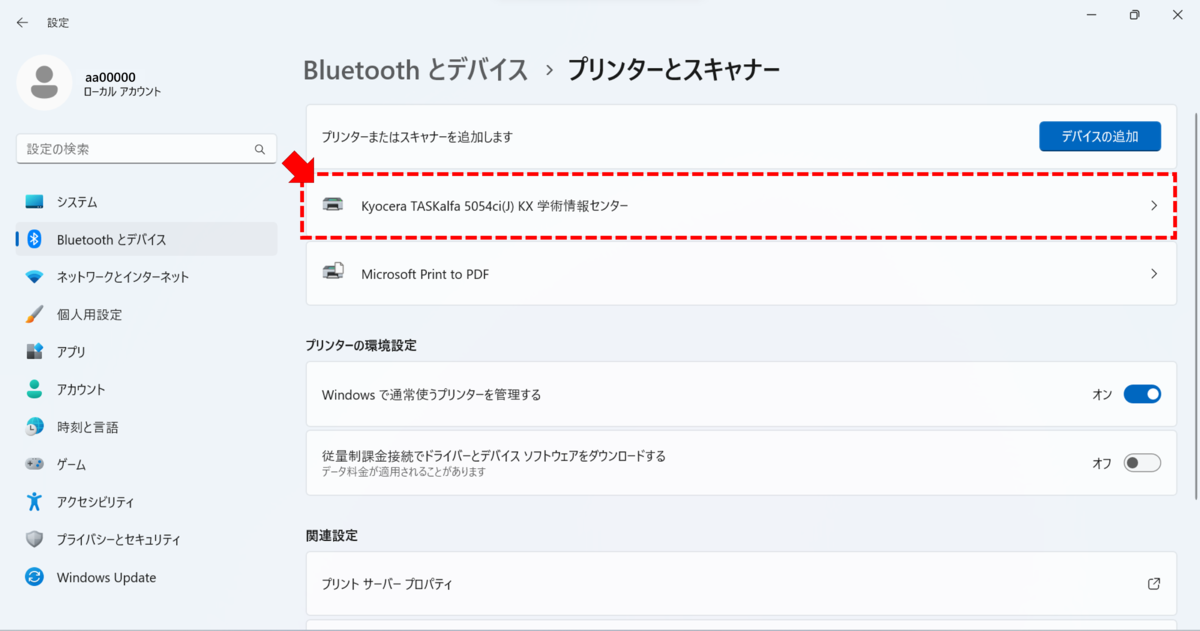
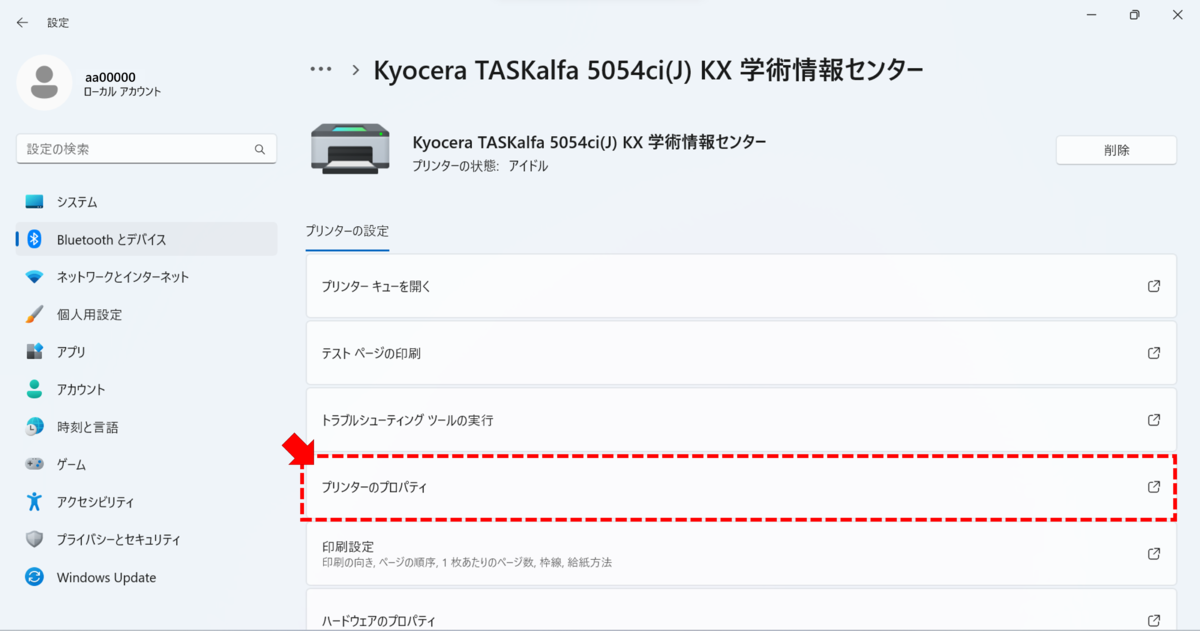
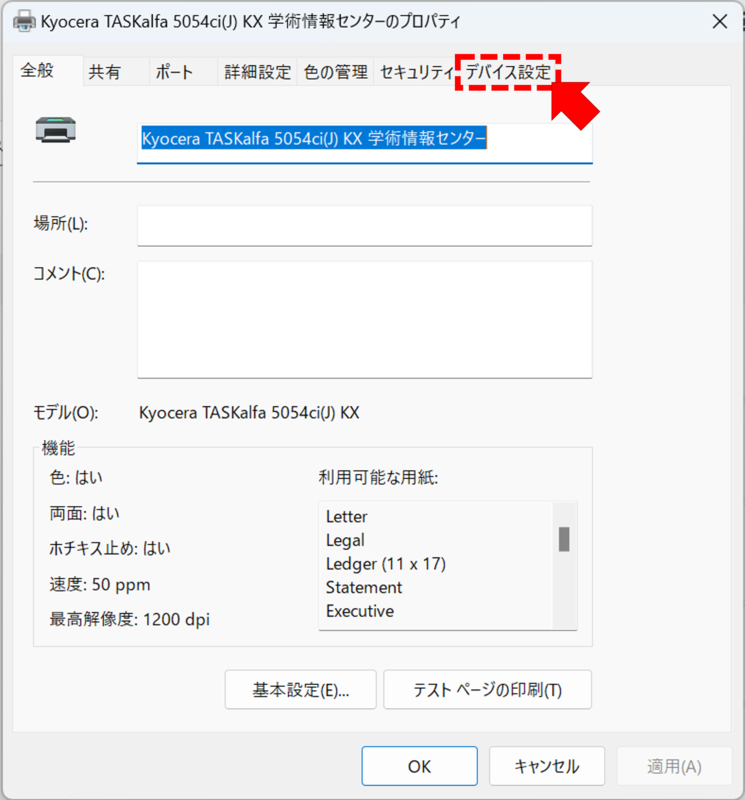
26.Choose "Printer Properties".
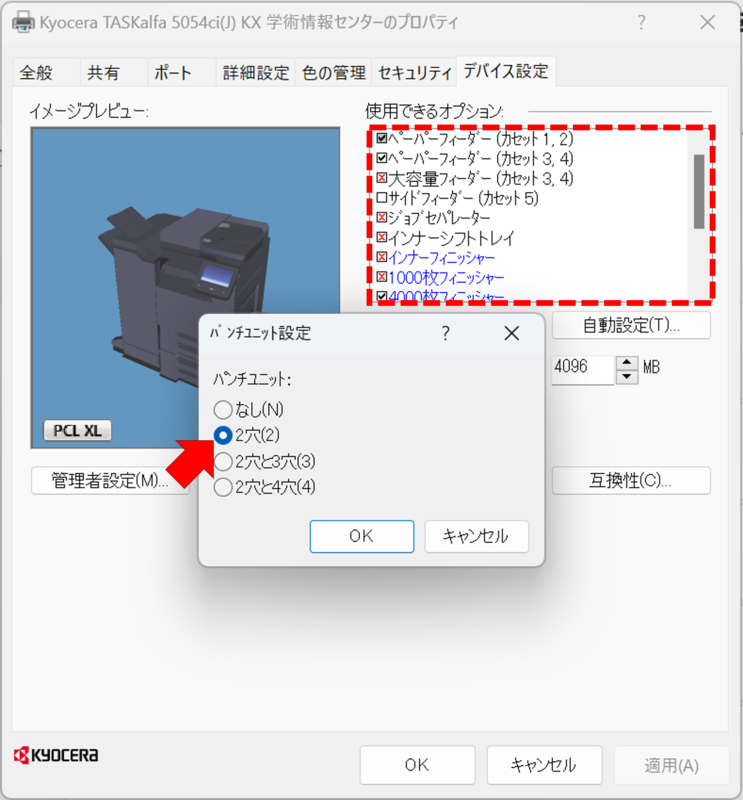
27.Choose "Device Setting" (デバイス設定) tab, and set options.
28.Set "Available Options" (使用できるオプション) to the following settings.(■ means checked、□ means unchecked)
■Paper feeder(cassette1,2)
■Paper feeder(cassette3,4)
□Large capcity feeder(cassette3,4)
□Side feeder(cassette5)
□Job separater
□Inner finisher
□1000 finisher
■4000 finisher ※□You can't choose 4000 finisher if you checked job separater.
●2 hole(2)→「OK」Button
□mail box
■Folded unit
■Hard Disk
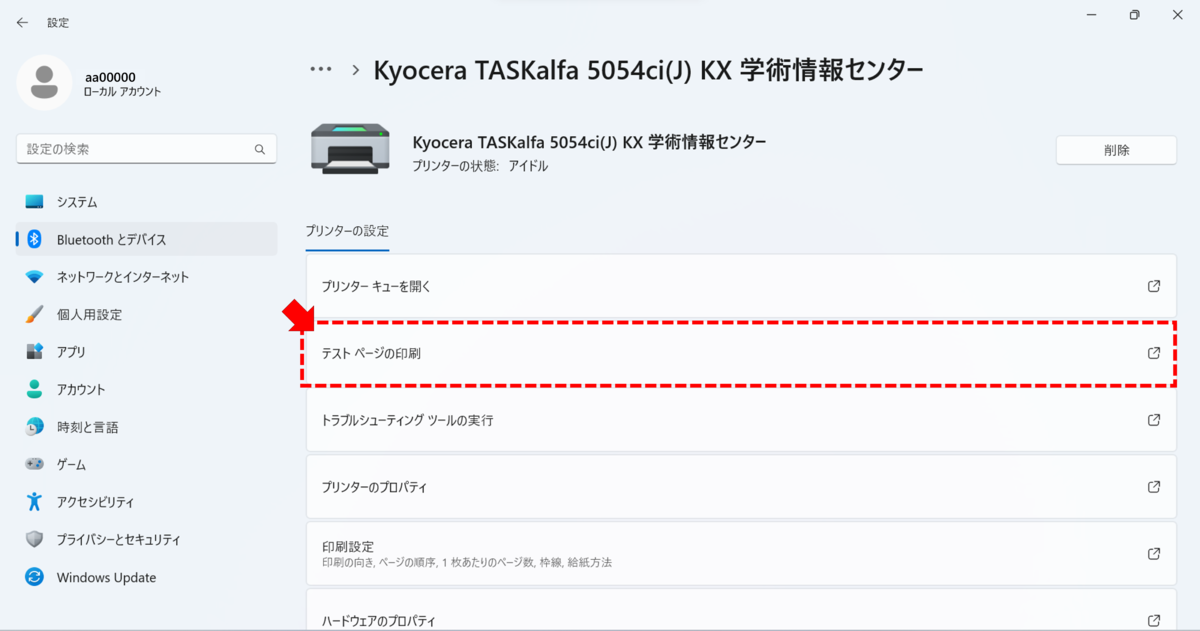
29.Choose "General" tag and click "Print Test Page".Then click "OK".
30.Check the print job Here
※If the SIC-ID is entered in uppercase, it cannot be printed. Please click Here.
※You can only print from the campus network; you cannot print if your Wi-Fi is connected to eduroam.(✓ SRAS5G, SRAS2G, SRAS-WPA, SRAS VPN, SITNET / ✖ eduroam)
31.Go to Kyocera Printer
> Touch your IC card on the card reader of the printer
> Touch "Print " on the screen
> Touch "mono-chro" or "color" button of the print job, and you can get the print.
Uninstall a driver for TASKalfa 5052ci
If you have not installed the Taskalfa 5052ci driver, you do not need to do the following.
1.Choose "Settings" (Red Arrow) from start menu.
2.Chose "Printers and Scanners" (Red Arrow 2) under "Bluetooth and Devices" (Red Arrow 1).
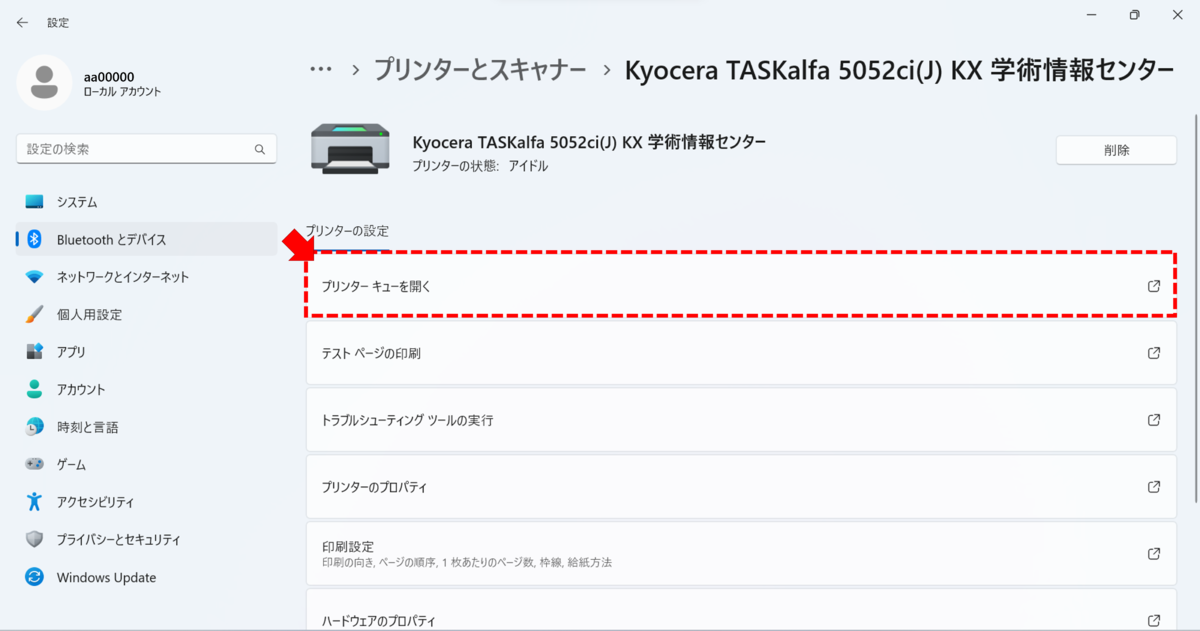
3. Select a printer for TASKalfa 5052ci (Red Arrow).
※The printer name was given by the user themselves and therefore varies depending on the setting.
4.Select ''Open Printer Queue".
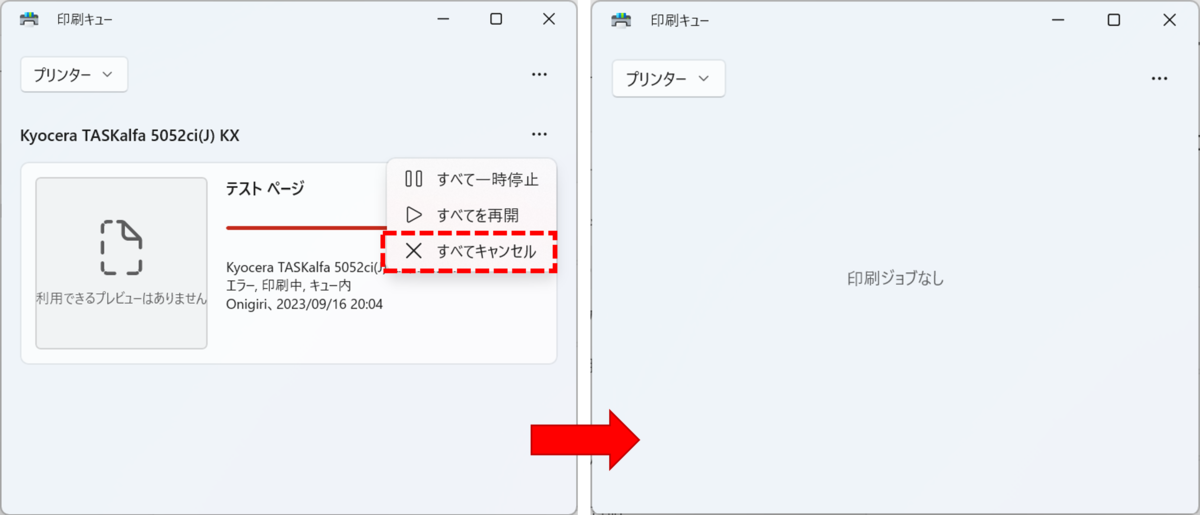
5.Confirm that the printer queue is set to 'No print jobs', as shown in the image right.
If print jobs exist as shown on the left, press 'Cancel all'.
6.Close the printer queue, and click delete button (Red Allow).
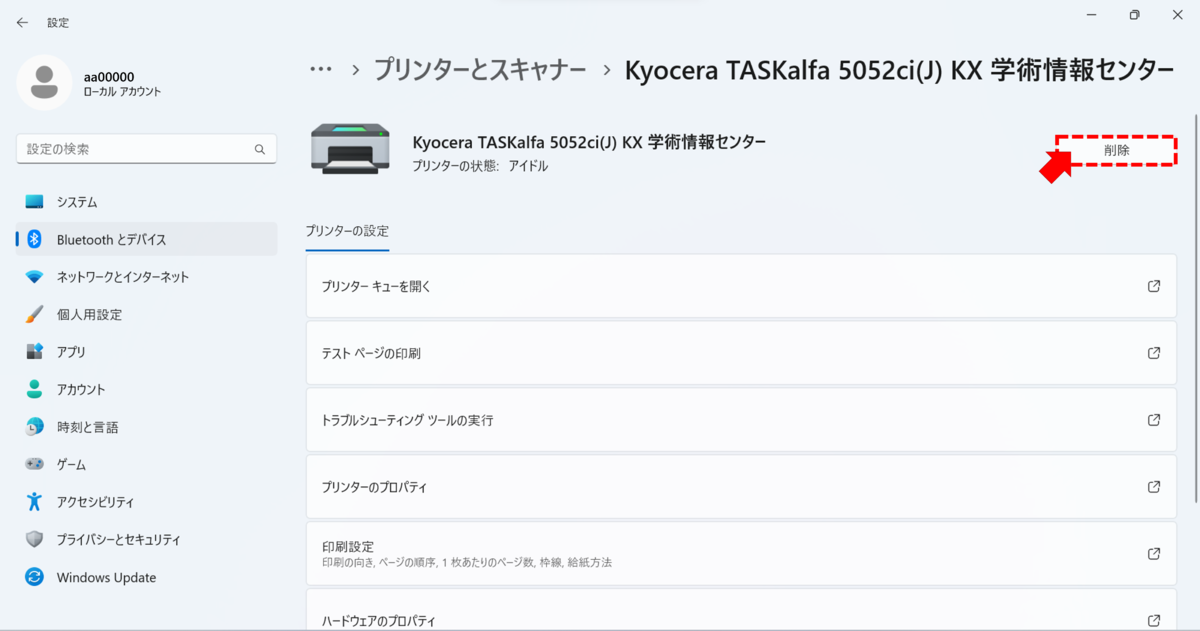
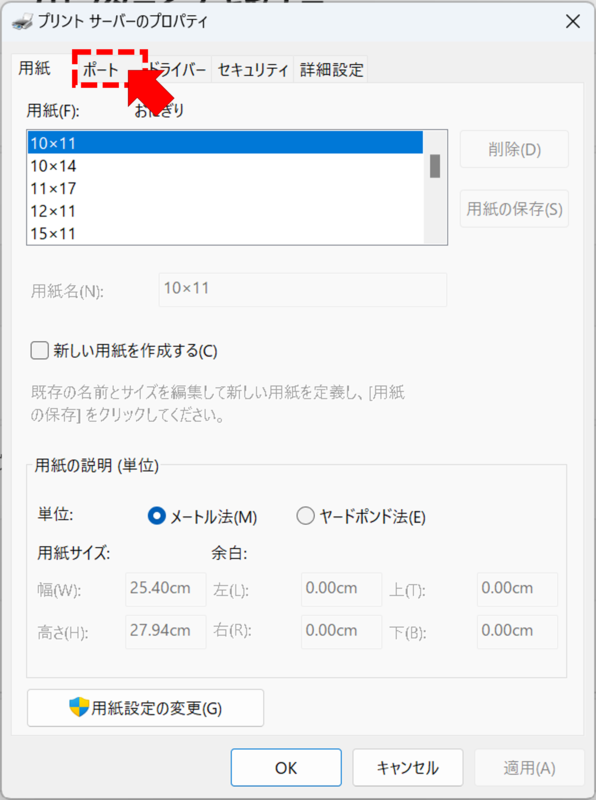
7.Confirm that the TASKalfa 5052ci has been removed and is no longer in the printer list, then click on 'Print Server Properties' (Red Allow).
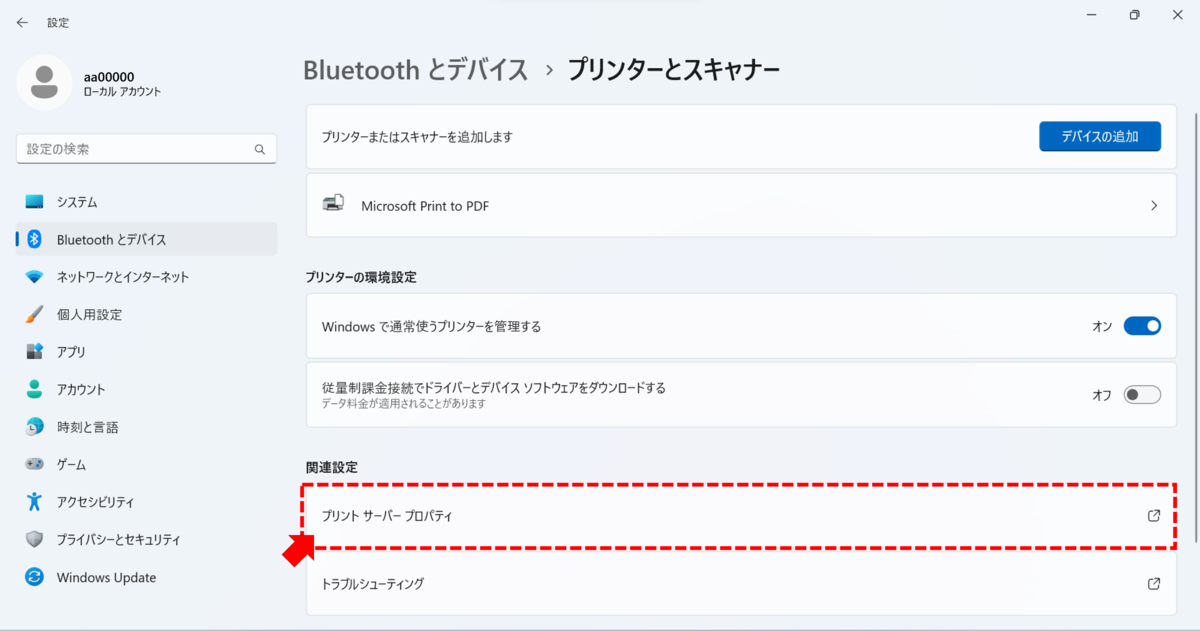
8.Open 'Port' tab (Red Allow).
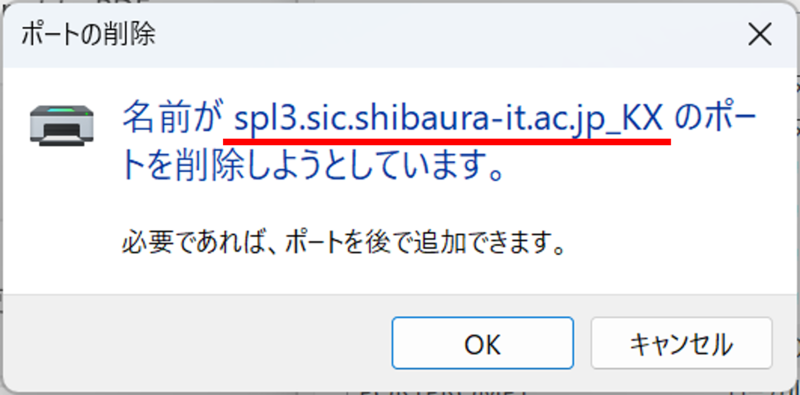
9.Select 'spl3.sic.shibaura-it.ac.jp_KX', and click 'Delete Port'.
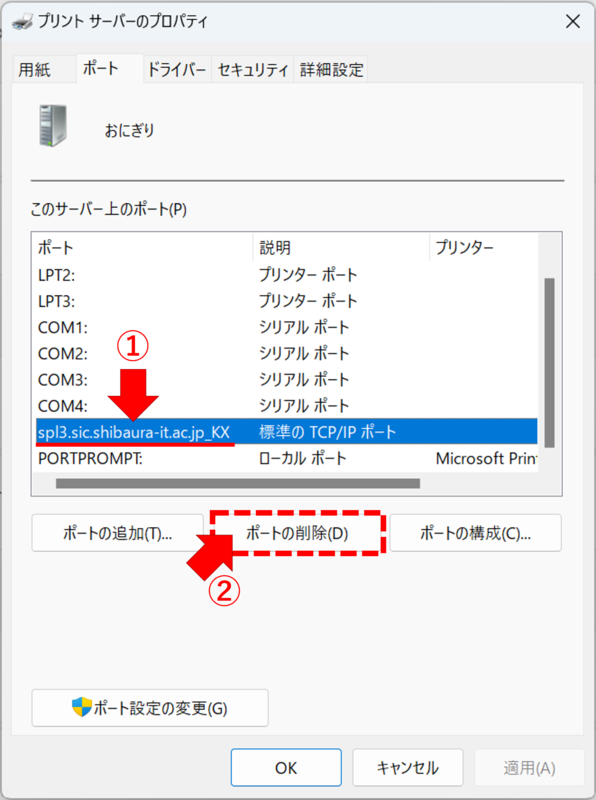
10.Confirm the port name as "spl3.sic.shibaura-it.ac.jp_KX", then select "OK buttun".