
ホーム > サービス > 授業支援 > Scomb > アンケート
Questionnaire
After the start date and time set when the questionnaires are created, links to the questionnaires will be displayed on the students' " Subject TOP" screen.
※If the response start date is set in the past, it will take up to one minute for the link to appear on the student's screen.
Create new questionnaire
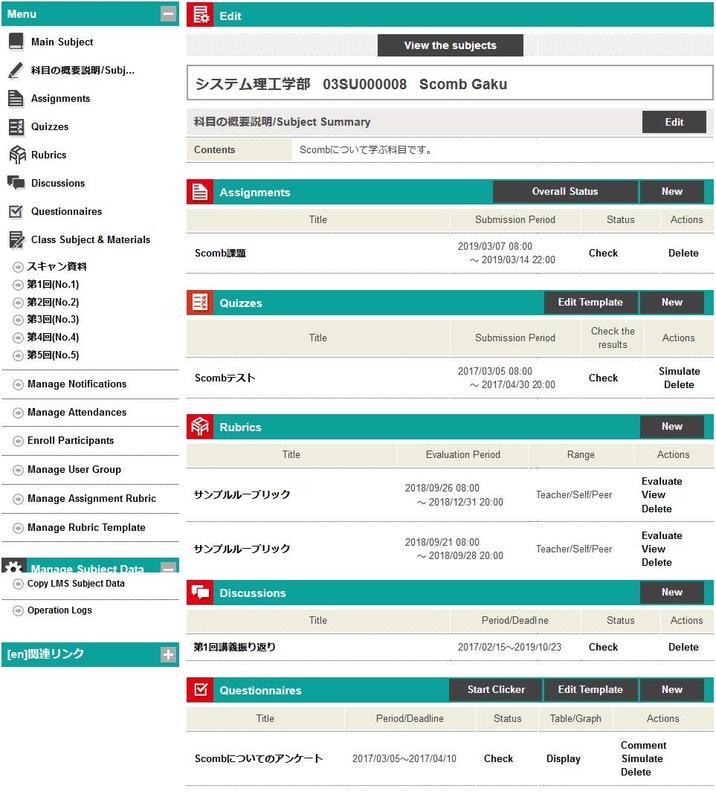
Clicking the "Create New" button for a questionnaire on the "Edit Subject TOP" screen will take you to the "New Questionnaire Registration" screen.


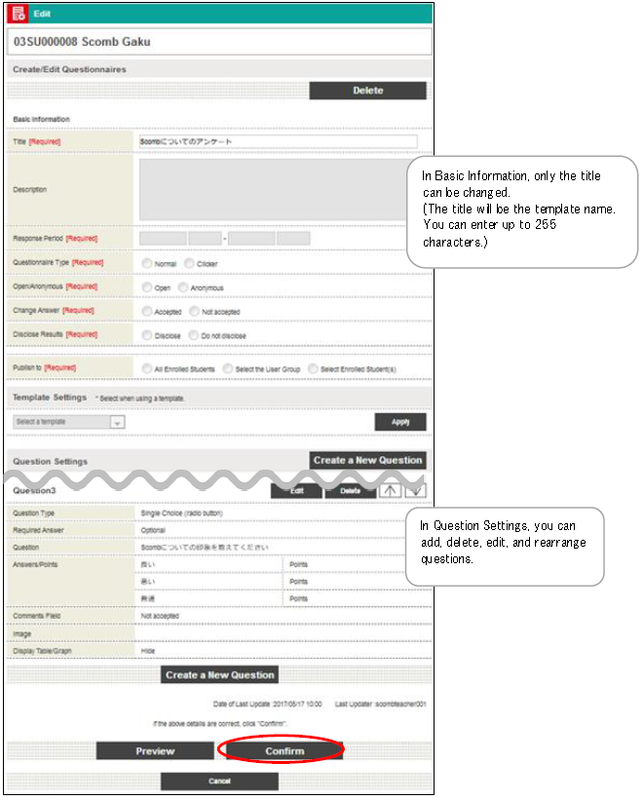
| ① | Title | Enter the name of the questionnaire. (max. 255 characters) | ||||||||||||
| ② | Contents | Enter a brief description of the questionnaire. (max. 1300 characters) | ||||||||||||
| ③ | Response period |
Set the survey response period.
|
||||||||||||
| ④ | Type | Set whether you want regular questionnaires or clickers. ※ See "Questionnaire Types" in this manual for more information on the types of questionnaires. |
||||||||||||
| ⑤ | Registered/Unregistered | Set whether the questionnaire will be a registered or unregistered questionnaire. | ||||||||||||
| ⑥ | Modification of Responses | Enable/Disable re-response for students who have already completed the questionnaire once. | ||||||||||||
| ⑦ | Publication of results | Sets whether or not the results of the questionnaire will be made available to enrollees. | ||||||||||||
| ⑧ | Results are published during |
Set a period during which the results of the questionnaire will be made available to the enrollees. |
||||||||||||
| ⑨ | Publish to | Decide who you want to publish the survey to 【"All Students", "Select User Group", or "Select Students"】. Selecting "Select User Group" displays a list of user groups. To use a user group, a user group must be created in "User Group Management" beforehand. Select "Select Students" to see a list of students. |
||||||||||||
| ⑩ | Template Settings | You can select a pre-registered template. [Please select a template]. Select a template from the pull-down menu of [Click the "Apply" button to apply the template. |
||||||||||||
| ⑪ | Create New Questions | New questions can be created. Click the "Create New Question" button to move to the next screen. |
||||||||||||
| ⑫ | Register as Template | The created questions can be registered as templates. | ||||||||||||
| ⑬ | Preview | You can preview the screen where the student will answer the questions. |
After entry, click the [Confirm] button to go to the confirmation screen.
Check the details and click the [Submit] button.
Submission will be completed with a completion message.
※When the Response Period starts, the questionnaire will be displayed in the students' Subject TOP screen.
For 3 days after the Response Period starts, NEW will be displayed with the questionnaire title.
アンケート新規設問作成
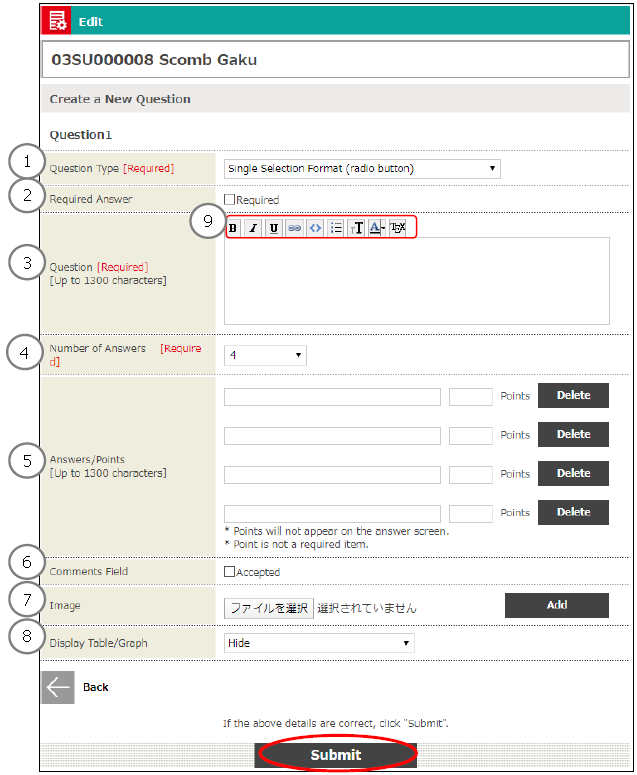
| ① | Question Type | Select a question type from the pull down menu. ※Items displayed in the pull down menu vary by the questionnaire type selected when creating the questionnaire. For details on the question types, see " Questionnaires: Question Types " . |
| ② | Required Answer | Set whether or not to require an answer. |
| ③ | Contents | Enter a description of the question . |
| ④ | Number of Answers | Set the number of choices. This is not displayed for descriptive type questions. |
| ⑤ | Answers/Points | Set the choices and the points. The number of choices is based on ④. This is not displayed for descriptive type questions. Points are used in the summary. You can set negative values. (They are not displayed to students.) |
| ⑥ | Comments Field | Set whether or not to allow students to enter comments (1300 characters or less) for their answers. |
| ⑦ | Image | You can add an image to the question. Available file formats are gif, jpg, and png. |
| ⑨ | Display Table/Graph |
Set whether to display the summary in a table or graph when publishing the questionnaire results. |
There are the following 3 types of table/graph.
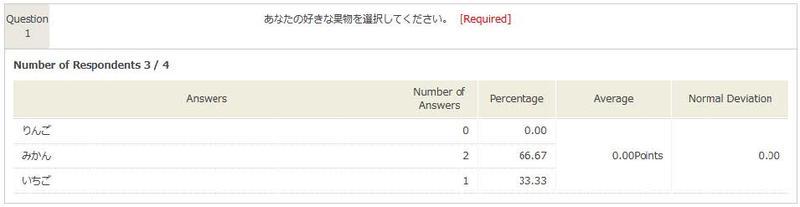
<Average + Number of Answers + Standard Deviation (Table Format)>
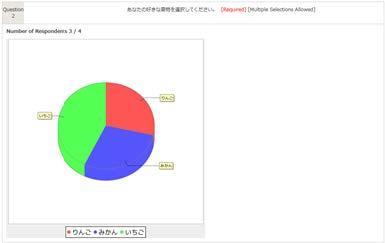
<Percentage (Pie Graph)>
<Total (Bar Graph)>

Create a question and click the [Register] button to register the question to the questionnaire.The order of registered questions can be changed in the "Create a New Questionnaire" screen or Edit Questionnaire screen.
Questionnaires: Question Types
Question types vary by questionnaire type.
- Normal questionnaires
There are 7 question types for normal questionnaires as follows:
・Single Choice (radio button)
・Multiple Choice (check box)
・Text Format (text box)
・Free Text Format (text area)
・List Choice (pull down menu)
・Single Selection Table Format (radio button)
・Multiple Selection Table Format (check box)
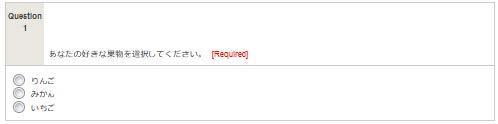
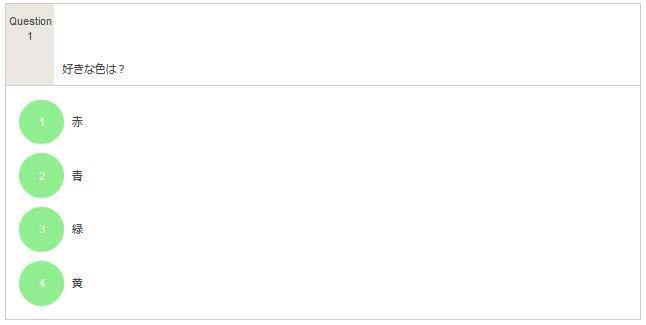
Single Choice (radio button)
Students' view:
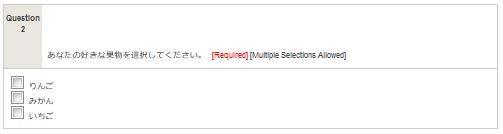
Multiple Choice (check box)
Students' view:
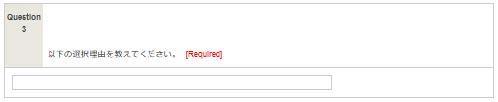
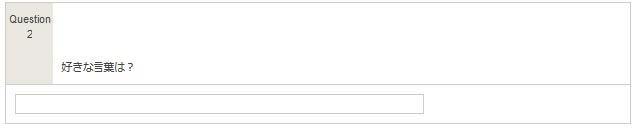
Text Format (text box)
Students' view:
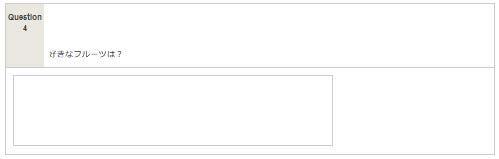
Free Text Format (text area)
Students' view:
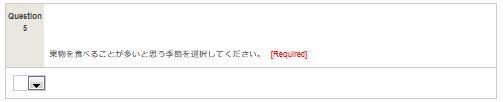
List Choice (pull down menu)
Students' view:
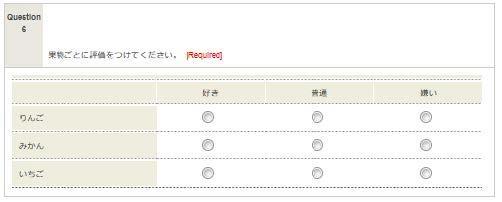
Single Selection Table Format (radio button)
Students' view:
Multiple Selection Table Format (check box)
Students' view:
Create a question and click the [Submit] button to add the created question to the questionnaire. - Clicker (normal)
There are 2 question types for clickers as follows:
・ Single Choice (radio button)
・ Text Format (text box)
Single Choice
Students' view:
Text Format
Students' view:

Questionnaires: Creating Templates
You can register the created questions into a template.
※ The templates you create can be used for other subjects as well.
※ Although the same title can be used for more than one template, setting different titles is recommended to avoid confusion.
Click the [Register as Template] button in the "Create a New Questionnaire" screen or Edit Questionnaire screen to go to the Confirm Questionnaires Template screen.
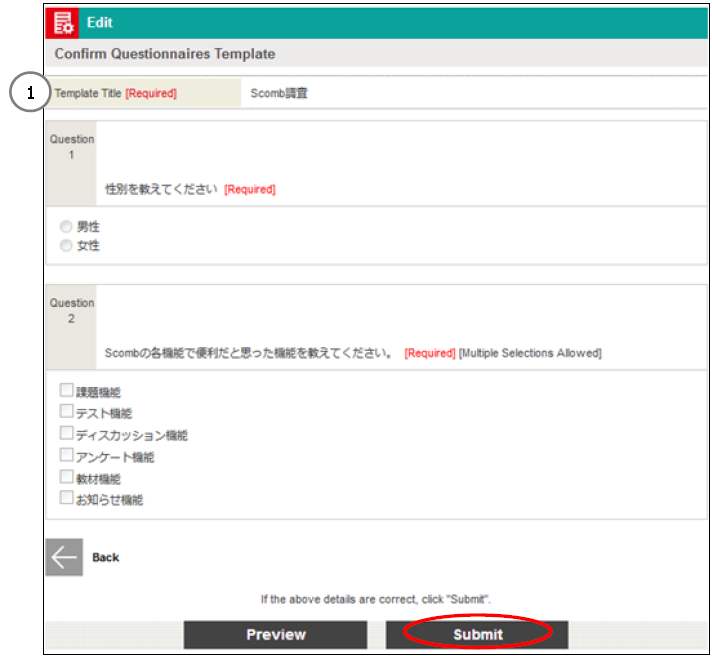

①Template Title
The questionnaire title will be registered as the template title by default.
※Although the same title can be used for more than one template, setting different titles is recommended to avoid confusion.
To change the title, first register the template, and then edit it.
Check the details and click the [Submit] button.
Template registration will be completed with a completion message.
Questionnaires: Editing/Deleting Templates
Click the [Edit Template] button for Questionnaires in the Edit Subject TOP screen to go to the Questionnaire Template List screen.

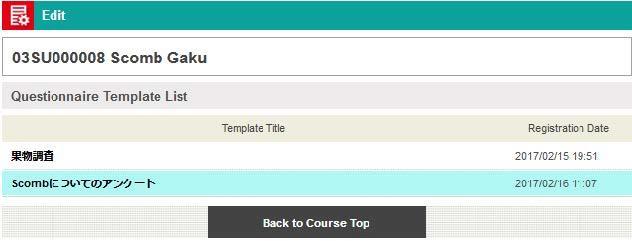
Click the title of the template you want to edit to go to the Create/Edit Questionnaires screen.

Check the details and click the [Submit] button.
Submission will be completed with a confirmation message.
Click the [Delete] button to delete the template.
Clicker (simple) new creation
A clicker (simple) can be created with a single button operation. You can collect and display simple questionnaires and comments during the lecture.
The clicker (simple) has 9 single selection formulas (radio buttons) and the comment input field is fixed, and the question contents are not displayed, so it is necessary to inform the students of each question content before starting.
If you want to set the questions in advance or increase the number of questions, use the clicker (normal).
※ For clickers (typical),see "Creating a New Questionnaire."(See above)
(Image in preparation...)
When you click the [Clicker Start] button of the questionnaire on the "Course Editing TOP" screen, a popup will be displayed.
Click "Yes" to create a clicker (simple).

The contents of the clicker (simple) are automatically set as follows.

| ① | Title | Subject name creation date and time(”YYYY/MM/DDHH:MM”) |
| ② | Response period | From creation day 8:00 to creation day 22:00 |
| ③ | Type | Clicker (simple) |
| ④ | Named/Blank | Named |
| ⑤ | Change Answer | No |
| ⑥ | Publicize questionnaire results | Release |
| ⑦ | Result publication period |
From 22:00 on the following day to March 31, 23:59 this year ※The result disclosure period can be changed on the clicker (simple) result display screen. For details, refer to "Clicker (simple) result display".(See below) |
| ⑧ | Publish to | All Students |
| ⑩ | Questions |
Questions are set automatically.
※You can only change the "answer item" and "table/graph display" of the question. |
Clicker (simple) question editing
Click the [Edit] button on the "Clicker (simple) edit" screen to move to the "Edit question" screen.
After confirming that the content is correct, click the register button to complete editing the question.
※For more information about the question, please refer to "Questionnaires: Creating a New Question" in "Creating Questionnaires".
Clicker (Simple) Question format
The clicker (simple) question format is only "single selection format (radio button)".

Clicker (simple) result display
Only the lesson subject administrator can view the clicker (simple) real-time result display screen.
If you want to make it available to students before the response is accepted, you need to display this screen and show it directly.
| ① | Switch display | Before the result disclosure period, you can switch to each of the "pie chart", "bar chart", and "table format" displays regardless of the display format set when the clicker (simple) was created. |
| ② | Table/Graph | The total result will be displayed in real time. |
| ③ | Comment | When responding, the comments entered by the students will be displayed. Displayed in order from the top. |
| ⑤ | Reception closed | When you click the reception end button, the questionnaire reception will end immediately, and at the same time, the results will be published. |
※ As a result, during the publication period, it will be displayed in the same way as a normal questionnaire.
アンケート 回答状況の確認
You can check the response status of the questionnaire.
If you click the [Confirm] link in the "Response status" of the questionnaire on the "Course editing TOP" screen, you can go to the "Response status confirmation" screen and check the response status. The survey results can be downloaded as an Excel file (.xlsx format).

| ① | Download results |
The questionnaire results can be downloaded as an Excel file (.xlsx format). |
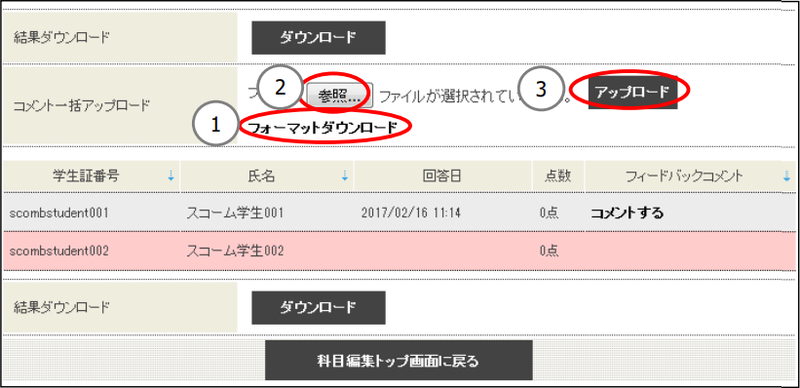
| ② | Batch upload of comments | You can register the questionnaire comments in a batch. Download the Excel file (.xlsx format) from the [Format download] link, enter the comment, and then upload without changing the file name. If there is an input error, all data in the upload file will not be reflected, so please correct and upload again. ※ See below for details. |
| ③ | Feedback comment | You can process the scores and comments of the questionnaire individually. Click the [Comment] link to display the "Feedback comment registration" screen. By updating and registering feedback, the display will change from the [Comment] link to the [Last updated] link. If there is an input error, all the data in the upload file will not be reflected, so please correct and upload again. ※ See below for details. |
| ⑤ | List of answers | You can check the response status of the questionnaire target user. ※ The users whose background color is displayed in gray are the users whose provisional registration period has expired and who have not registered for courses. ※ Regardless of whether or not the temporary registration validity period has expired, temporary registration users who do not respond to the questionnaire will not be displayed in the list. |
Batch upload comments
You can upload grades and comments to all students at once.
Immediately after uploading, students can check the uploaded contents.

-
Download the format from [Format Download].
<Example of comment format input>

You can enter comments for students. (Up to 1300 characters)
Comments are displayed at the bottom of the survey response screen for students.
※ Only users who have answered will be displayed in the format.
2.Click the [Browse] button and select the completed format.
3.Click the [Upload] button to upload the entered scores and comments in a batch.
Rating/Feedback Comment
Click the [Score/Comment] link of "Score/Feedback Comment" on the "Response Status Confirmation" screen to move to the "Feedback Comment Registration" screen.
On the "Feedback comment registration" screen, you can register feedback comments for the survey for each student. Immediately after registration, students can check the registration details.

You can enter feedback comments that students can check. (Up to 1300 characters)
Comments are displayed at the bottom of the questionnaire response screen for students.
After entering the feedback comments, click the [Continue to confirmation screen] button to display the "Confirm registered contents" screen.
After confirming that the contents are correct, click the [Register] button.
If the message "Completed." is displayed, registration is complete.
Display of questionnaires and graphs
You can display the questionnaire results in a table or graph by clicking the [Display] link in the "Table/Graph" of the questionnaire on the "Course Editing TOP" screen.
※ Users who have not passed the temporary registration expiration date and have not registered for the course will not be included in the counting result.
(Image in preparation...)
Only teachers can display clicker (normal/easy) results in real time.
After the result publication start date, it can be displayed on the result confirmation screen for students.
In order to display it, it is necessary to set [Publish questionnaire result] to public in the questionnaire edit screen.
The format of the displayed table depends on the content specified when creating the questionnaire.
The results display screens for normal questionnaire, clicker (normal), and clicker (simple) are different.
-
Normal questionnaire result display
-
Clicker (normal) result display
※ During the result display period, it will be displayed in the same way as a normal questionnaire.
-
Clicker (simple) result display
※ During the result display period, it will be displayed in the same way as a normal questionnaire.
Edit questionnaire contents
Click the [Questionnaire Title] link of the questionnaire on the "Edit Course TOP" screen to switch to the "Edit Questionnaire" screen.
For questionnaires for which the answers have already been closed, you can change the items for which questionnaire results are disclosed and the table/graph display method for each question.

※ Questionnaires with the title "Class Evaluation Questionnaire" are general surveys. You cannot edit the class evaluation questionnaire.
You can edit the following contents.
- Editing the response period (extension/shortening)
※ It can be edited only during the response period. - Publicize questionnaire results
- Private switching
- Change of table/graph display method for each question
After editing is complete, click the [Proceed to confirmation screen] button to move to the "Confirm registered contents" screen.
After confirming that the contents are correct, click the [Register] button.
If the message "Registration is complete." is displayed, registration is complete.
Questionnaire overall comment
You can add a comment to the result of the questionnaire. Comments can be viewed by all target audiences. You cannot comment on each question. You can view the overall comment from the link below.
Course manager: [Display] link of "Table/Graph" that exists in the survey of the course TOP (edit/view)
Attendees : [Confirm questionnaire results] link on the subject TOP

Enter a comment (up to 1300 characters) in the comment field and click the [Register] button.
※ Questionnaires with the title "Class Evaluation Questionnaire" are Class Evaluation Questionnaires. It is not possible to add comments to the Class Evaluation Questionnaire.