
Home > Service > Network > SRAS > SRAS Wired LANSRAS > SRAS Information Outlet Connection Guide with IEEE802.1X Authentication
SRAS Information Outlet Connection Guide with IEEE802.1X Authentication
2021/3/11 更新
1.About Windows OS
If you want to use IEEE 802.1X authentication for SRAS information outlet connection on Windows 10, the following three steps are required.
- Start the authentication service.
- Configuring 802.1X Authentication
- Authentication
Start the authentication service.
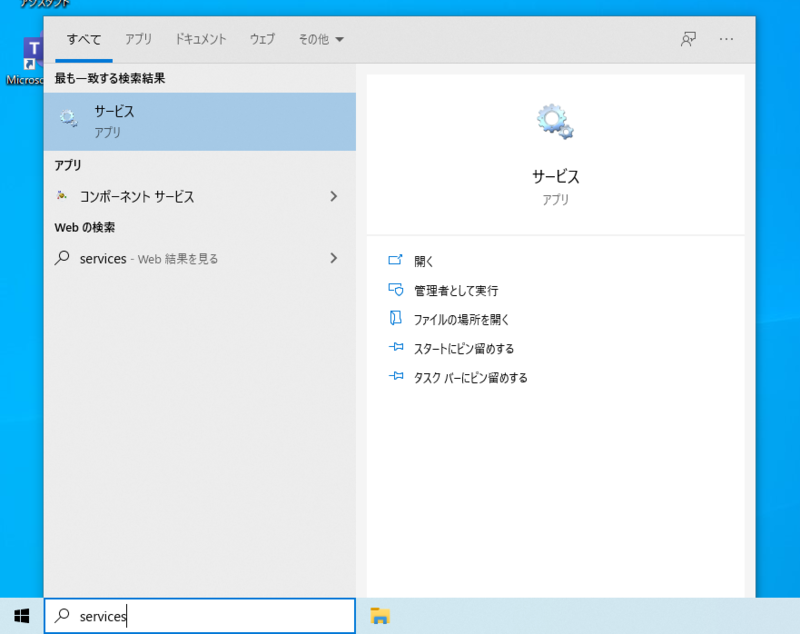
- Search for "services" in the search box and run the "Services" application from the search results.
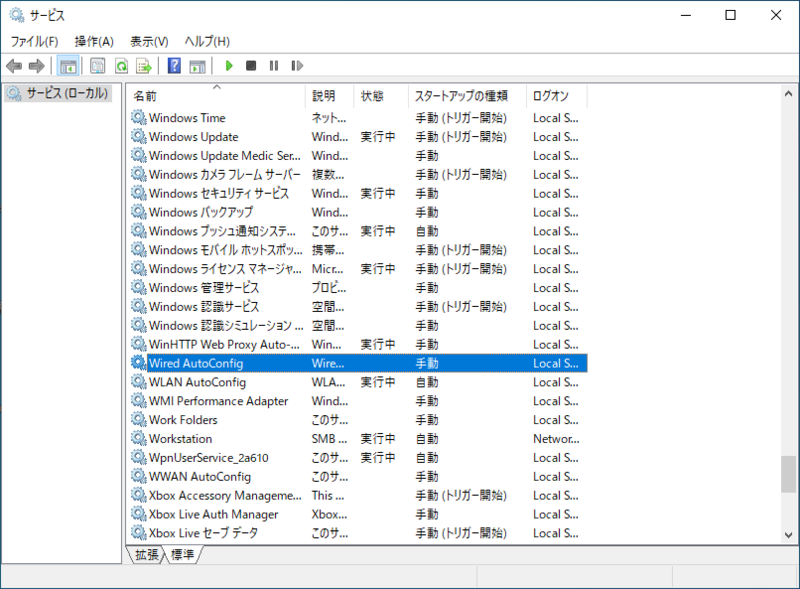
*Please note that this is not a "component service". - Change the tab at the bottom of the service to "Standard".
- Find "Wired AutoConfig" in the list of services and double-click it to open its properties.
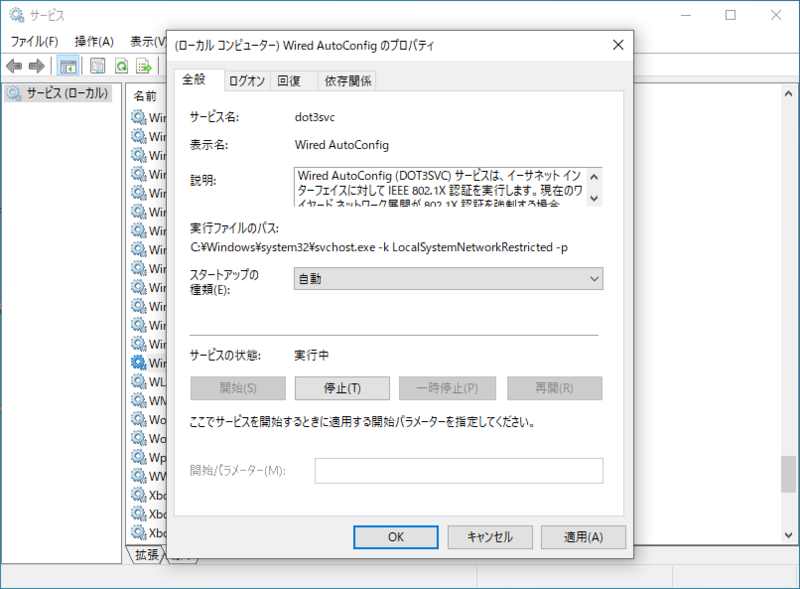
*Note that this is not "WLAN AutoConfig". - Click "Start (S)" in the "Service Status" in the properties to start the authentication service.By setting the "Startup Type (E)" in the same property to "Automatic", the authentication service will be automatically started when the PC starts.
Configuring 802.1X Authentication
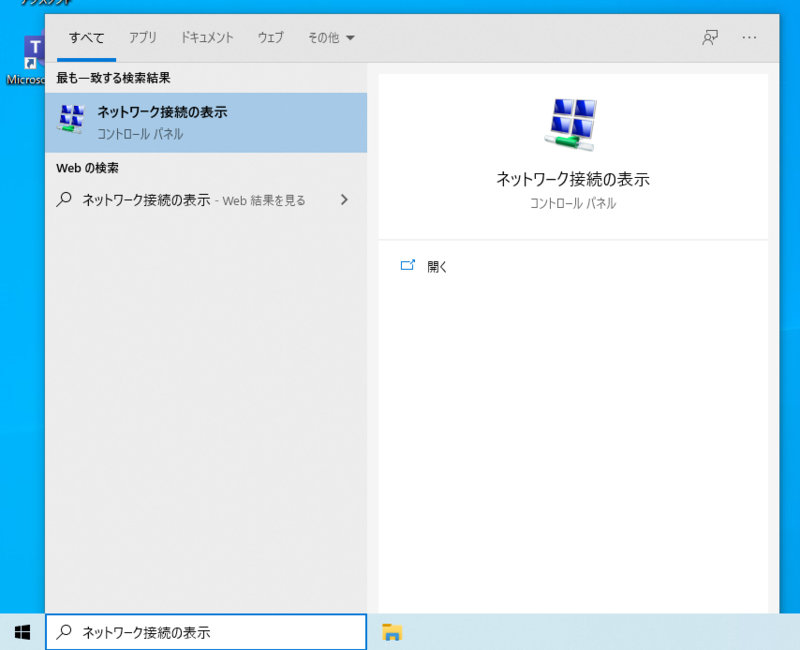
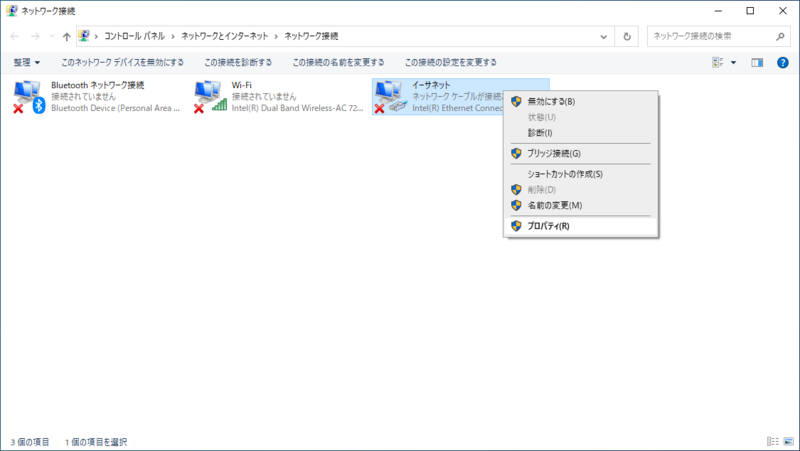
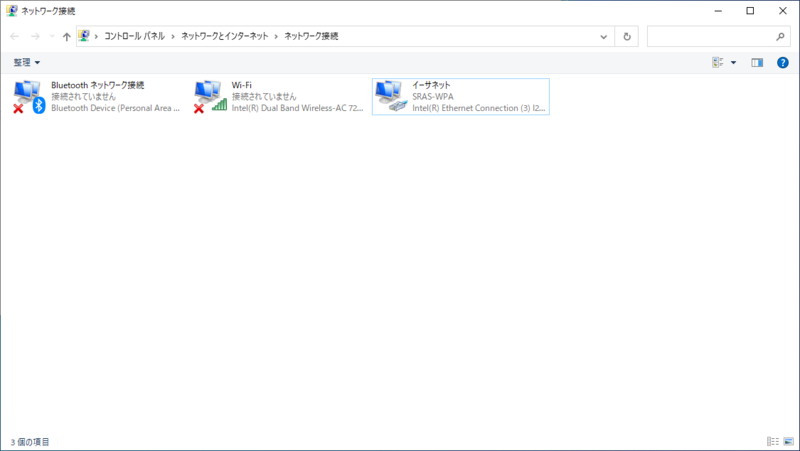
- Search for "Show network connections" in the search box and run "Show network connections" from the search results.
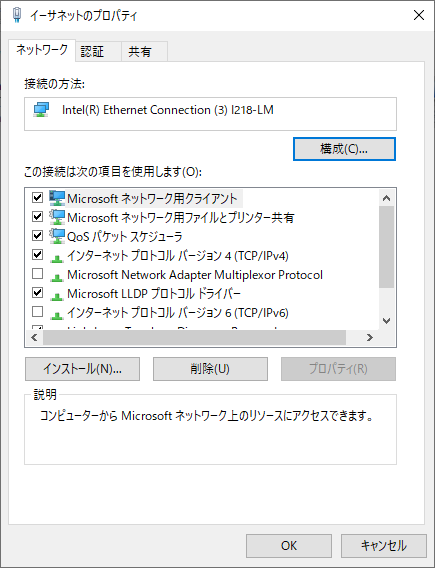
- When the network adapters are displayed, right-click on the wired network adapter (e.g. Ethernet) and select "Properties (R)".
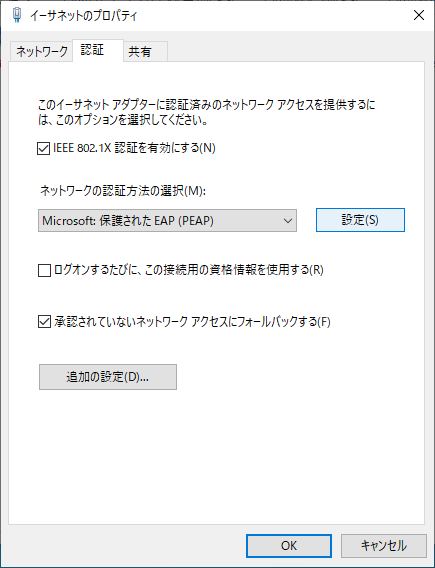
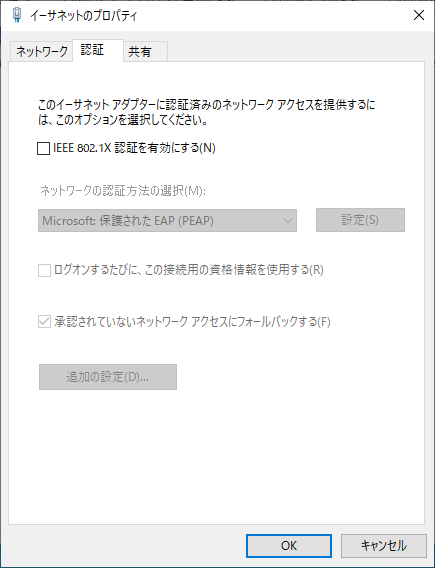
- Change the tab at the top of the properties to "Authentication". If there is no authentication tab, please try "Start Authentication Service" again as described above.
- Check the "Enable IEEE 802.1X authentication (N)" checkbox.
- Select "Microsoft Protected EAP (PEAP)" from "Select network authentication method (M)".
- Click "Settings" to the right of the above selection.
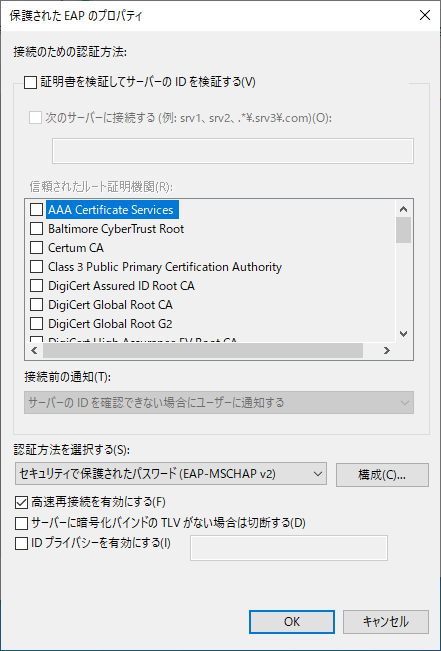
- In the "Protected EAP Properties" window, uncheck the "Verify certificate and server ID (V)" checkbox at the top. Then click "OK" at the bottom to close the "Protected EAP Properties".
- Go back to the Authentication tab of the network adapter properties and click "Additional settings (D)..." at the bottom.
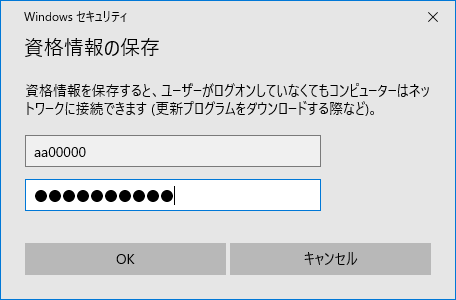
- Check "Specify authentication mode (P)" and change the authentication mode to "User authentication" in the "Advanced settings" window.
- Click "Save credentials (C)" or "Replace credentials (C)" to the right of the above selection.
- When the authentication screen appears, enter your Academic SIC ID (e.g., aa00000) and SRAS wireless LAN password.
- Press "OK" on each of the authentication screen, advanced settings, and network adapter properties to return to the network adapter display.
- Connect the LAN cable and make sure that the adapter you selected in "2.


Authentication
- If you have saved your authentication credentials in the previous section "10.~12.", authentication will be performed when you connect the LAN cable.
If you have not saved the credentials, the authentication screen will be displayed. Enter your SIC ID in the User Name field and your SRAS wireless LAN password in the Password field to authenticate.
2.About Mac OS
This is the procedure for making an SRAS Info Outlet connection on MacOSX.
On MacOSX (ver. 10.15.4 or later), there is no need to register in advance. When you connect the LAN cable, the authentication screen will appear, and you can complete the authentication by entering your SIC ID as the user name and the SRAS wireless LAN password as the password.
From the second time onward, authentication will be performed automatically and the connection will be established.