
Home > Service > Printing > Printing machine > Install Kyocera TASKalfa 5052ci Driver for Windows
Install Kyocera TASKalfa 5052ci Driver for Windows10
Updated 2020/11/30
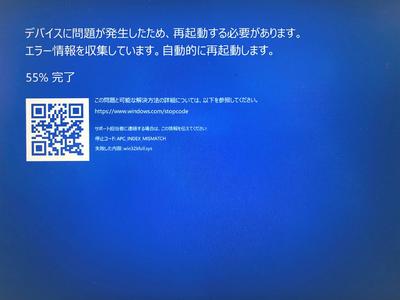
If the image below is displayed when printing and you cannot print, see items 25 and later in the installation guide.KB5000802 included in the March 2021 Windows Update contains a bug that causes a blue screen when printing on a Kyocera printer. |
| For who | For all SIT students and all SIT teachers |
| Caution |
|
1.Click here --> (Here
2.Choose your PC's OS.
3.Click "KY Driver(32bit/64bit)" in【Recomended Driver】.
4.Click "Apply" button and the driver file is downloded in download folder on your PC.
5.After downloading the file, Extract all...
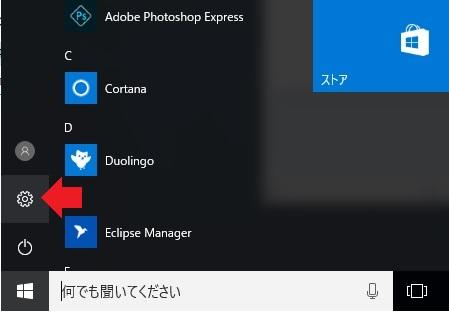
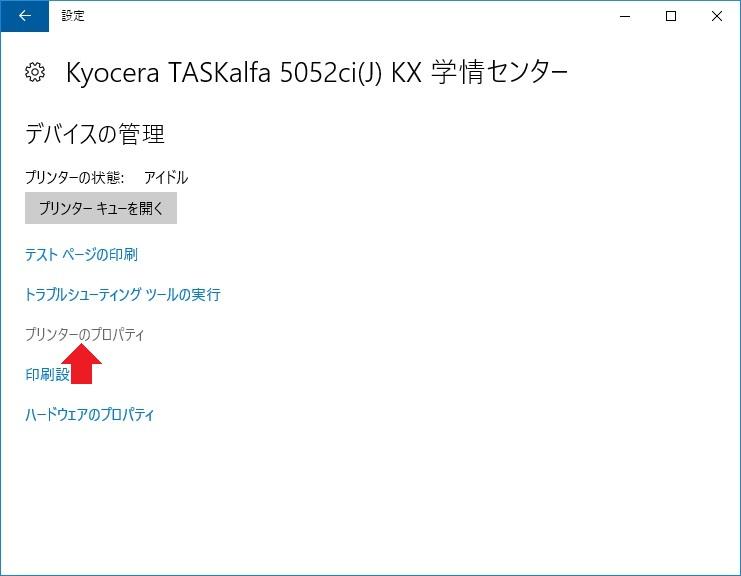
6.Choose "Settings" (Red Arrow)from start menu.
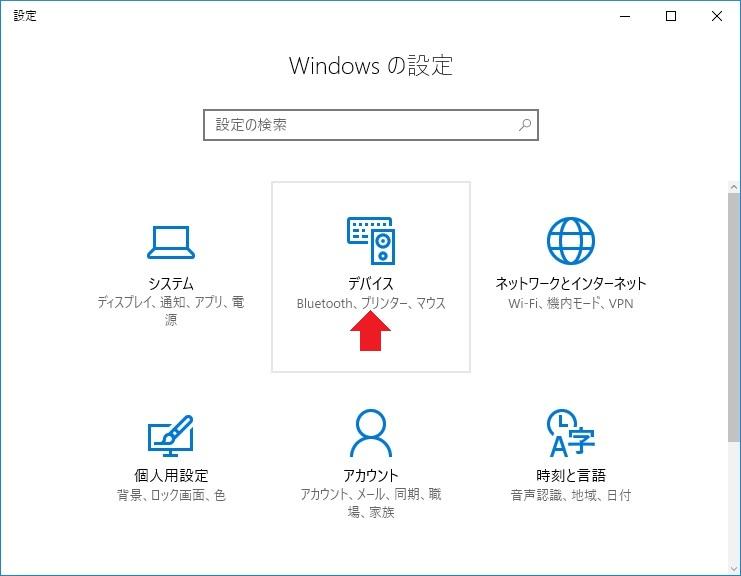
7.Click "Devices" (Red Arrow).
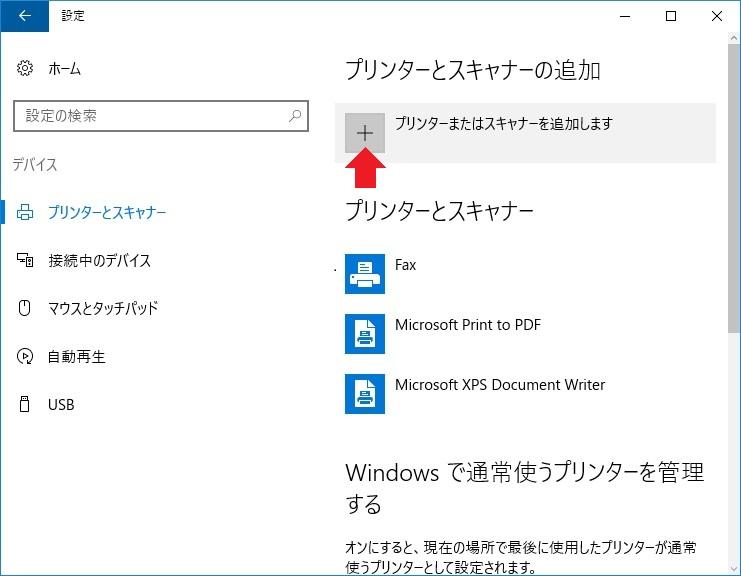
8.Choose "Printers & Scanners" and Click "+ button" which is said "Add a printer or scanner".(Red Arrow)
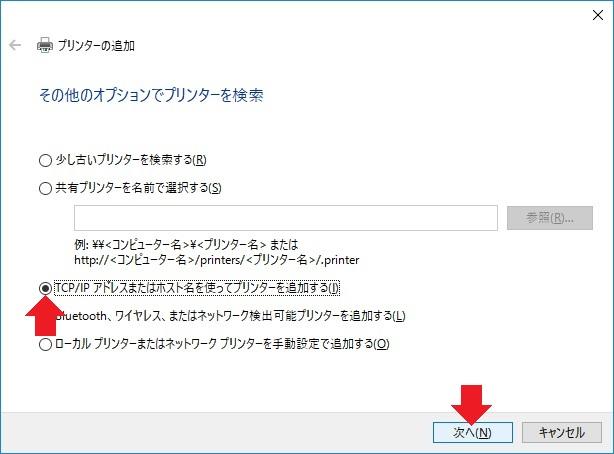
9.Choose "Add printer with TCP/IP address or host name" and click "next".
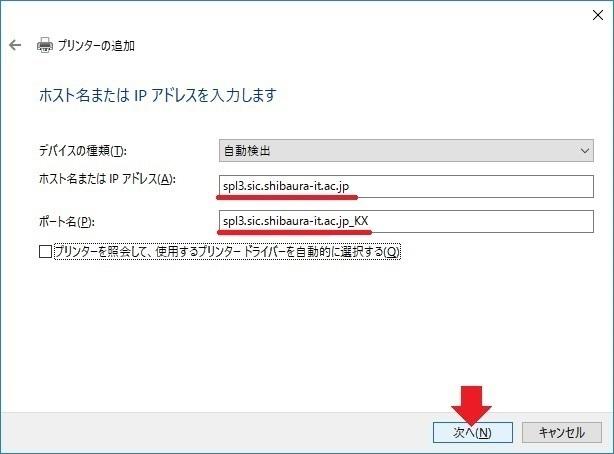
10.Enter "host name or IP address(A)" and "port name(P)" and click "next".
spl3.sic.shibaura-it.ac.jp
spl3.sic.shibaura-it.ac.jp_KX
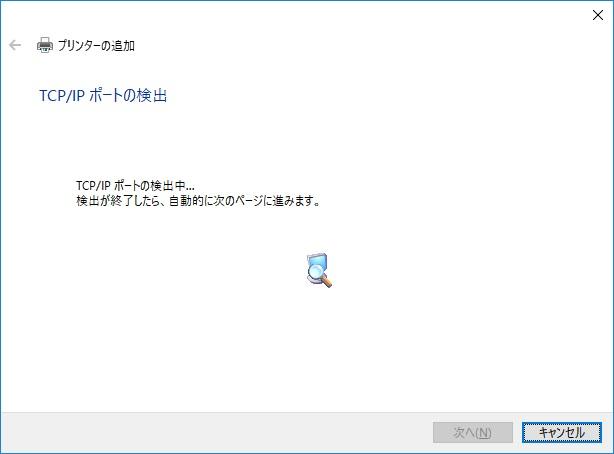
11.Wait for a moment when your PC is searching TCP/IP port.
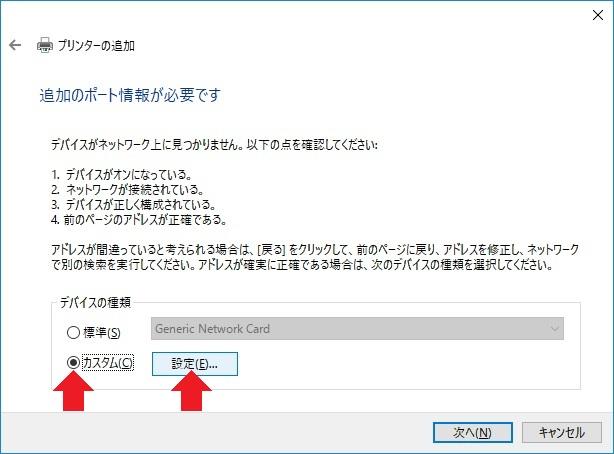
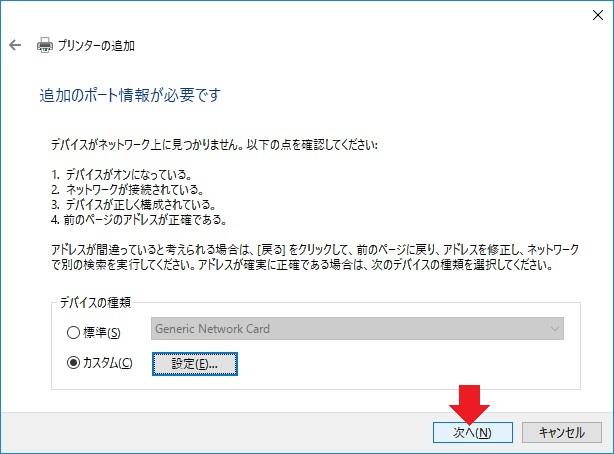
12.Click "custom" and "control" button.
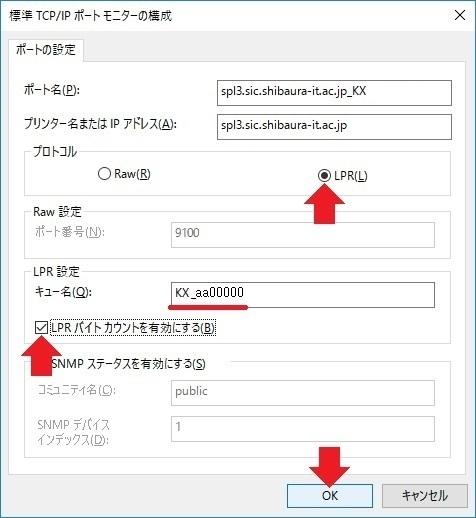
13.Choose "LPR". Queue name is your user name when you login SIT PC.
Choose "Valid LPR byte count(B)" and click "OK".
14.Click "Next".
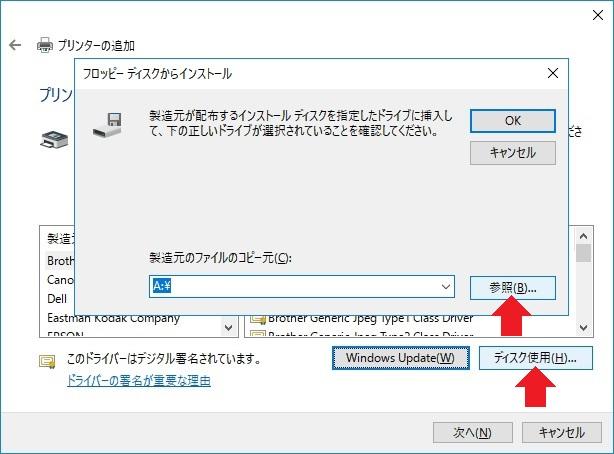
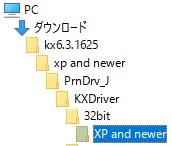
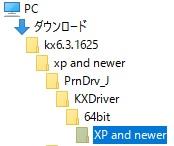
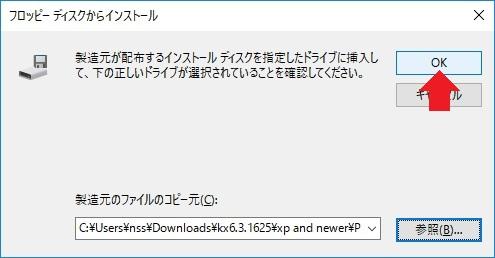
15.Click "Disk(H)" and click "reference(B)".
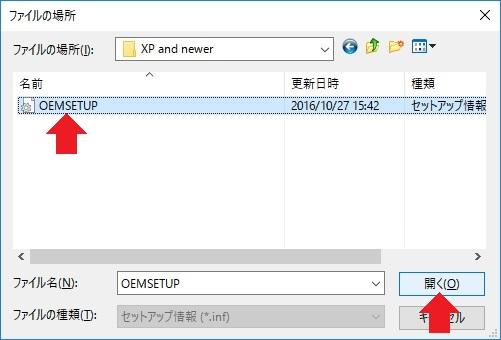
16.Choose OMESETUP file from the folder when you expand downloaded file in No.5.Then click "Open(O)".
【32bit版ファイルの場所】【64bit版ファイルの場所】
※This will depend on the version of the driver.
17.Click "OK".
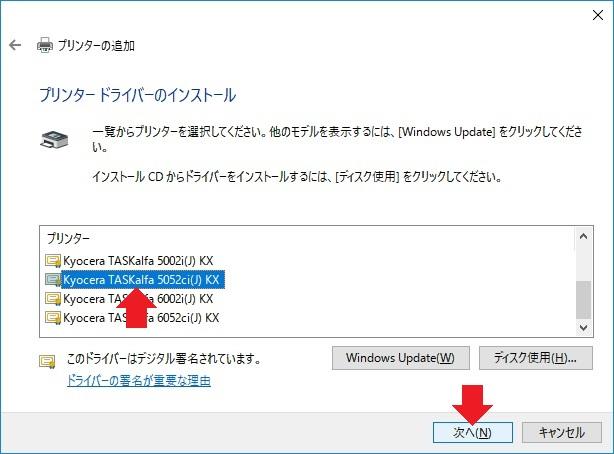
18.Choose "Kyocera TASKalfa 5052ci(J)KX" and click "Next(N)".
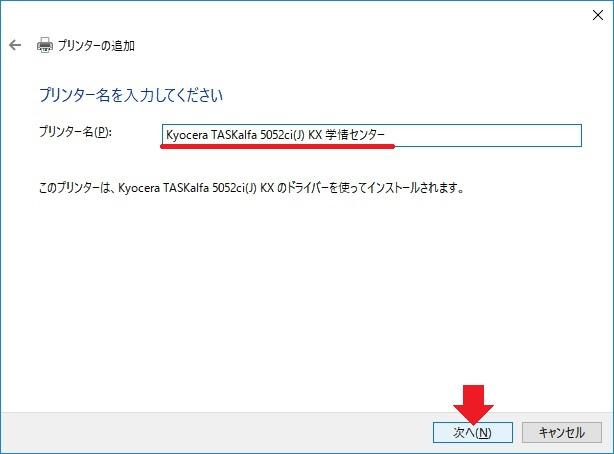
19.Enter the name which is convinience for you in "printer name(P)". Click "Next(N)".
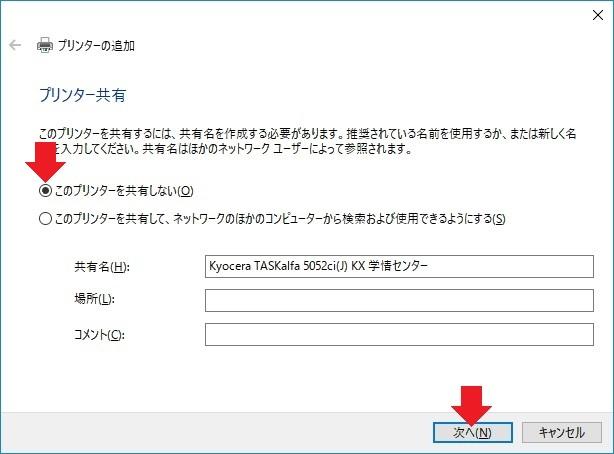
20.Choose "Don't share this printer." and click "Next(N)".
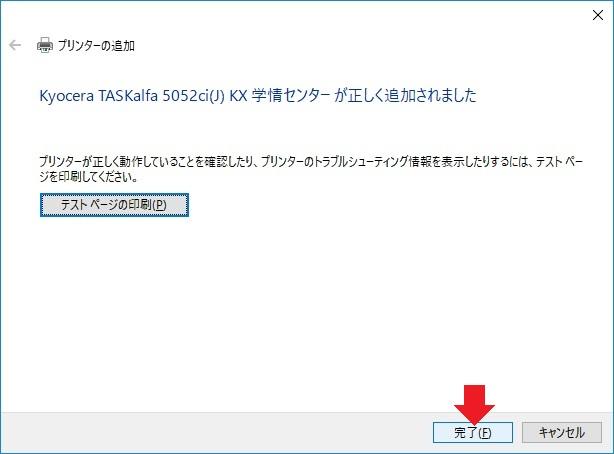
21.Click "Finish(F)".
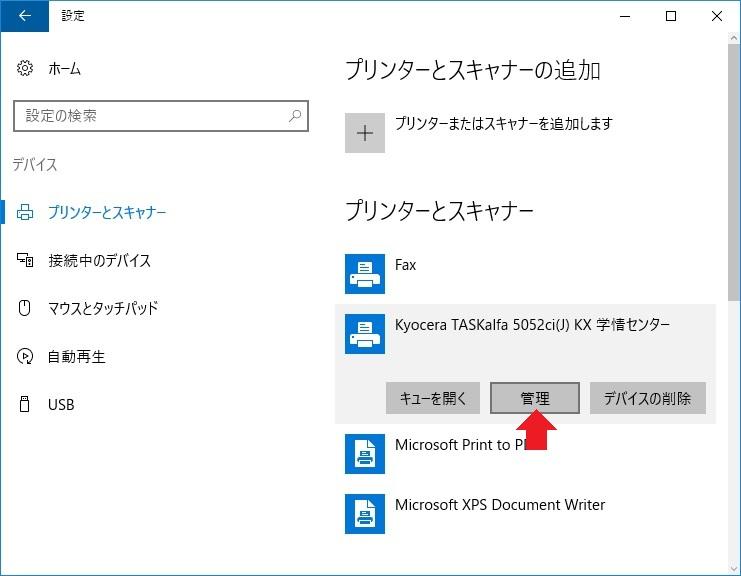
22.Choose Kyocera printer and click "Managae".
23.Choose "Printer Properties".
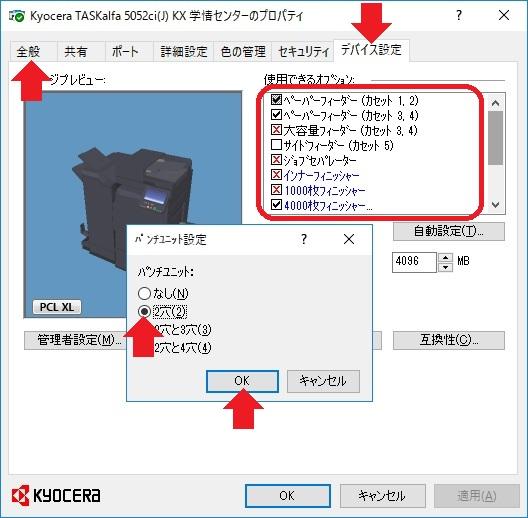
24.Choose "デバイス設定" (Device Setting) tag, and set options.
■ means checked、□ means unchecked
■Paper feeder(cassette1,2)
■Paper feeder(cassette3,4)
□Large capcity feeder(cassette3,4)
□Side feeder(cassette5)
□Job separater
□Inner finisher
□1000 finisher
■4000 finisher ※□You can't choose 4000 finisher if you checked job separater.
●2 hole(2)→「OK」Button
□mail box
■Folded unit
■Hard Disk
25.Choose "General" tag and click "Print Test Page".Then click "OK".
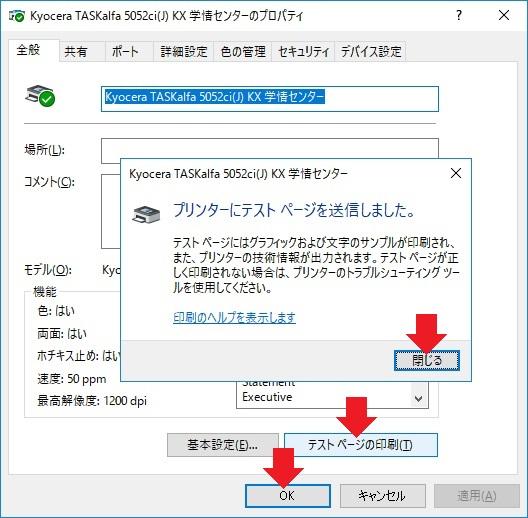
26.Check the print job here
27.Go to Kyocera Printer > Touch your IC card on the card reader of the printer > Touch "Print " on the screen > Touch "mono-chro" or "color" button of the print job, and you can get the print.