
Home > Service > Printing > Printing machine > HP DesignJet Z6dr install guide(Windows11)
HP DesignJet Z6dr install guide(Windows11)
Updated on 2023/09/21
| Target persons | For all students and SIT teachers |
| Caution |
|
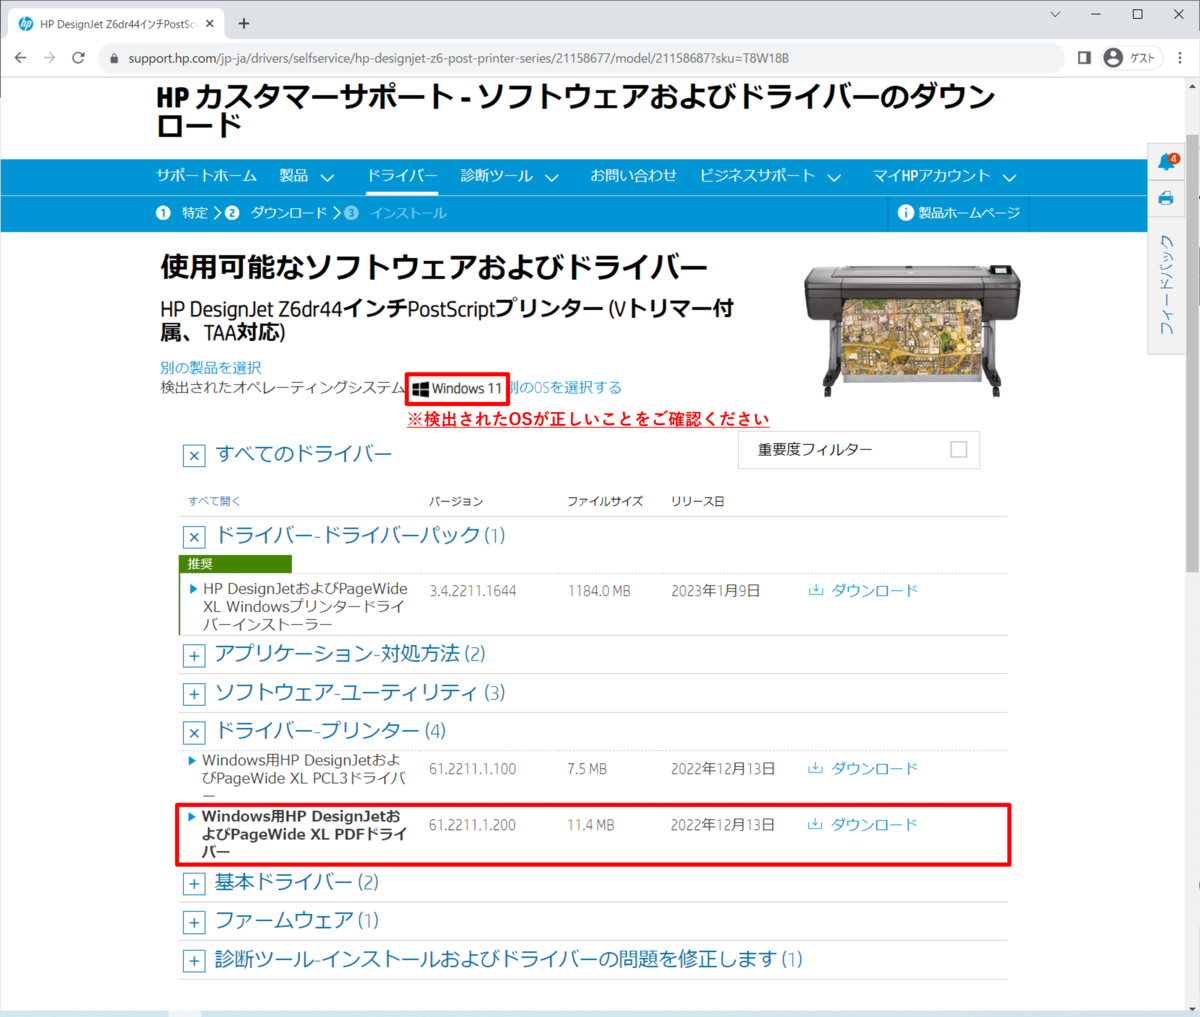
1. Please access here
2. Please confirm that [Detected operating system] is [Windows 11].
Press [All drivers] then > [Driver-Printer]「ドライバープリンター」> and download [HP DesignJet and PageWide XL PDF Driver for Windows].
3. Create a folder and move the downloaded file there.
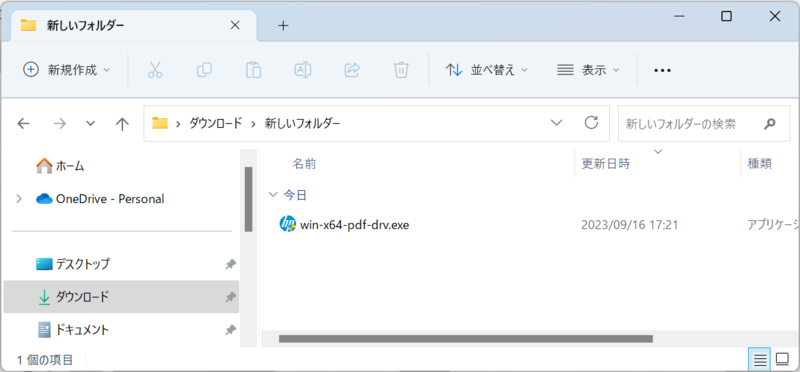
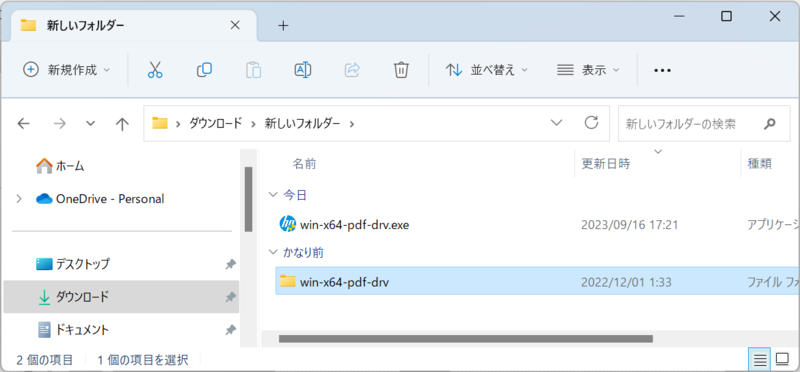
4. Execute the downloaded file
When it is executed, a window will appear for a moment, then a folder that contains the drivers will appear.
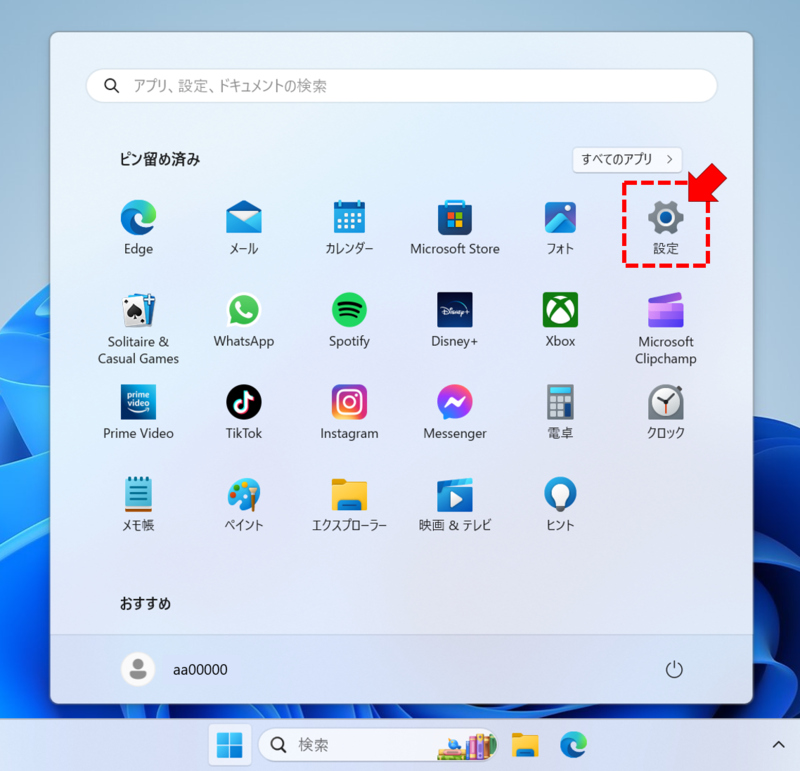
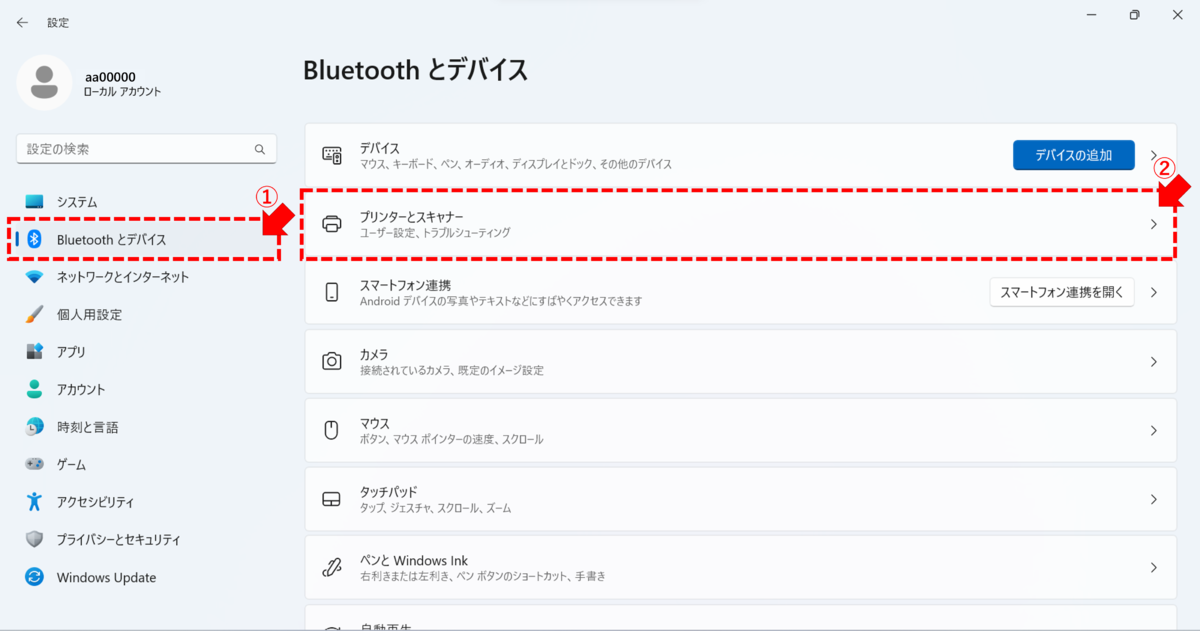
5. From the [Start] menu, open [Settings]
6. On [Bluetooth and devices] choose [Printer and scanners].
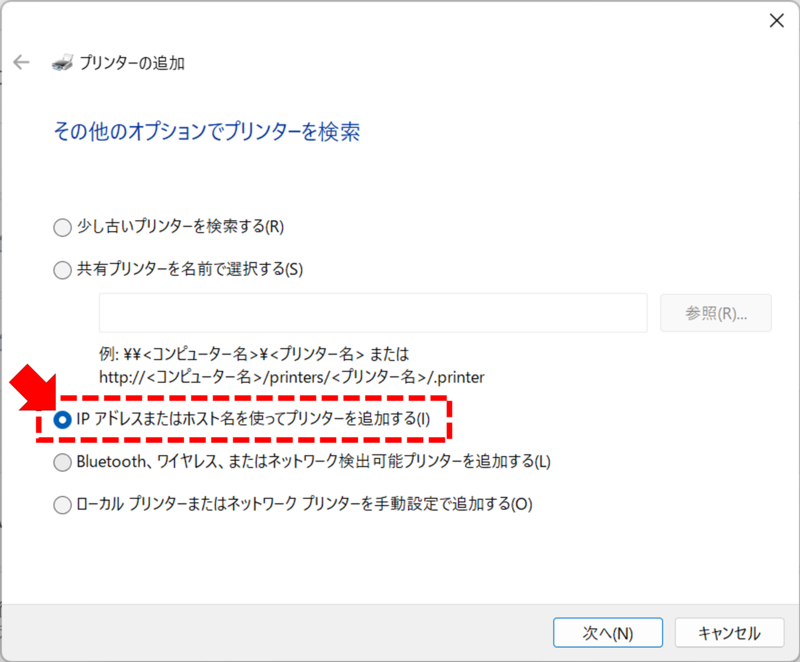
7. In [Add printer or scanners] click [Add a device]. Then click the option [Manually add a device].

8. Select "Add printer using IP address or host name".
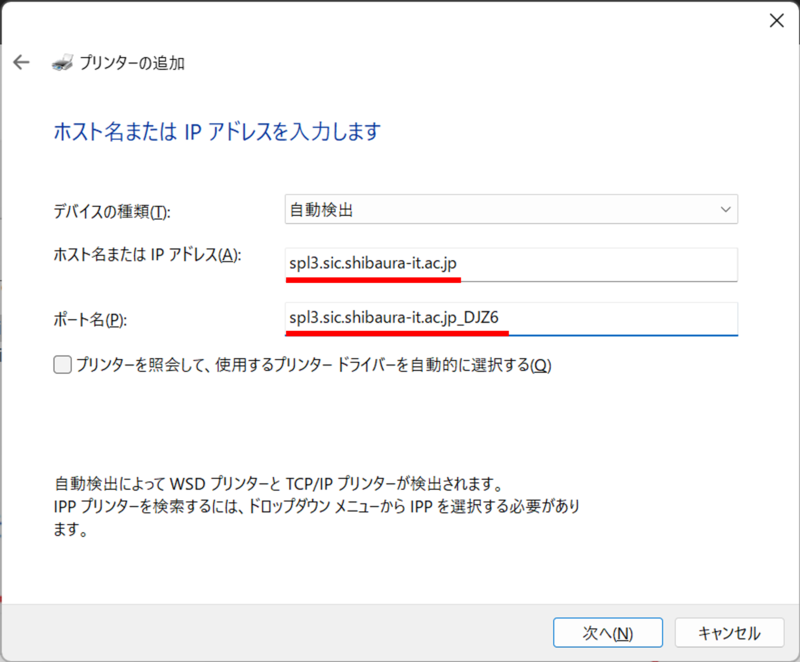
9. Set "Device Type" to "Auto Discovery" and enter the "Host Name or IP Address" and "Port Name" as follows
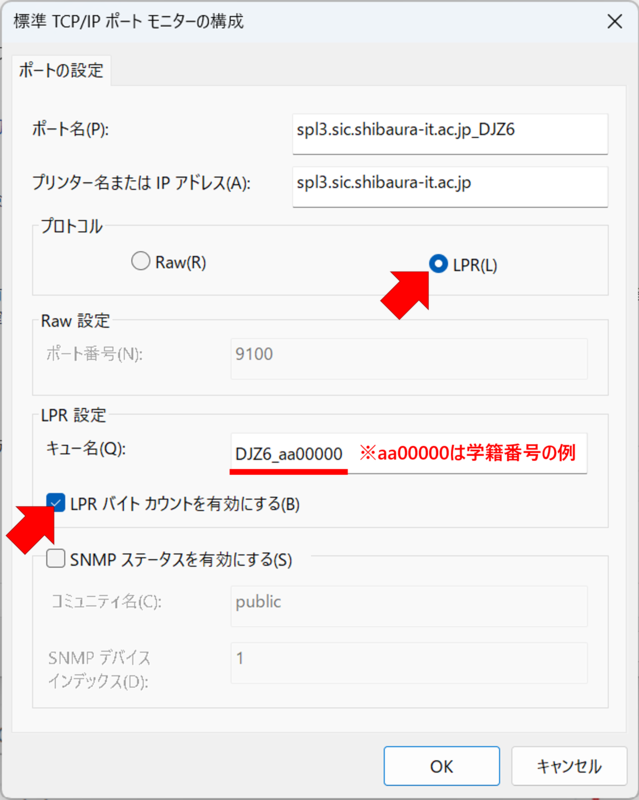
Host name or IP address:spl3.sic.shibaura-it.ac.jp
Port Name:spl3.sic.shibaura-it.ac.jp_DJZ6
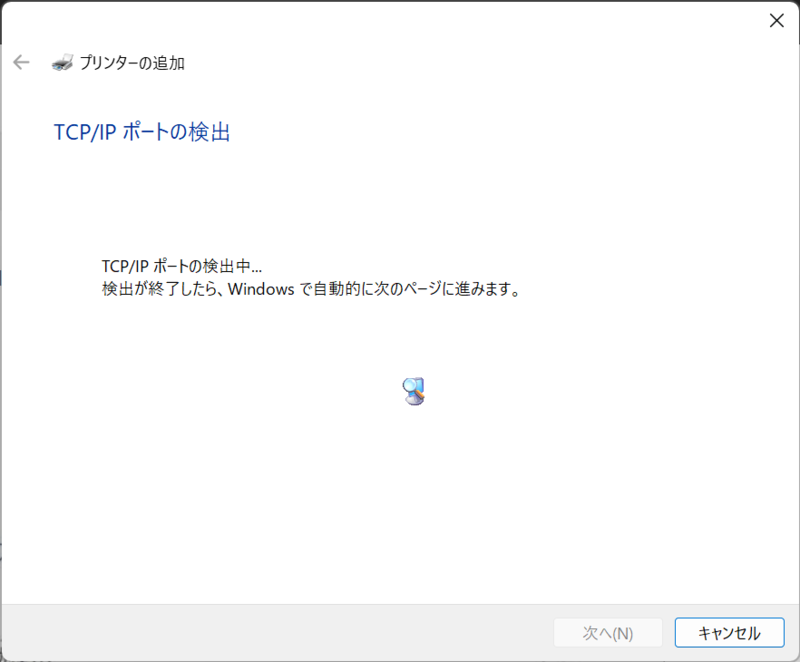
10. The TCP/IP port discovery window will appear for a short while.
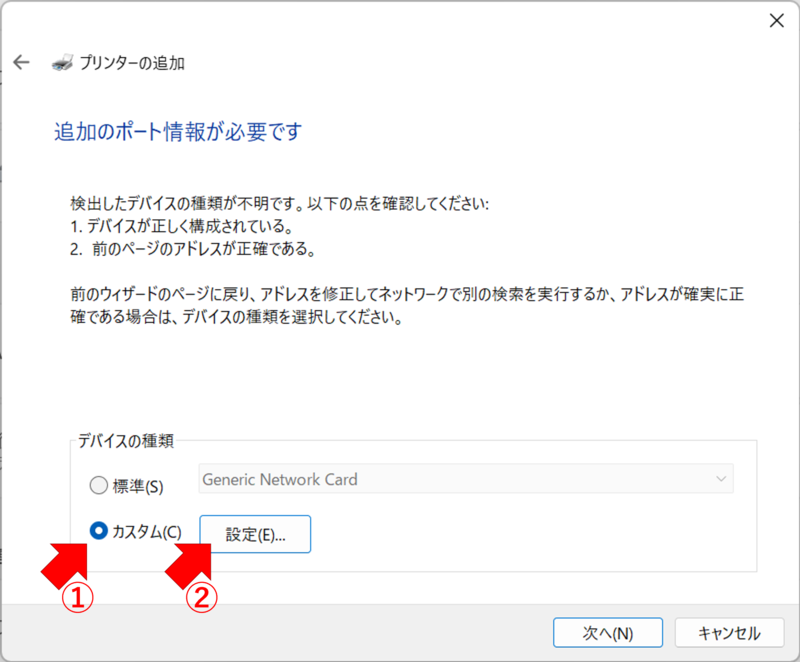
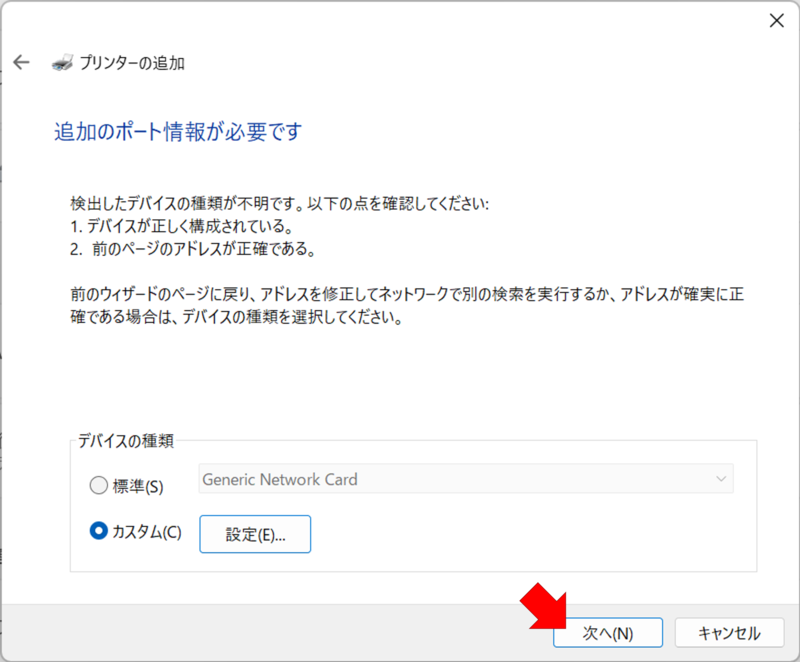
11. Check [Custom] and click [Settings].
12. Select [LPR] under [Protocol], then [DJZ6_Student or Staff ID] under [Queue Name]. Refer to the picture below.
Also, check the "Enable LPR Byte Count" checkbox.
※ Student number should be in lower caseor it won't work.
13. Press [Next].
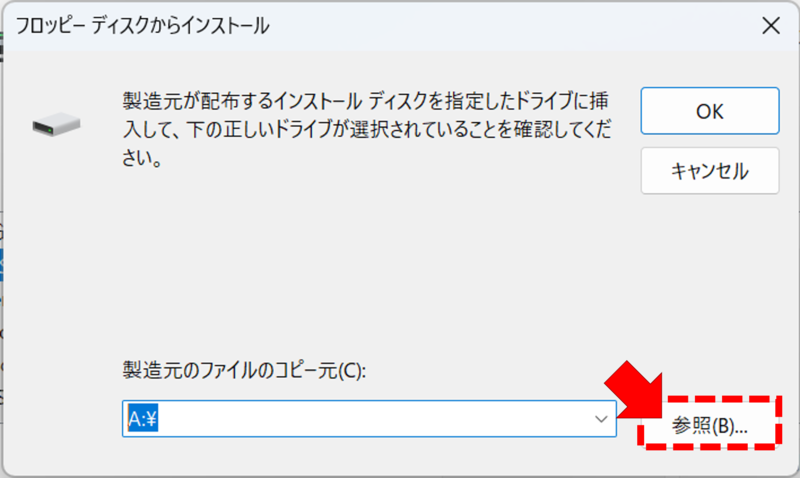
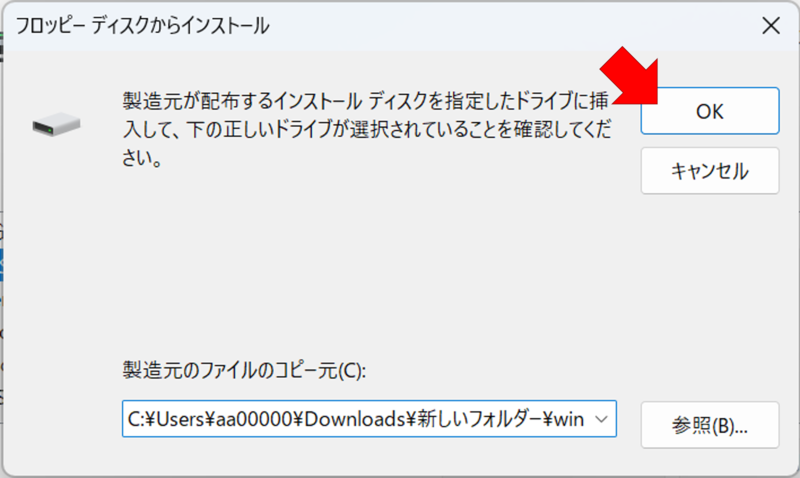
14. Press [Use Disk].

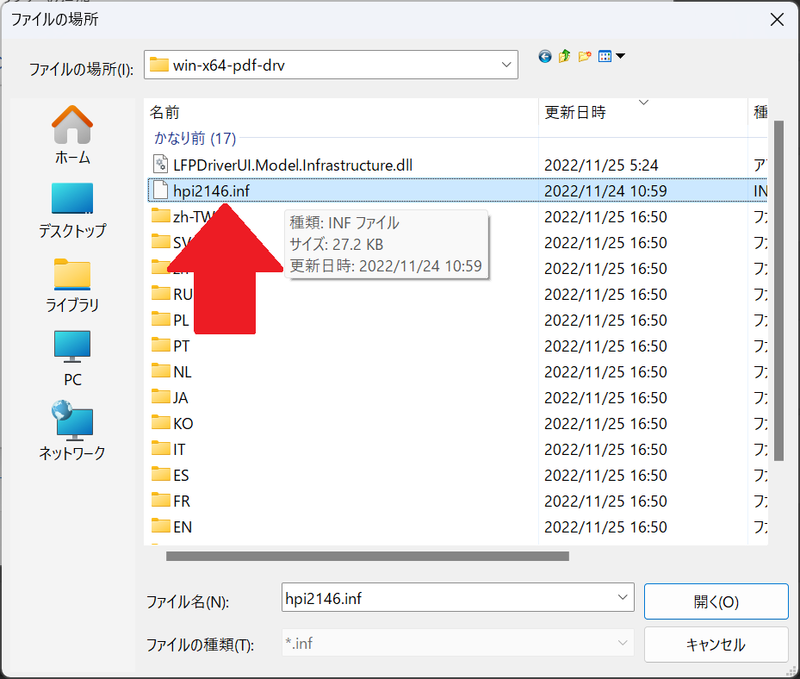
15. Press [Select].
16. From the folder created at step [4.], choose [hpi2146.inf] , then click [Open]
※File name might be different according to the driver's version. Choose the file with [.inf] extension.
17. Click [OK].
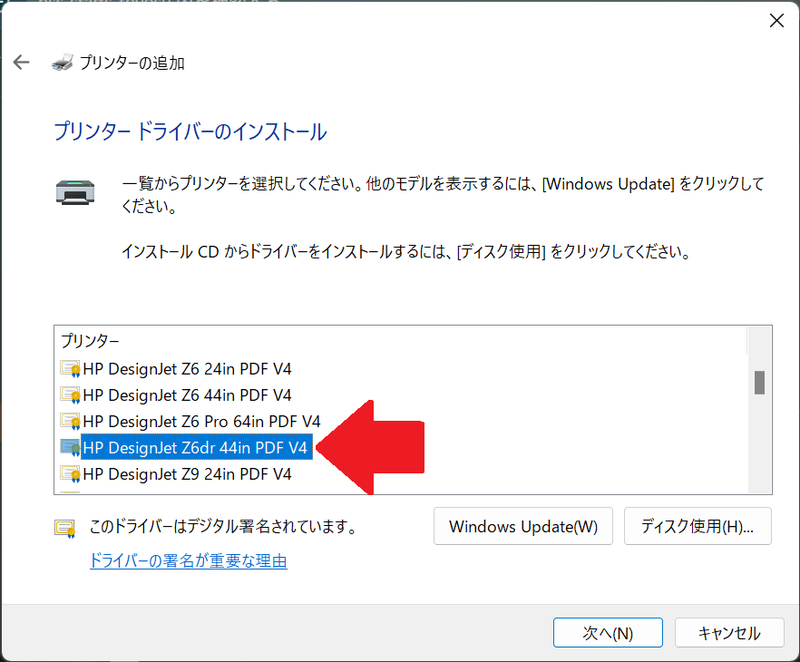
18. From the list of [Printer] choose [HP DesignJet Z6dr 44in PDF V4], then click [Next].
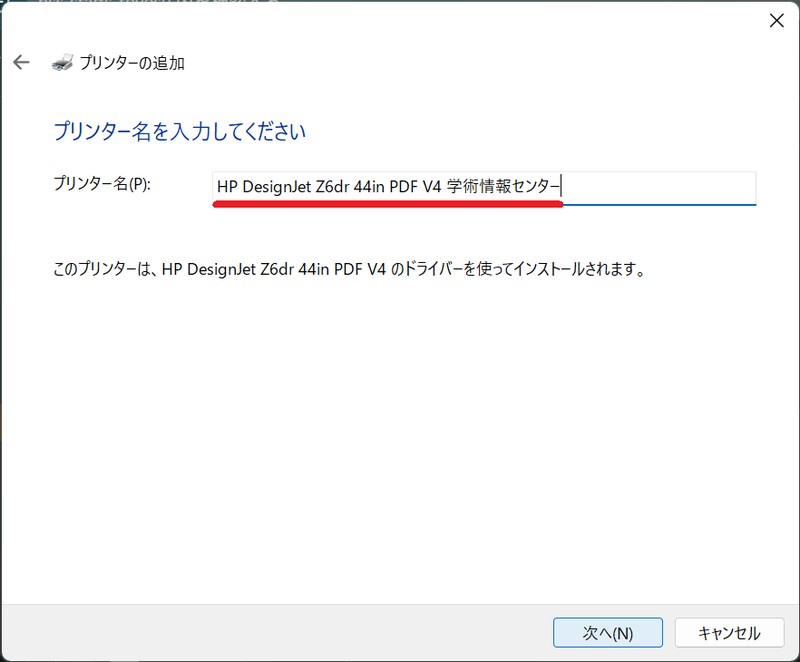
19. Choose an easy to understand [Printer Name], then click [Next].
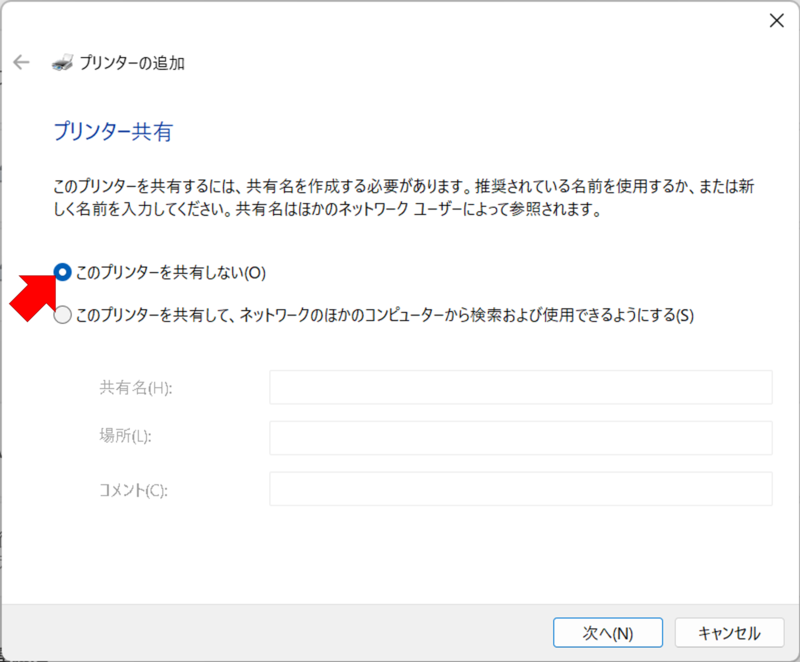
20. Choose [Don't share this printer], then click [Next].
21. Click [Finish]

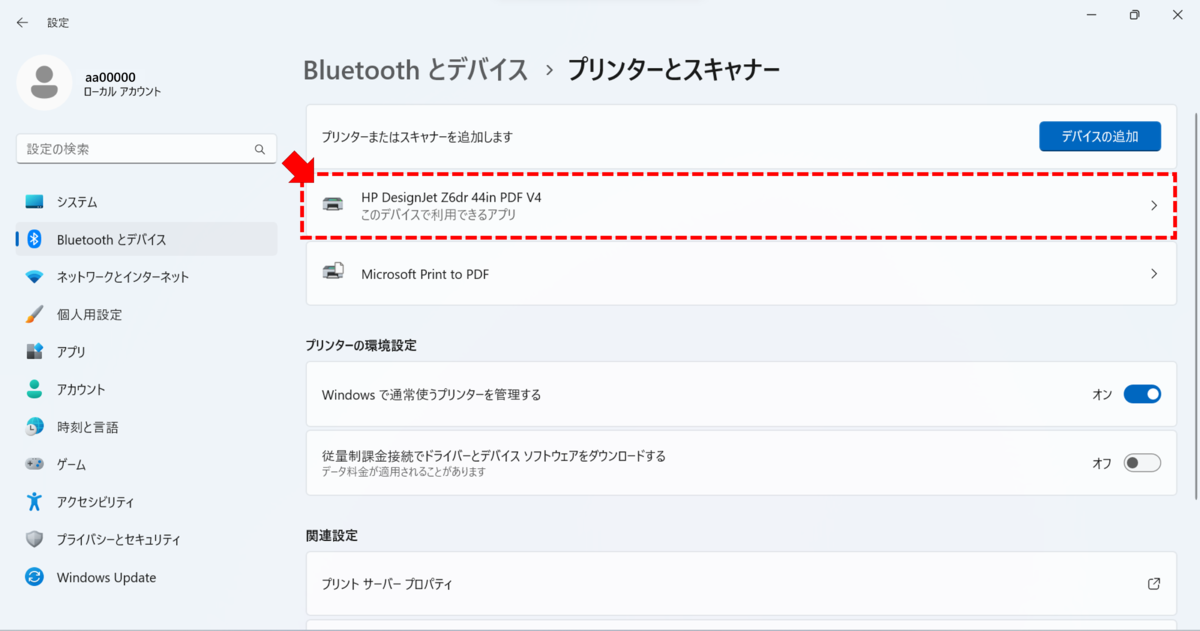
22. On the list of [Printers and Scanners] choose the added printer.
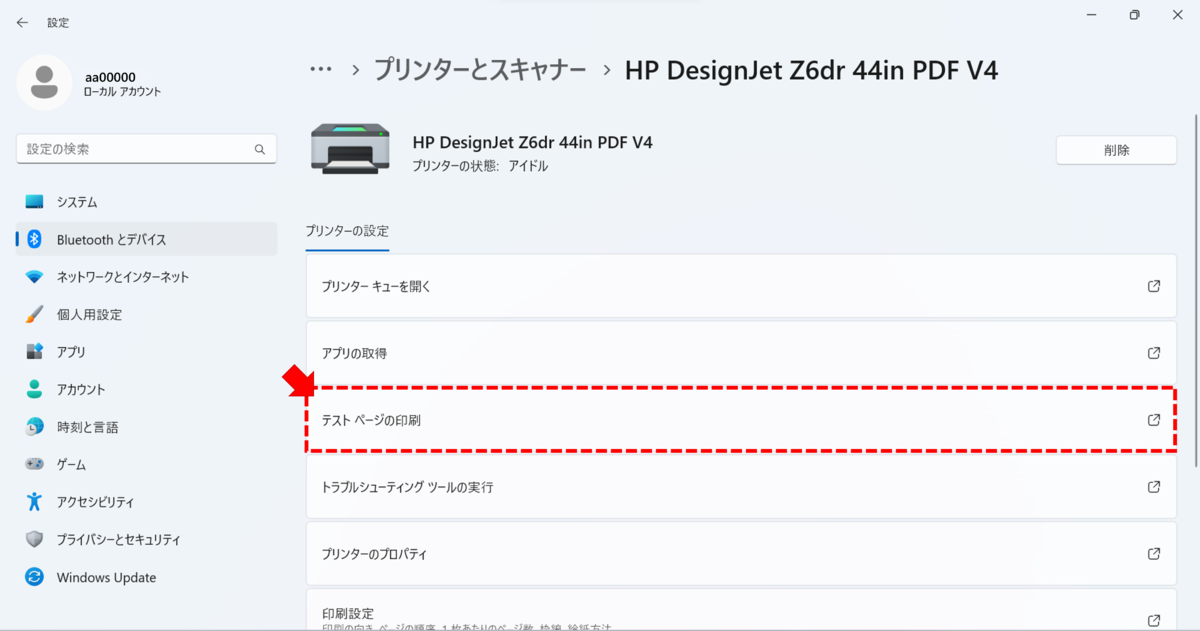
23. Click [Print a test page].
24. The print job can be checked here

※If the username is in upper case, it won't be accepted.
※Only devices connected to the school's network can use the printer.(〇 SRAS5G, SRAS2G, SRAS-WPA, SRAS VPN, SITNET / ✖ eduroam)
25. Move to the printer, Move to the printing device > Follow the device's LCD screen and set the plotter paper > Hold the IC card (student or staff ID) over the card reader
> Touch "Print" on the control screen > Touch the "B&W" or "Color" button for the print job. Once printed, the setting is complete.